
Summary of Portable Fine Particle Measurement
This project details a portable air quality monitor designed to measure fine particulate matter (PM10 and PM2.5) for home or mobile use. Utilizing an SDS011 laser sensor connected to an Arduino NANO Every, the device displays real-time data on a ST7735 screen, tracks measurement trends over 44 minutes, and monitors battery voltage. The system operates on a 9V battery for approximately six hours, featuring a compact design with a transparent mounting box and flexible intake tube.
Parts used in Portable Fine Particle Measurement:
- ST7735 color display (128x160)
- Arduino NANO Every
- SDS011 Probe
- Battery 9V
- A push switch
- 2 x 10k resistors
- Epoxy printed circuit board
- Flexible tube of 6mm inner diameter
- Mounting box with transparent cover (12x8x6cm)
- Plexiglas or Epoxy plate
- 4 sets of screws and plastic spacers
- 4 metal screws
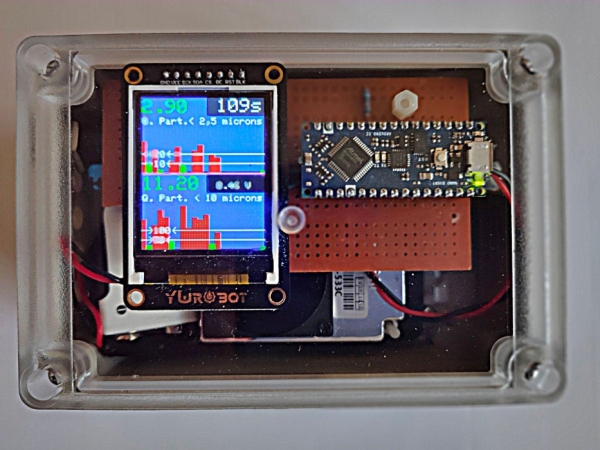
The objective of this project is to measure air quality by measuring the quantity of fine particles.
Thanks to its portability, it will be possible to carry out measurements at home or on the move.
Air quality and fine particles: Particulate matter (PM) is generally defined as fine solid particles carried by the air (source: Wikipedia). Fine particles penetrate deep into the lungs. They can cause inflammation and worsen the health of people with heart and lung disease.
The writing device measures the presence rate of PM10 and PM2.5 particles
The writing device shall measure the presence of PM10 and PM2,5
The term “PM10” refers to particles with a diameter of less than 10 micrometers.
PM2,5″ means particulate matter with a diameter less than 2,5 micrometers.
The sensor :
This sensor is based on an SDS011 PM2.5/PM10 laser for accurate and reliable air quality testing. This laser measures the level of particles in the air between 0.3 and 10 µm.
Step 1: List of Components:
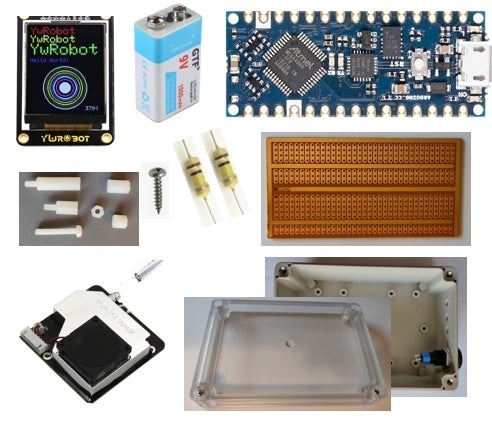
- ST7735 color display (128×160)
- Arduino NANO Every
- SDS011 Probe
- Battery 9V
- A push switch
- 2 x 10k resistors
- Epoxy printed circuit board
- Flexible tube of 6mm inner diameter.
- Mounting box with transparent cover (12x8x6cm)
- Plexiglas or Epoxy plate
- 4 sets of screws and plastic spacers
- 4 metal screws (delivered with case)
Step 2: Principle of Operation :
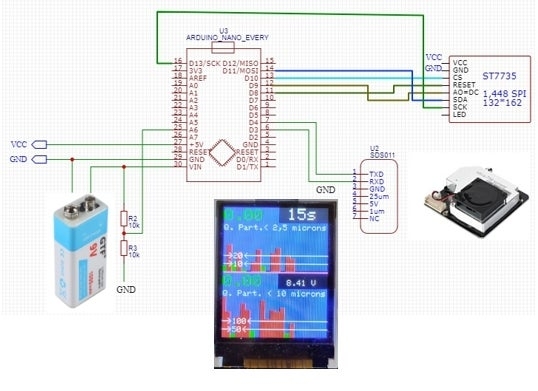
The particle sensor is programmed (factory) to provide on an I2C bus, every 2 minutes, the values corresponding to PM10 and PM2.5.
This sensor is controlled by an Arduino NANO Every controller programmed with the Arduino IDE software.
The ST7735 display allows to follow the evolution of the measurements.A measurement is taken every two minutes. Two tables allow to follow the evolution of the measurements over 44 minutes (22 measurements). Each new measurement is added to the right of the table after shifting the old measurements to the left.The display also shows the time remaining before the next measurement as well as the battery voltage. Translated with www.DeepL.com/Translator (free version)
In order to monitor the system supply voltage a voltage divider (10kO-10kO resistors) is connected to the battery and the A6 port of the controller. This voltage divider avoids injecting a voltage higher than 4.5V on the A6 port. With the use of a 9V 1000mAh battery the device can operate for 6 hours.
Step 3: Programming
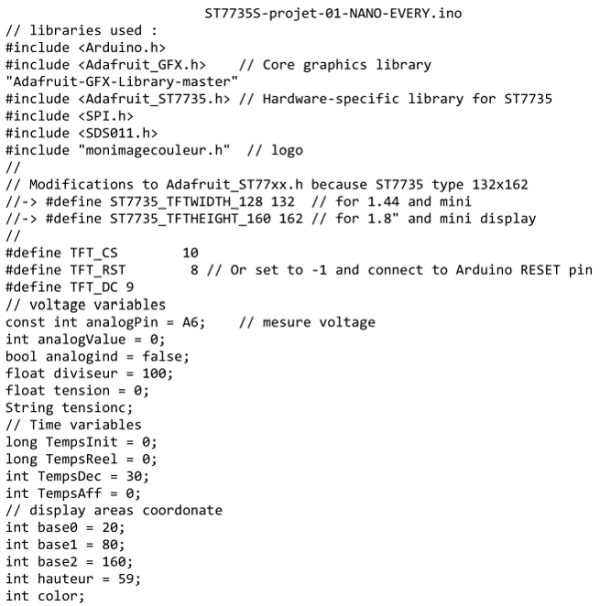
Programming is done with Arduino IDE. The libraries used are indicated below in the beginning of the program. They are downloaded from the Arduino website.
The complete program can be downloaded here.
Step 4: Assembly:
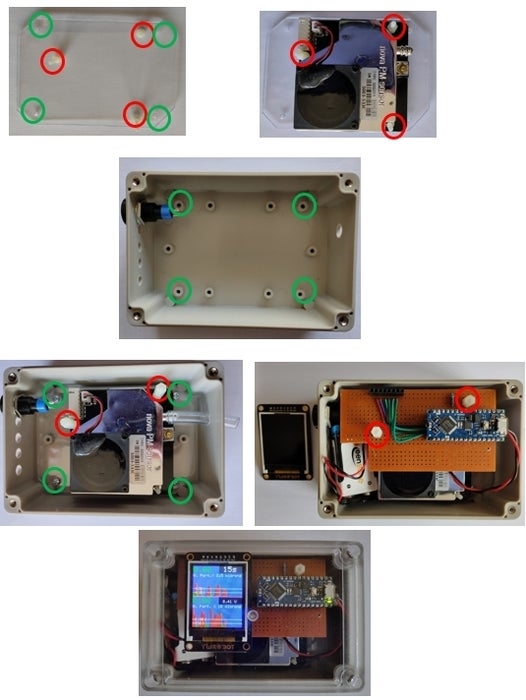
The assembly does not pose any particular problem. It is simplified thanks to the use of a housing with a transparent cover.
To facilitate assembly, the elements are stacked and fixed one on top of the other. The coloured circles on the pictures show how the elements are stacked.
Start mounting the SDS011 probe on a Plexiglas plate (red circles). This assembly is fixed in the housing (green circles). Then add the finished mounting plate (except the display). The display is plugged onto the mounting plate so that all fixing screws can be fastened.
The SDS sensor is connected to the outside of the housing by a flexible tube.
Conclusion:
This assembly does not represent any particular difficulty for people with knowledge in Arduino IDE programming.
It allows to efficiently measure the presence of fine particles.
This assembly can be completed with sensors for measuring temperature, humidity, pressure, CO2 etc…
Source: Portable Fine Particle Measurement
-
What particles does this device measure?
The device measures the presence rate of PM10 and PM2.5 particles. -
How often does the sensor provide measurements?
The particle sensor is programmed to provide values every 2 minutes. -
What is the duration of operation on a single charge?
With a 9V 1000mAh battery, the device can operate for 6 hours. -
How does the display show measurement history?
Two tables track measurements over 44 minutes, shifting old data left as new data is added. -
Can I modify the device to measure other environmental factors?
Yes, the assembly can be completed with sensors for temperature, humidity, pressure, and CO2. -
How is the battery voltage monitored safely?
A voltage divider using two 10k resistors connects to the A6 port to avoid injecting more than 4.5V. -
What programming software is required for this project?
Programming is done using the Arduino IDE software. -
How is the sensor physically connected to the outside air?
The SDS sensor is connected to the outside of the housing by a flexible tube.
