
Summary of Poduino Case
This article details a DIY project to create a protective "Poduino Case" for an Arduino and breadboard using a repurposed iPod Touch case. The author modifies the plastic case to fit the electronics, allowing for a compact and affordable workspace without needing advanced plastic-working skills or expensive tools.
Parts used in the Poduino Case:
- Arduino (or compatible)
- 270 point breadboard
- iPod Touch case
- Rubber band
- Double-sided tape
- Ginsu knife
- Needle nose pliers
- Side cutters
- Nail clippers
- Carbide scribe
- File
- Rotary tool (Dremel)
- Non-permanent marker
The ‘Poduino Case’. A protective case for your Arduino (with breadboard work area):
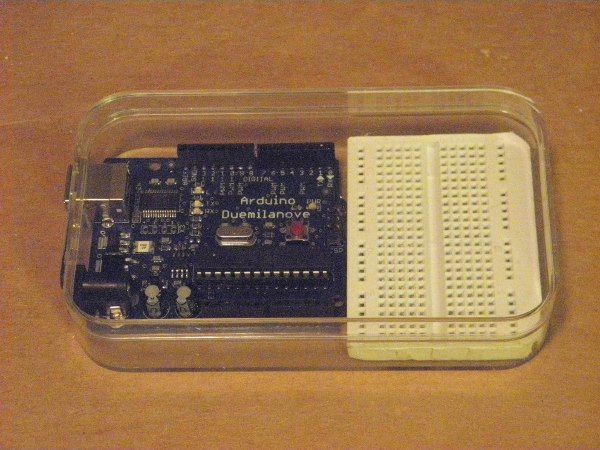
I just received my Arduino Duemilanove and breadboard today. After some careful thought, I realized there is no way this thing could possibly survive daily life on my desk. I saw some great Instructables on plastic cases, and even one that used an iPod Nano case. However, I have little plastic-working abilities, and I’m cheap. I didn’t want to spend any more money…
So… I found my iPod Touch case. Perfect.
Step 1: The Parts
Parts list:
Arduino (or compatible)
270 point breadboard
iPod Touch case
Rubber band
Double-sided tape
Tools:
(what I used)
Ginsu knife
Needle nose pliers
Side cutters
Nail clippers
Carbide scribe
File
(what I suggest you use)
Rotary tool (Dremel)
Needle nose pliers
Non-permanent marker
File
Step 2: The Layout
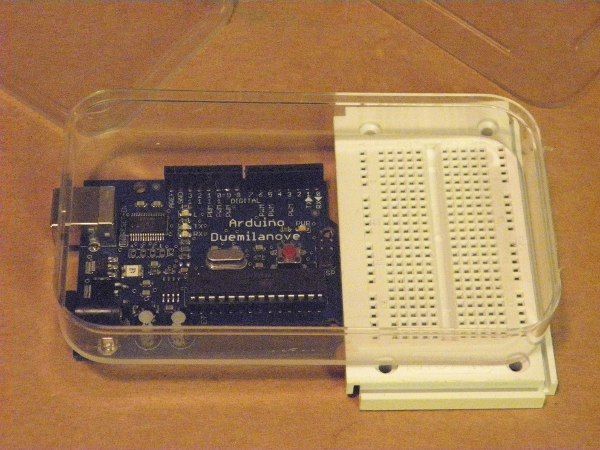
I laid the Arduino board next to the breadboard and placed the iPod case on top to get an idea of how much cutting I’d have to do. Luckily, the Arduino board didn’t really need any modification. The breadboard, on the other hand, needed some surgery. In order to get the measurements just right, I had to cut the openings for the USB and power in the case and lay the Arduino board in there.
Step 3: Cut stuff
Time to cut. Lay the board in the case. Put the USB port against the edge. Center the board between the two rounded edges. Mark the locations of the USB port and power socket on the plastic, being sure that the board stays centered. Cut the notches. If you’re really good, you can leave the top lip of the case intact. I didn’t have a Dremel or the patience to do it, so I just cut down into it with the side cutters. Seems to work fine.
Note to self-
Self, clean your fingernails. The whole internet is watching.
For more detail: Poduino Case
-
What is the purpose of the Poduino Case?
To provide a protective enclosure for an Arduino and breadboard that can survive daily desk life. -
How did the author modify the iPod Touch case?
The author cut notches in the plastic to accommodate the USB port and power socket while centering the board. -
Which tools are suggested for this project?
A rotary tool like a Dremel, needle nose pliers, a non-permanent marker, and a file are suggested. -
Does the Arduino board require modification?
No, the article states that the Arduino board did not really need any modification. -
What specific part of the breadboard needed surgery?
The breadboard required cutting openings for the USB and power connections within the case. -
Can I use nail clippers instead of a Dremel?
Yes, the author successfully used side cutters and nail clippers to cut down into the plastic lip. -
How do you ensure the board stays centered in the case?
You must lay the board in the case and mark the locations of the USB port and power socket on the plastic. -
Why did the author choose an iPod Touch case?
The author chose it because they had little plastic-working ability, wanted to be cheap, and found it perfect.
