Ah yes. It has been a long time since I posted an Instructable…well here goes:
It has been a while since I have been otivated to write an ‘ible. During this idle time I have been writing, rewriting and editing code as well as designing lots of PCBs.
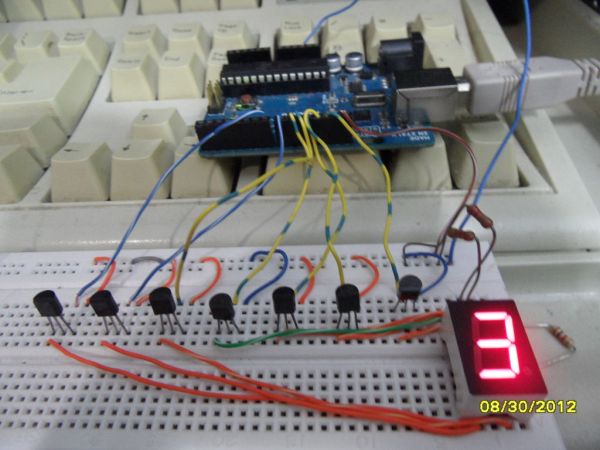
For my new ible which I have refined the code for I have made the Arduino Uno display pi one digit at a time I only went so far.(depending on how many digits you are willing to copy, paste and edit you can have more or less. )
So, let’s build it!
Step 1: Parts, Parts, Parts
You will need:
1 Single Digit Seven Segment Display (Try to get common cathode. If you don’t you will need the transistors.)
7 Transistors (I used these to drive the single digit seven segment. If you got common anode then you need these.)
7 1K resistors( You will need these if you have transistors.)
Common anode: All the pins have the positive lead in common.
Common Cathode: All the leads have the negative lead in common.
Step 2: A Bit of Theory Before Moving On.
A common anode seven segment is a bit harder to use and is less welcome in a world of common cathode. Common anode is reversed compared to common cathode. Therefore, everything is the inverse. On means off and off means on. (see my ‘ible on Sinking and Sourcing) Therefore we place a transistor to drive it allowing it to be common anode but we cannot omit the resistor (All 1Kohm on the base pin of the transistor because to prevent the transistors from pulling too much current and burning the ATMega328(Guess how I know this.)
Step 3: Programming.
I tested every pin and wrote the code in a way I would understand. Here is how I did it:
T1=Pin 7=E
T2=Pin 8=D
T3=Pin 9=C
T4=Pin 10=G
T5=Pin 11=F
T6=Pin 12=A
T7=Pin13=B
The T’s indicate the transistor numbers like on the page before or the page after this one. The A,B,C,D,E,F,G are standardized seven segment letters. Above I have standardized seven segment letter names for your reference.
1 Single Digit Seven Segment Display
7 Transistors
For more detail: Pi…In A Single Digit using an Arduino


