Summary of Monitor fridge with Arduino MKR1000 and thethings.iO
This article demonstrates how to remotely monitor a fridge's temperature using an Arduino MKR1000 and the thethings.iO platform. The project connects a waterproof DS18B20 sensor to the microcontroller, which transmits data over Wi-Fi to a cloud dashboard for real-time visualization. This setup allows users to ensure beverages stay cool by tracking temperature from anywhere.
Parts used in the Fridge Monitor:
- Arduino MKR1000
- Temperature sensor DS18B20
- Jumper wires (generic)
- Soldering iron (generic)
- 4.7 kOhm resistor
- Plastic box (optional)
To assure that your beer (and other) beverages are at a cool temperature, today we show you how to remotely monitor your fridge!
Things used in this project
Hardware components |
||||||
 |
|
× | 1 | |||
|
× | 1 | ||||
 |
|
× | 3 | |||
Hand tools and fabrication machines |
||||||
 |
|
|||||
Story
Introduction
Today we will show you how to monitor a fridge using an Arduino MKR1000 and the Internet of Things platform thethings.iO in order to keep your beer (or other beverages) at a cool temperature. Summer is coming!
We use a one wire waterproof temperature sensor DS18B20 to measure the temperature. The MKR1000 is connected to a local network and sends the data to the platform thethings.iO which we can access from anywhere and that gives a nice visual feedback of our data.
Material
These are the things that we need:
- Arduino MKR1000
- Temperature sensor DS18B20
- 4.7 kOhm resistor
- 3 wires (we used them with female ends)
- A plastic box (optional)
Step 1: Get an account at thethings.iO
If you already have an account you can skip this step.
- Go to thethings.io
- In the upper right corner click on ‘Start now’.
- Register.
Step 2: Create your first product
- In your account, at the sidebar on the left click on ‘Things’.
- The click on ‘Create New Product’ and you will see the following screen:
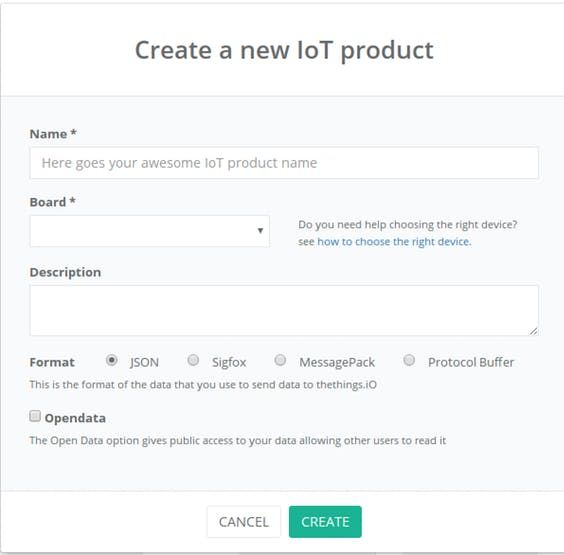
- Fill out the name of your new product.
- As ‘Board’ choose Arduino.
- If you want, you can add a description.
- We leave the format at JSON.
- Click on ‘Create’.
Step 3: Activate your thing!
- Click on your new product.
- In the ‘Things’ section click on ‘Get activation codes’.
- Then click on ‘Generate Activation Codes’.
- You will be asked how many activation codes you need, leave it at 1 and click ‘Generate’.
- After that, you may have to reload the page.
- Then click on the ‘+’ sign on the right side.
- A window opens, click on ‘Accept’.
Congratulations! You have just activated your first thing on thethings.iO!
Step 4: Install the library for thethings.iO and the Arduino MKR1000
thethings.iO publish some libraries that make it very easy to make our things communicate with the platform. We will use the arduino library for our project.
- Go to https://github.com/theThings/thethings.iO-arduino-library and click on ‘Download ZIP’.
- Unpack the archive.
- And copy the resulting folder in your libraries folder.
- Or use the add .zip library option in the Arduino IDE.
- If you use the first option and the IDE was already running, restart it.
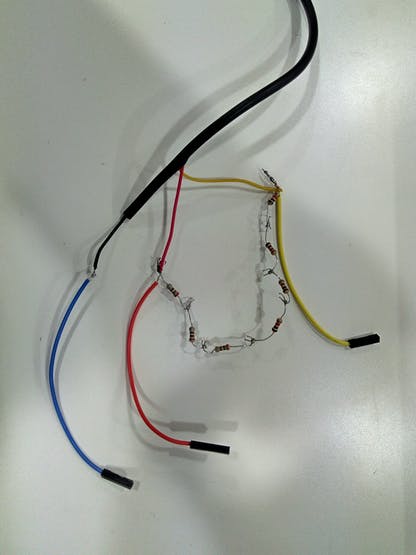
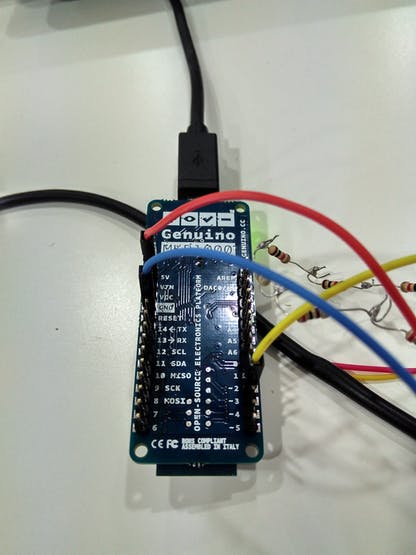
Step 5: Connect the sensor to the Arduino MKR1000
- First, solder the three wires to the sensor cable in order to make it easier to connect the sensor to the Arduino.
- Then solder the resistor between the red and black wire (VCC & GND).
At the end, it should look like this (We didn’t have a 4.7 kOhm, so we soldered a few together):
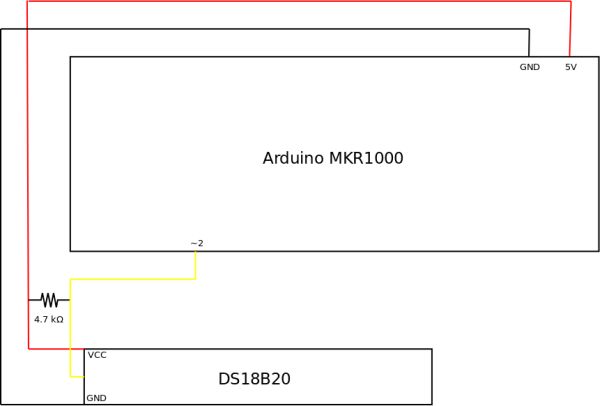
- Next, we connect the VCC wire to the 5V pin of the Arduino.
- Then we connect the GND wire to the GND pin of the Arduino.
- Finally, we connect the signal wire to the pin 2 of the Arduino.
- Connect the USB cable to the computer.
At the end it should look like this:
Step 6: Upload the sketch the Arduino MKR1000
- Download the sketch from this tutorial.
- You have to change three things in the code, fill in:
- 1) The Essid of your network
- 2) The password of your network
- 3) Your token (Get it by clicking on your product at thethings.iO)
- Save it and upload it to the Arduino.
- If you click on the serial monitor you should the measured temperature.
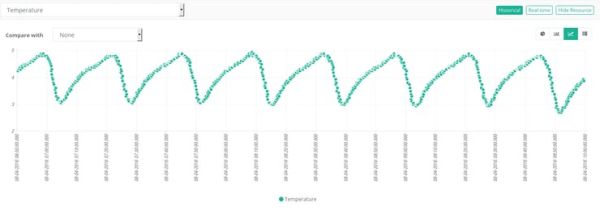
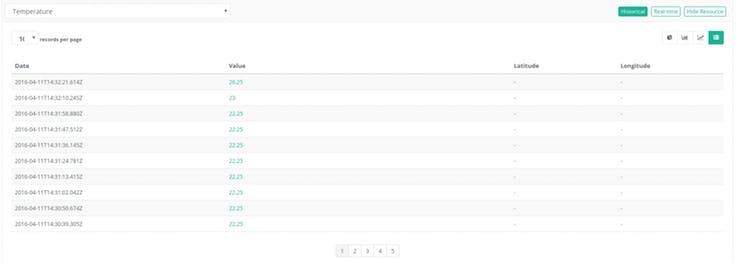
Step 7: See the data arriving at thethings.iO
We are sending the measured temperatue every ten seconds to thethings.iO, so let’s see how the data arrives!
- Enter at your thethings.io account.
- Click in ‘Things’ at the sidebar on the left.
- Click on your product.
- On the right side of the token you use click on ‘Details’.
- You wll see this page:
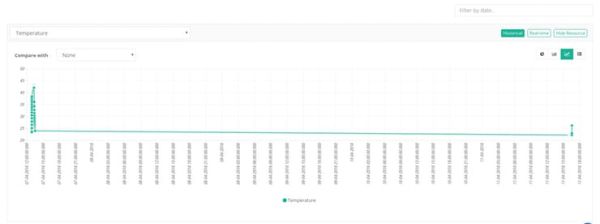
- On the right side, we can play around with different visualizations or click on ‘Real-time’ and watch our data arriving!

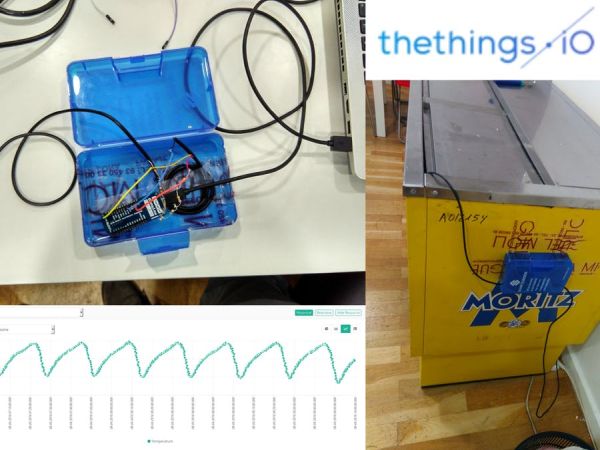
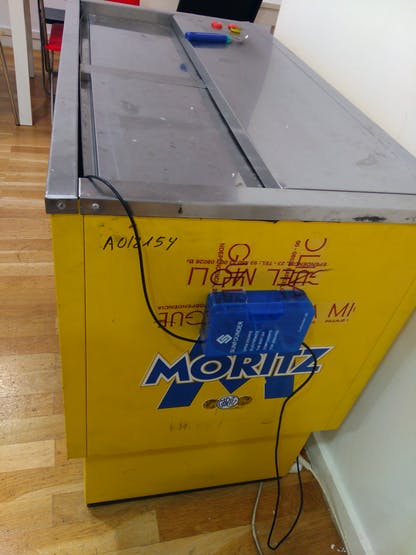
Step 8: Put Arduino in a box
We put the Arduino in a plastic box. This is optional but it might make it easier to put it on the fridge.
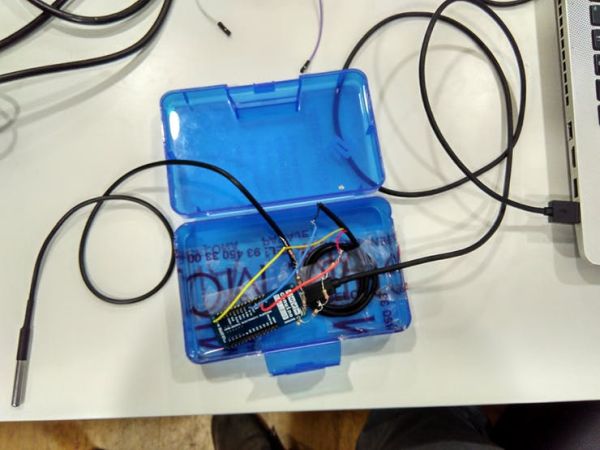
Step 9: Put box on the fridge
The we put the box on the fridge and the sensor inside. Connect the Arduino to a power source.
Step 10: Make some cool widgets on your dashboard!
thethings.iO has a nice dashboard that we can we customize easily to have a real-time overview over our different things. We will make a cool widget to see the measured temperature from our fridge!
- Go to your account at thethings.io
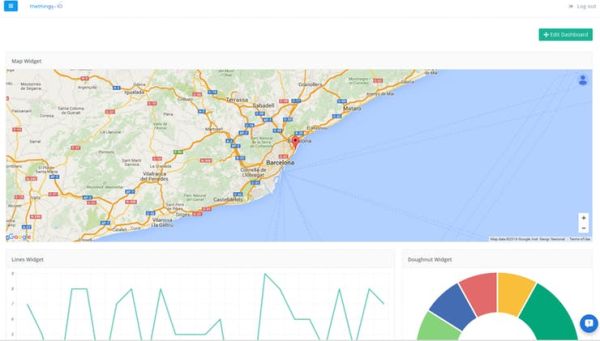
- On sidebar at the left click on Dashboard.
- You will see a screen like this:
- At the upper right corner click on ‘Edit Dashboard’.
- Then on ‘Add Widget’.
- A window opens:
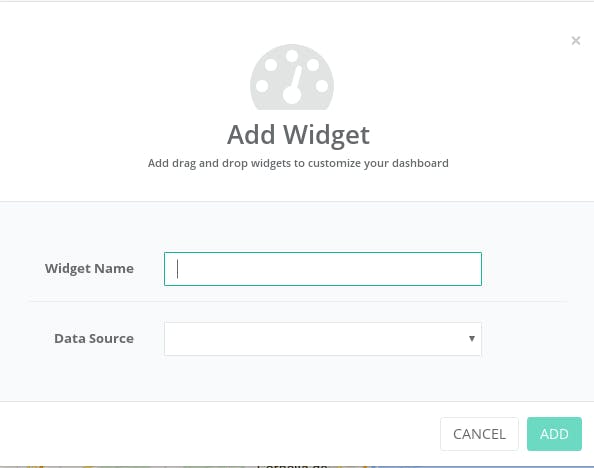
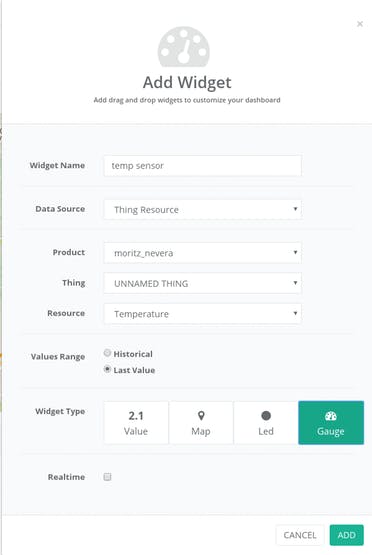
- Enter a name for your widget.
- In ‘Data Source’ choose ‘Thing Resource’.
- In Product choose your product.
- Choose your thing.
- In ‘Resource’ choose ‘Temperature’.
- In ‘Value Range’ choose ‘Last Value’.
- In ‘Widget Type’ choose ‘Gauge’.
- Activate the ‘Realtime’ option.
- It should be looking something like this:
- Click on ‘Add’.
- Now, at the dashboard scroll down at you will see our new widget:
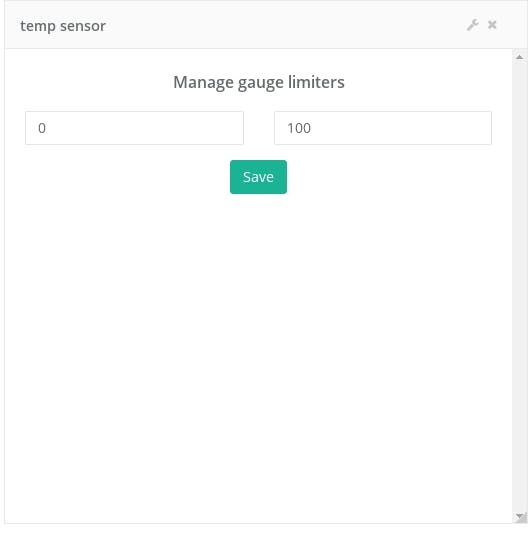
- We still have to choose the limits for our widgets, for now let’s put -10 and 40.
- Click on ‘Save’ and you should see the message: ‘Values updated!’
- Reload the page aaaaand:
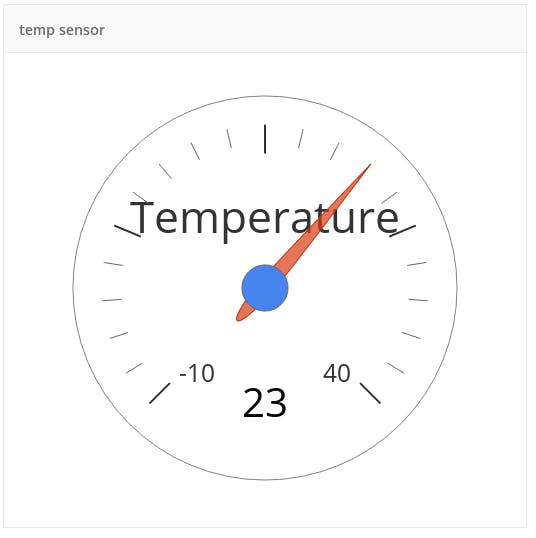
- You can see our beautiful widget!
Step 11: Have a cold beer
Cheers! 😉
Schematics
Code
- How do I connect the temperature sensor to the Arduino?
Solder three wires to the sensor cable and a 4.7 kOhm resistor between the red and black wires, then connect VCC to 5V, GND to GND, and the signal wire to pin 2. - Can I access the data from anywhere?
Yes, the MKR1000 sends data to thethings.iO, allowing you to access it from anywhere via the internet. - What is the best way to create a visual dashboard?
You can customize the dashboard on thethings.io by adding a Gauge widget linked to the Temperature resource with Realtime enabled. - Does the system send data continuously?
No, the measured temperature is sent every ten seconds to thethings.iO. - What libraries are required for this project?
You need the arduino library for thethings.iO and standard libraries like WiFi101.h, WiFiClient.h, and OneWire.h. - How do I activate my device on the platform?
Create a product, generate activation codes in the Things section, and click the plus sign to accept and activate your thing. - What happens if the sensor address is invalid?
The code checks the CRC; if it is not valid, the system prints an error message and returns without processing further. - Is a plastic box necessary for the project?
No, the plastic box is optional but recommended to make it easier to place the Arduino inside the fridge.