Send temperature and humidity data from an Arduino MKR1000 to Microsoft Azure.
Things used in this project
Hardware components
Arduino MKR1000
Arduino MKR1000
× 1
DHT22 Temperature Sensor
DHT22 Temperature Sensor
× 1
Software apps and online services
Microsoft Azure
Microsoft Azure
Arduino IDE
Arduino IDE
Visual Studio 2015
Microsoft Visual Studio 2015
Story
Paul DeCarlo has a great article on sending weather data from a Particle Photon to Microsoft Azure. I wanted to duplicate this with the new Arduino MKR1000.
The Photon uses a webhook to send data from the Particle cloud to Azure. Since the MKR1000 supports HTTPS, data can be sent directly to Azure. This guide will get your MKR1000 connected to Azure and reuse a lot of the server side code from the Microsoft Connect the Dots project.
Hardware
A DHT22 sensor is used to measure temperature and humidity. You could also modify the code to support the DHT11 sensor. Wire the DHT sensor on the breadboard. Send 3.3 volts from the MKR1000 to the first pin. Place a 10,000Ω pullup resistor from 3.3V to pin 2. Connect pin 3 to ground. Run a wire from pin 2 on the DHT22 to pin 6 on the MKR1000.
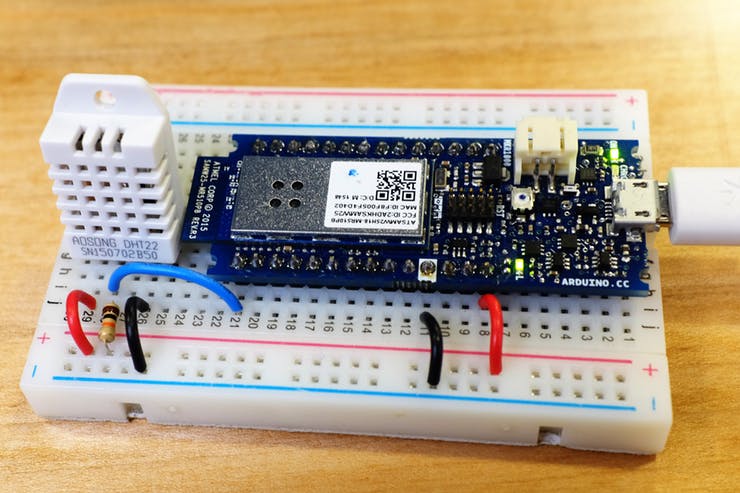
For more info on DHT22, see Adafruit’s DHT tutorial.
Arduino IDE
Open the Arduino IDE. Use the Boards Manager to install the MKR1000 board. Use the Library Manager to install the WiFi101 library.
HTTPS
The Arduino MKR1000 supports HTTPS, but we need to manually install the certificates for the sites we will visit. This is necessary since the memory on the device is limited. This is a two step process. First we load a sketch on the board and then run a program on our computer to upload the certificates.
Use the Arduino IDE to load the Firmware Updater Sketch onto your board.
Examples -> WiFi101 -> Firmware Updater
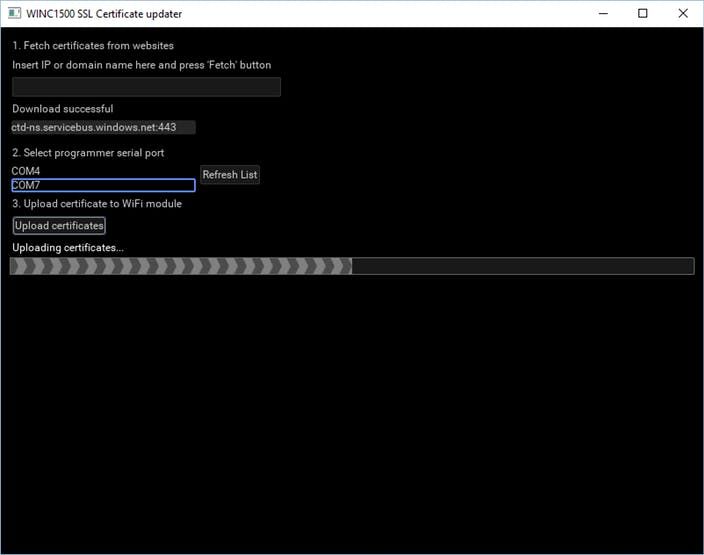
Download the WiFi101 Firmware Updater. Unzip the archive and run winc1500-uploader-gui.exe.
The HTTPS certificate for Azure Event hubs is issued to servicebus.windows.net so any service bus URL should work. Enter ctd-ns.servicebus.windows.net in the text field. Choose your COM port and upload the certificates.
Arduino Sketch
Clone or download the Arudino sketch from https://github.com/don/MKR1000-Azure. Edit the ssid tab and change the ssid[] and password[] to match your network settings. Upload the sketch to your MKR1000 board.
If you get errors, you might need to use the Arduino Library Manger (Sketch -> Include Library -> Manage Libraries…) to install the “DHT sensor library”, ArduinoJson, or RTCZero library.
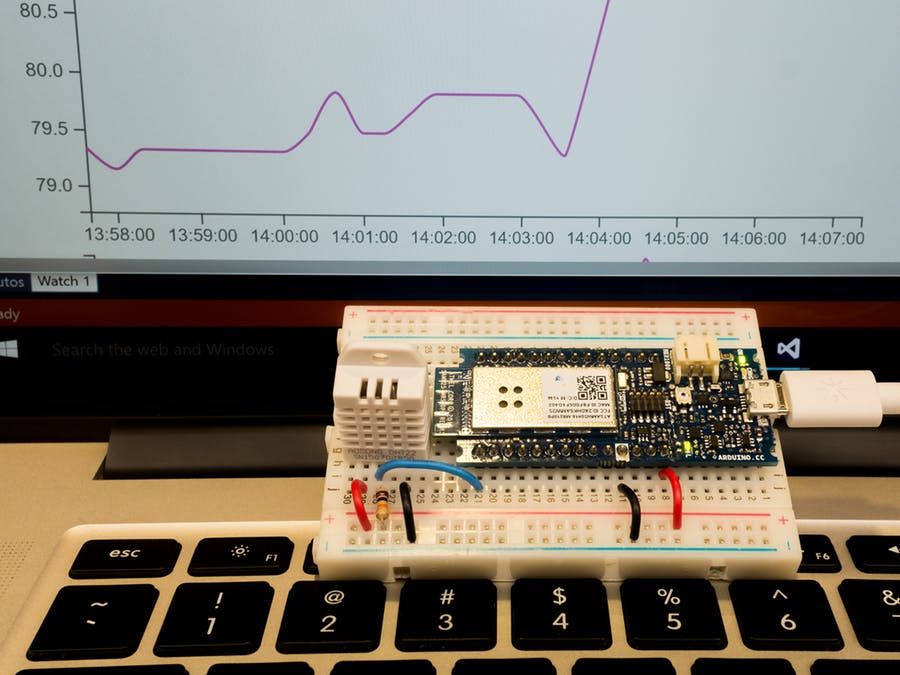
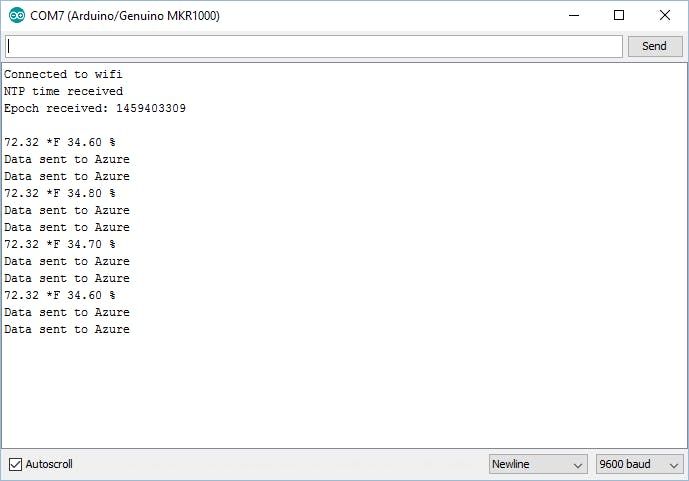
Open the Arduino Serial Monitor (Tools -> Serial Monitor) and ensure that data is begin sent to Azure.

The sketch reuses an Event hub from the connect the dots project. This means that we can use the existing Azure web app to view our data. Open http://connectthedotsdx.azurewebsites.net/ in your browser. You should see data from MKR1000. Since this is a “public” event hub, your sensor data will be mixed with other sensors. If multiple people are running this MKR1000 code, you might want to change the displayname or guid in the createJSONfunction.

Creating your own Event Hub
Running against the existing Event hub is OK, but you can also create your own event hub for your data. This requires Visual Studio and an Azure subscription. The Free Visual Studio 2015 Community edition works fine. You can also sign up for a free Azure trial subscription.
We’ll be using code from the Connect the Dots project. Clone project with git or use the Download ZIP button on the Github page.
git clone https://github.com/Azure/connectthedots.git
You can follow Microsoft’s instructions to for creating the Azure resources which takes a while but gives you a deep understanding of how the pieces are put together. I suggest using the AzurePrep project from the cloned repository to automatically create these resources.
Use Visual Studio and open the AzurePrep Solution from connectthedots\Azure\AzurePrep. Run the AzurePrep project in Release Mode.
The application will open some windows prompting you to log into Azure in and grant permission to your resources. After that, answer a bunch of questions in the terminal to create the resources.
You need to choose a name for resources. The connect the dots documentation recommends the name ctd (connect the dots) + your initials. For example, I chose “ctddc”.
Back in Visual Studio, run the CreateWebConfig target from AzurePrep to create a configuration file for the website. Login, follow the prompts. A web.config file will be written to the desktop.
Copy web.config from your Desktop into the connectthedots website project, connectthedots\Azure\WebSite\ConnectTheDotsWebSite.
Open ConnectTheDotsWebsite solution from connectthedots\Azure\WebSite in Visual Studio.
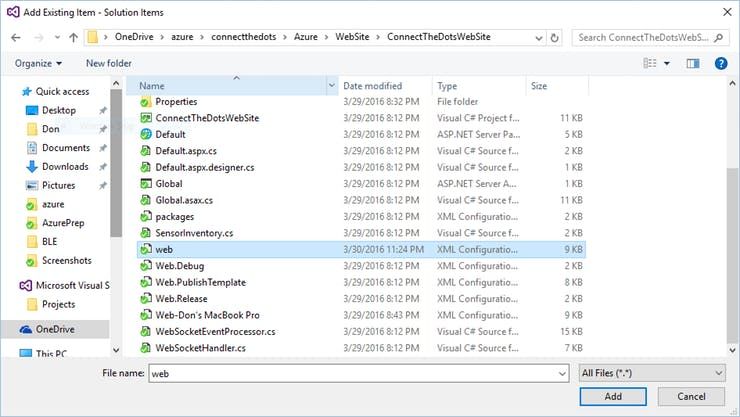
You need to add the new web.config file to the project. Right click the solution in Solution Explorer. Choose “Add -> Existing Item…” from the menu. Navigate into ConnectTheDotsWebSite and add web.config.
Run the project in Microsoft Edge. You won’t see any data until we update the sketch on the MKR1000.
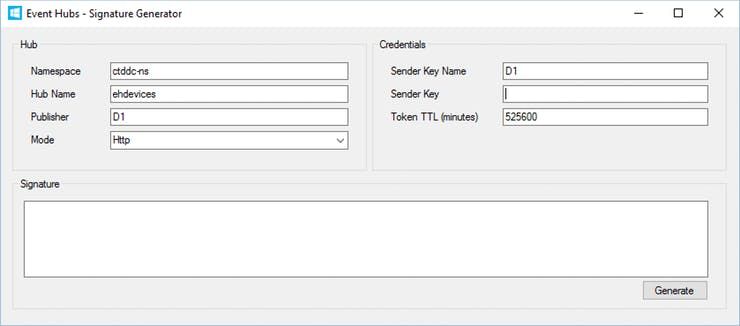
The Arduino sketch needs a SAS key to access the Azure resources. Use Sandrino Di Mattia’s Event Hubs Signature Generator tool to generate the key in the correct format. Download from https://github.com/sandrinodimattia/RedDog/releases. Unzip the tool and launch RedDog.ServiceBus.EventHubs.SignatureGenerator.
Fill in the UI using the namespace you created before. Since I used ctddc when creating the Azure resources, my namespace is ctddc-ns. The hub name is ehdevices. The publisher and sender key name should both be D1. I set the Token TTL for 1 year (525,600 minutes). The signature should be good for the life of the device.
You need to log into the Azure Portal to get the sender key. From the left menu, choose browse, and use the filter to find Event hubs.
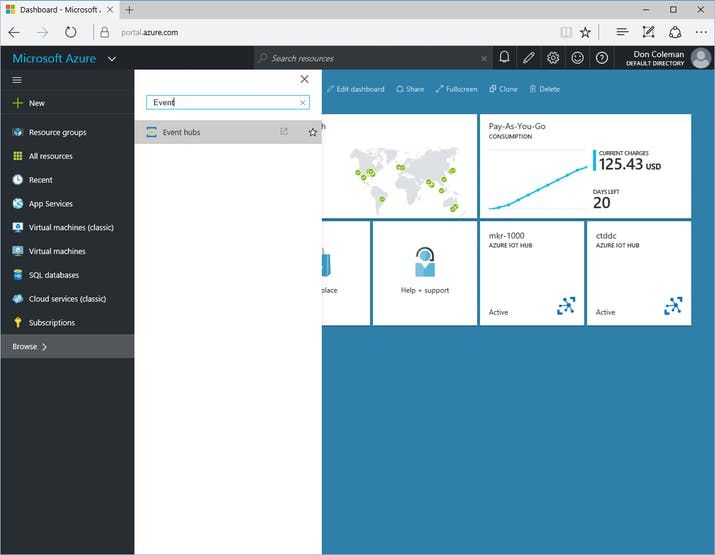
Event hubs opens a new window in the old Azure portal.
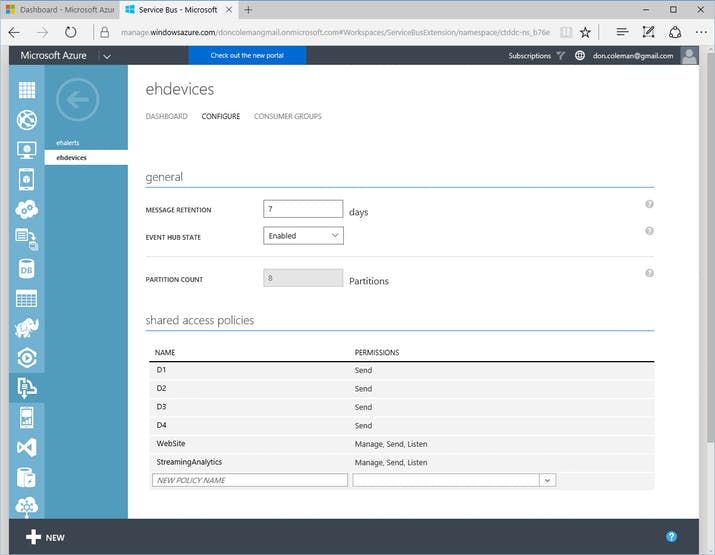
- Click on the namespace you created.
- Choose Event Hubs
- Choose ehdevices
- Choose configure
- Scroll to the bottom and copy the primary key for D1
Switch back to the Signature Generator tool and paste the key into the Sender Key Field. Click the Generate button to generate a signature.
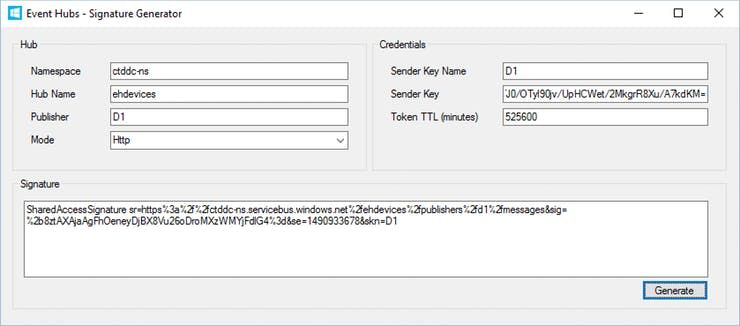
Copy the generated signature.
Open the MKR1000-Azure sketch in the Arduino IDE again. We need to replace the hostname[] and authSAS[] variables with our new event hub settings. Paste the generated signature into the char authSAS[] field. Edit the hostname field to match your hostname. e.g. char hostname[] = "ctddc-ns.servicebus.windows.net";
Save the sketch and upload it to your MKR1000. Optionally open the Serial Monitor and check that data is begin sent to Azure.
ALT+TAB to the connect the dots website running in Microsoft Edge and you should start seeing data from your device.

IoT Hub
Azure IoT hub is newer than Event hub and may be more appropriate for your project. IoT Hub supports device-to-cloud messaging (like this project) and cloud-to-device messaging.
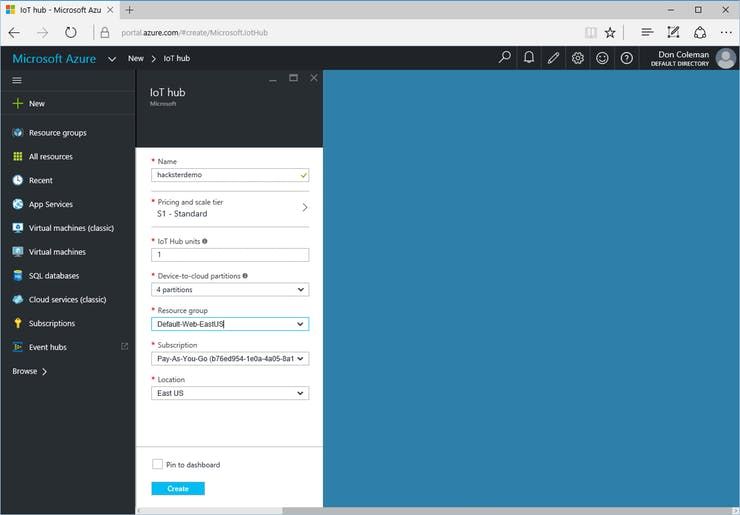
Use the Azure Portal to create a new IoT Hub.
Device Explorer is used to generate signatures for accessing IoT hub. Download SetupDeviceExplorer.msi from https://github.com/Azure/azure-iot-sdks/releases.
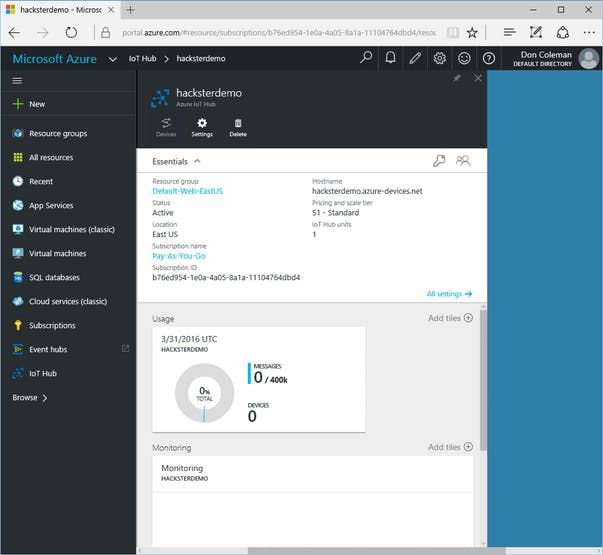
Go back the the Azure Portal and open the new Iot hub. Click on the key icon, select the iothubowner row, copy the connection string for the primary key.
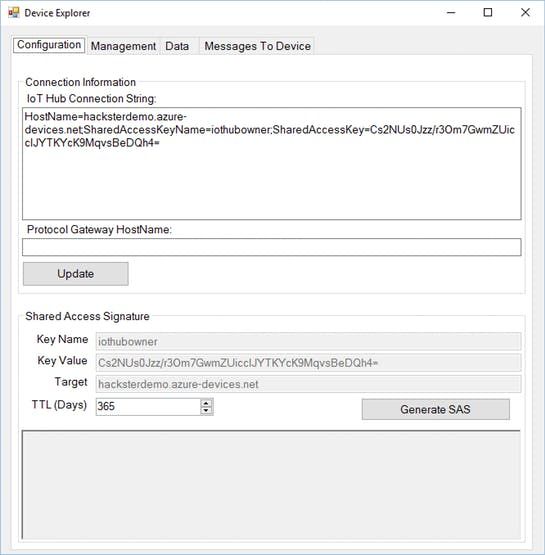
Open Device Explorer, paste in the connection string, click update.
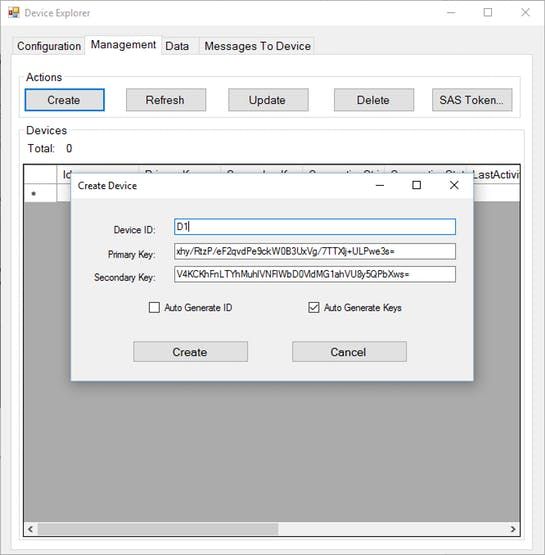
Click on the Management tab. Click the create button under Actions. Enter D1 as the Device ID and click Create.
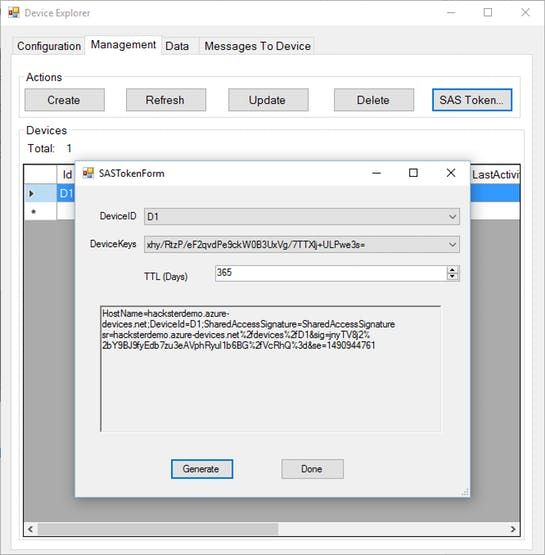
Highlight the D1 row and click the SAS Token button and generate a new token.
Open the MKR1000-Azure sketch in the Arduino IDE.
Replace the hostname[] with your IoT hub name + “.azure-devices.net”. Update authSAS[] with the value generated with Device Explorer. Be sure to only copy the portion of the SAS Token after “SharedAcessSignature=”. Adjust the URI to point to IoT hub.
char hostname[] = "hacksterdemo.azure-devices.net";
char authSAS[] = "SharedAccessSignature sr=hacksterdemo.azure-devices.net%2fdevices%2fD1&sig=jnyTV8j2%2bY9BJ9fyEdb7zu3eAVphRyul1b6BG%2fVcRhQ%3d&se=1490944761";

String deviceName = "D1";
String uri = "/devices/" + deviceName + "/messages/events?api-version=2016-02-03";
Edit the code in the sendEvent function that checks for a valid response. Event hub sends a HTTP 201 to indicate success. IoT hub sends a HTTP 204.
Change
if (response.startsWith("HTTP/1.1 201")) {
To
if (response.startsWith("HTTP/1.1 204")) {
Use the Arduino IDE to upload the sketch to your Arduino MKR1000.
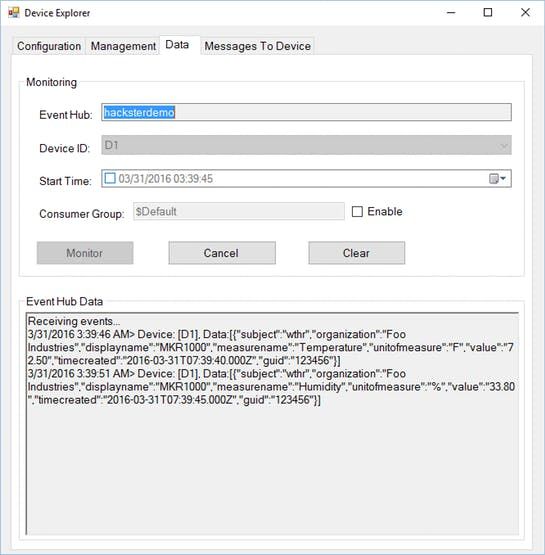
Switch the Data tab in Device Explorer. Click the monitor button to view data being sent to the Event Hub.
Since this project is sending data from device-to-cloud, I’m using HTTP POST to send the data. There are also libraries for sending and receiving data with Azure IoT hub. Unfortunately, IMO they’re not very Arduino-like or user friendly yet. If you want your device to receive data from Azure, the libraries might be more helpful. Alternately, check out Mohan Palanisamy’s blog post about sending data from IoT hub to a MKR1000.
This post showed how to send sensor data from MRK1000 to Azure Event hubs and Iot hub. We used existing code view and graph the data. Check out the connect the dots project for more ways to write code for storing, manipulating and viewing your data with Azure.
Now that you’re done, you might want to shut down or delete resources that you’re not using to limit the amount of money you’re charged. The AzurePrep solution has a ClearResources project to help you remove the Azure services.
Schematics
Wiring
