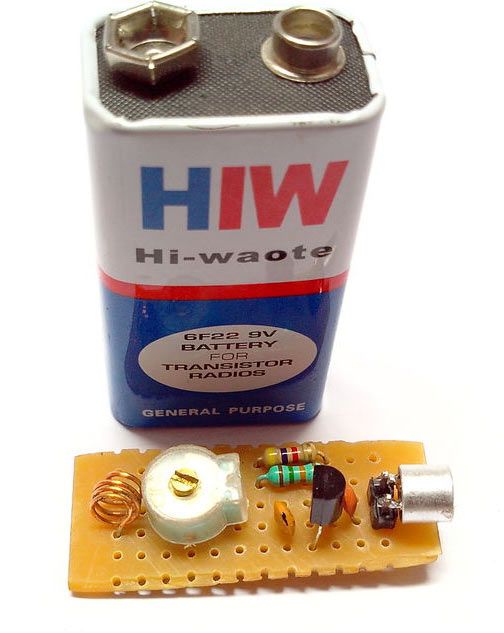
Here’s how to build your own mini FM transmitter. It transmits FM waves so you could easily receive the signals on your mobile phone, radios, etc. As the name and the picture indicates it is very small and is approximately the size of a 9v battery clip. With this FM transmitter you could start your own mini FM station. The circuit uses BC547 transistor to amplify the signal and then frequency modulate it. It uses “frequency modulation” most commonly known as FM, the same principal to transmit audio signals captured by the microphone.
Lets start with getting all the parts.
Components
BC547 Transistor
An microphone
A variable capacitor 47pf
An Inductor (see steps for description)
4.7k Resistor
330ohm resistor
1n capacitor (102)
10p capacitor
9V battery
LED(optional)
Tools
Soldering Iron
An FM receiver (any mobile phone)
I got almost all of the components from a pile of old PCBs I had in an old forgotten box. All I had to get was the BC547 and the electret microphone. Actually I did find the BC547 in an old PCB but i was not sure if it would work. It looked quite burnt to me. The old PCBs had many components resistors, crystals, diodes, etc. I may use them some day and for know back in the box.
I had to de-solder the parts of the old board, for those who don’t know how to solder and de-solder there is a bunch of instructables that describe how to do this and learning to solder is not a hard task.
First of all lets start with cutting up a PCB to the required size. The size to compare is a 9v battery clip, it might look quite small in the beginning but don’t worry it would hold all the components just fine. Use a sand paper for smoothing the sides of the PCB and to clear out any rough edges.
Make sure to get a PCB with big holes as the variable capacitor pins won’t go in the standard size holes.
You can get the microphone at a local hardware store. And be sure to get some male pins to hold the microphone in place refer the picture as to how to solder the microphone in place.
Why not use some wires to hold the microphone?
I would not suggest wires as when you tape the circuit if the last few steps you would not get a clear audio. I tried it and got a lot of noise. I got lesser noise when I used the male pins soldered to the microphone.
Once you’re done with the PCB and know where and how to solder the microphone now it’s time to complete the rest of the circuit. Follow the circuit above and solder all of the components. Make sure not to leave any space between any of the components if you need to get the circuit small. For the inductor use 0.5mm wire and 8 turns, with each turn with a diameter of 6mm.
And for the antenna just use a thin 5cm long wire. For more stability you could center tap the coil and solder the antenna to the center tap.
Also If you notice the circuit has a LED in it, it is used to show when the circuit is functional. I did not add the LED in my circuit because it was draining my battery faster.
Once you got the circuit like the one in the above picture, it’s time to cover it with tape. I used wiring tape to cover the whole circuit except the microphone and the variable capacitor. This is an important step as when you proceed to the next step, where you tune to the required bandwidth. Touching the circuit (mainly the coil) with your fingers would lead to severe noise.
You could also use a heat sink instead of tape, I used tape because I wanted to experiment withe circuit so I did not want it to be permanent.
Now it’s time to tune the circuit to a required bandwidth, you could do this in two ways.
Use your mobile phone to find the signal
Manually tune the variable capacitor to match a frequency
The first step is recommended all you have to do is power the circuit and turn on auto find bands on your mobile. Your mobile would scan for channels and all you have to do is look for your transmitter (play some music in front of the transmitter) on that list.
The second method is time consuming, in this method you have to turn on your radio and the circuit. Keep the radio at a specific channel, and then tune the variable capacitor extremely slowly. When you hear stuff on the radio maybe a song that you are playing stop and the bandwidth on the radio is the required bandwidth.
After using the 9v battery circuit for some time I thought of replacing the battery with rechargeable Li-ion batteries. If you have viewed my previous instructables you would have seen that I use these batteries a lot.
The rechargeable batteries provide longer transmission than the common 9v battery.
For more detail: Mini FM transmitter