Summary of Make Your Pet Dishes Tweet Using Arduino
This project monitors pet food and water levels with an Arduino, strain-gauge scale plus amplifier, and a water-level sensor, then posts alerts to Twitter via an Ethernet shield. It uses a kitchen/postal scale’s strain gauge read by an INA126PA instrumentation amplifier, maps analog readings to relative full/empty values, and detects water level via a three-wire float sensor. The build mounts bowls on a metal tray and uses Arduino code (with the Neocat Twitter library) to convert readings into tweets and alerts.
Parts used in the Pet Dish Tweeter:
- Arduino Uno
- Arduino Ethernet Shield
- Digital kitchen or postal scale (for strain gauge)
- Instrumentation amplifier INA126PA
- Water level sensor (three-wire float type)
- Prototyping board or prototyping shield
- 5V USB power supply and USB A-B cable
- Protective enclosure (plastic storage bin)
- Metal tray lid to mount bowls
- Resistors (including 220 ohm and 10k)
- Misc spare parts (zip-ties, Erector set pieces, screws)
You give your pets everything: Food, water, a home, toys, and love. Why not give them a twitter account?
This project allows you to monitor your pets’ eating habits and receive alerts when their supplies are low. It’s also a cute, fun way to learn how to interact with the Arduino, Twitter, sensors, and Ethernet.
Let’s get started!
Step 1: The Parts
Here is the part list I used to make it work. Depending on your individual needs, you may substitute the scale, amplifier, or water sensor.
- An Arduino Uno (available at Adafruit here )
- An Arduino Ethernet Shield (Also at Adafruit here )
- A cheap digital kitchen or postal scale ($20 at Bed Bath and Beyond) for the strain gauge.
- An instrumentation amplifier to boost the strain gauge output. I used a $3 INA126PA from Jameco.
- A water level sensor. For ease of use, I chose the this one from Jameco.
- A prototyping board, prototyping shield, or ability to create circuit boards.
- A 5V USB power supply and USB A-B cable.
- Something to protect your kit from the pets. I used a cheap plastic storage bin.
- A couple resistors, some spare parts from around the house, and some creativity.
There are alternatives to using the Ethernet shield posted by other entries to the Make it Tweet challenge. Check those out and see which method you like more. If you like their projects, vote for them!
Step 2: Science break: What is a strain gauge and amplifier?
The strain gauge is a metal bar with a series of four resistors on it making a wheatstone bridge. As the bar flexes (and it flexes VERY little) the resistance over the bridge changes a tiny amount. An electronic device can detect that change and, after some math, return the amount of weight on the bar.
The change is so miniscule that the Arduino cannot detect it by itself. That is why the INA126PA amplifier was used. The amp can detect the tiny changes and boost them to levels that the Arduino can read.
In my code, it’s obvious that I “cheated” at much of the math. Instead of trying to detect the actual number of grams present in the bowl, I simply captured the analog data from the amplifier and watched how it changed between an empty bowl and increments of weight up to a full bowl. At these levels, the readings reported a linear result from 587 to 599. While this is very low resolution, it’s enough to report a relative percentage from “empty” to “full” using the map() function in the Arduino IDE.
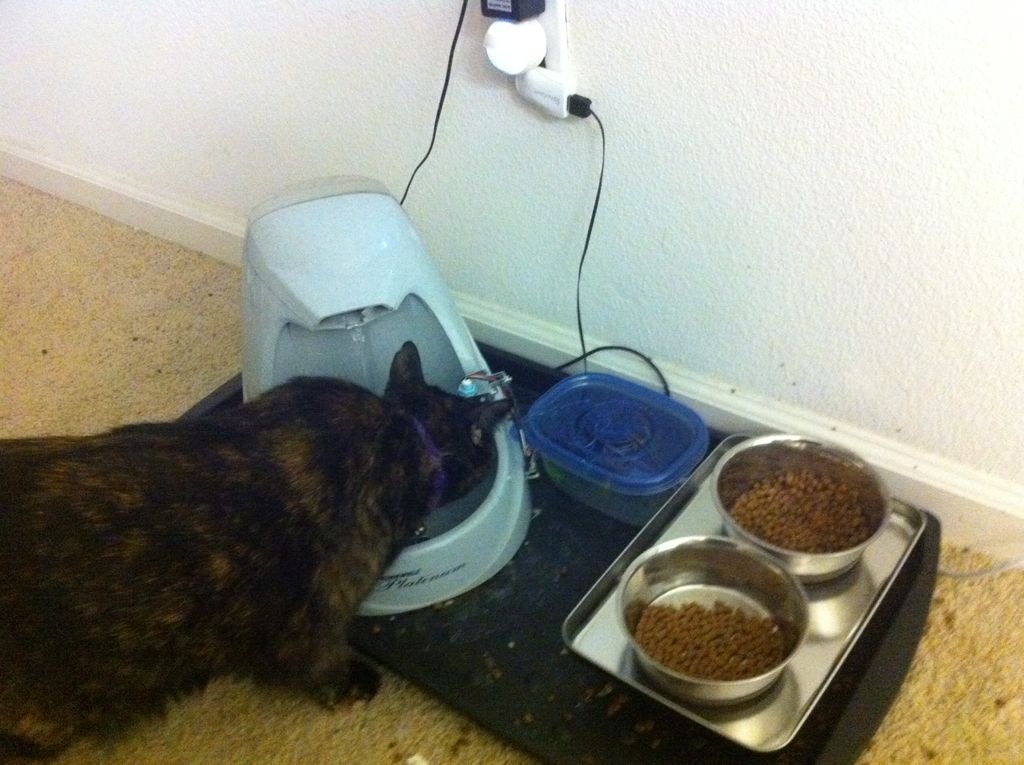
In this project, I used a metal tray “lid” from an IKEA storage bin and screwed it to the plastic base after removing the glass. This holds the bowls.
Step 3: The Water Sensor
This particular water level sensor was a perfect choice. It has three wires that connect to each other based on where the float ball is. This provides exactly three states: white+black, white+red, and red+black. In this kit, I only used the “bottom” state and (with a resistor) used the same code as the “example Button” sketch in the Arduino IDE. If the ball falls down to the bottom point, two wires are connected (like a button) and it reports the change to the Arduino.
I used pieces of an Erector set and a zip-tie to hook the sensor to the bowl.
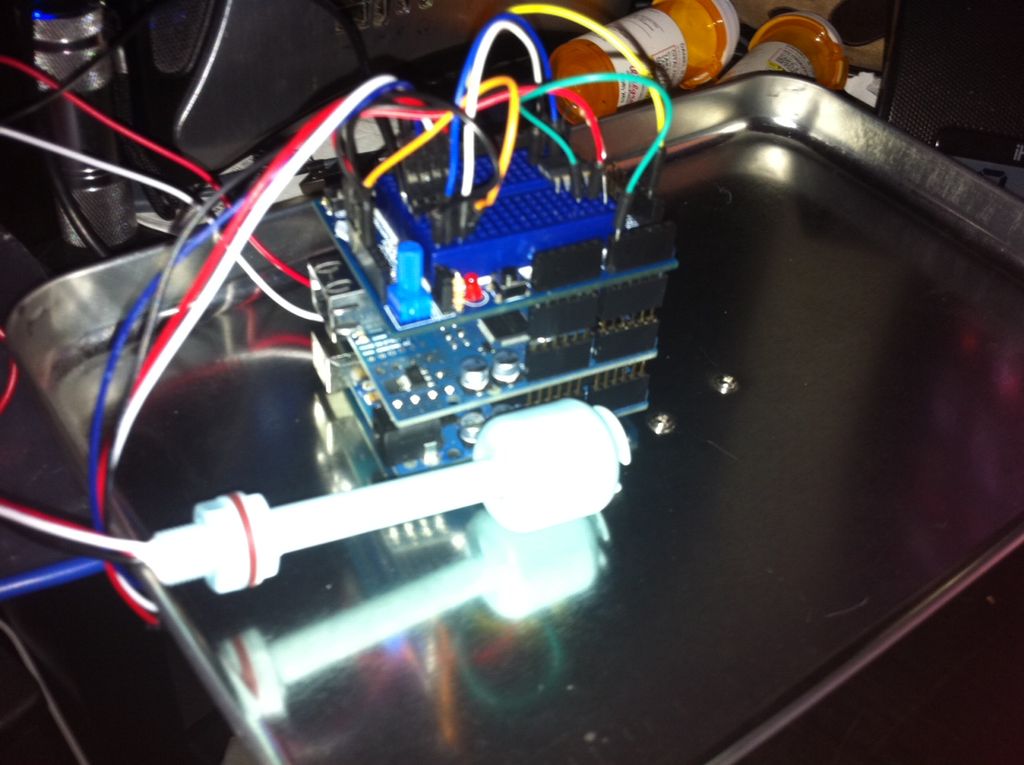
Step 4: The Wiring
There are four main components to this project:
- Arduino pins (labeled on the Arduino)
- Scale (Red, white, blue, and black are typical from these)
- The INA126PA (There’s a notch near Pin 1 and then count up counterclockwise)
- The Water Meter (Red/white/black)
Instead of providing a big schematic that takes a while to read, I’ll just give a simple device-by-device wiring.
The Amplifier and Water Sensor both have datasheets explaining each pin. See Step 1 for those links.
Strain Gauge:
(1) Red labeled E+ (to +5V)
(2) White labeled V+ (to INA126PA pin 2)
(3) Blue labeled V- (to INA125PA pin 3)
(4) Black labeled E- (to ground)
INA126PA
(1) Resistor to 8 (to set sensitivity – I used 220 ohm)
(2) V+ on INA126PA
(3) V- on INA126PA
(4) to ground
(5) unused
(6) Output (Arduino A0)
(7) +5V from the Arduino
(8) Resistor to 1
Water sensor
Red: to +5V on the Arduino AND to a 10k resistor to ground.
White: To Digital 3 on the Arduino
Black: Unused.
Step 5: Arduino + Twitter + Ethernet fun
A neat character named Neocat made the Arduino Twitter Library. Instead of storing your user ID and password in Arduino code, it issues a token to use the Twitter API. This token can be revoked at any time which is good if you accidentally post your whole code WITH the token to somewhere. Yes. I did that. Oops.
The difficulty I found is that it only accepts char[] arrays as tweets, so a character array must be declared then populated. Since my code generates Strings, I had to convert the String to a character array before passing it off to my Twitter function.
Here’s what I added to the example code to make it a function. The Serial.print lines are there just to help with debugging. I also initialized the variable at the top of the sketch with char msg[125]; // make a nice fat buffer (125 characters) for tweets
For more detail: Make your pet dishes tweet Using Arduino
- What does the strain gauge measure?
The strain gauge detects tiny resistance changes as the metal bar flexes, which correlate to weight on the bar. - Why is an amplifier needed for the strain gauge?
The change from the strain gauge is too small for the Arduino analog input, so the INA126PA boosts the signal to readable levels. - How are relative food levels determined?
The project maps analog readings from the amplifier between empty and full measurements to report a relative percentage using the map() function. - Which wires from the scale connect where?
Scale red to +5V, white to INA126PA pin 2 (V+), blue to INA126PA pin 3 (V-), black to ground. - How is the water sensor used?
The three-wire float sensor provides three states; the project uses the bottom state where two wires close like a button to report low water to the Arduino. - How is the INA126PA wired to the Arduino?
INA126PA pin 1 to resistor to pin 8 (set sensitivity), pin 2 to V+ from scale, pin 3 to V- from scale, pin 4 to ground, pin 6 to Arduino A0 output, pin 7 to +5V, pin 8 to resistor to pin 1. - What Arduino library handles Twitter posting?
The Neocat Arduino Twitter Library is used to obtain a token and post tweets without storing username and password in code. - How are generated Strings sent to Twitter?
Strings are converted to a char array buffer (e.g., char msg[125]) because the Twitter library accepts char[] arrays.