In this project we make electronic dice.
Updated 18/03/2013
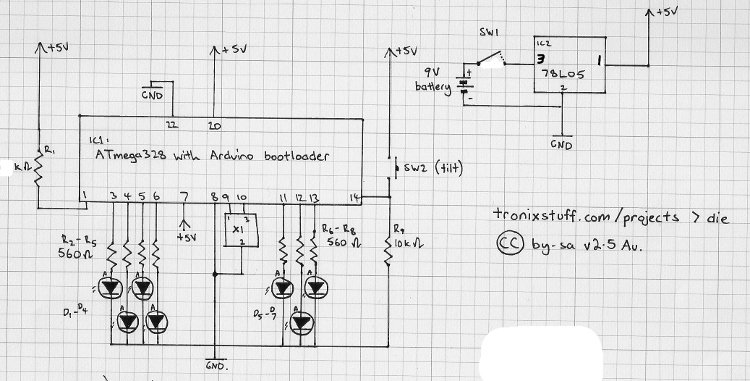
In this article you can learn how to make an electronic die (die is the singular of dice), using an ATmega328 with Arduino bootloader and a few inexpensive components. The reason for doing this is to introduce another object that you can build, learn from and be proud of. It is a fairly simple procedure, and at the end you will have something that is useful for a long time to come. Again this article will be a design-narrative, so please read it in full before making a die yourself.
First of all, here is a photo of my finished product.
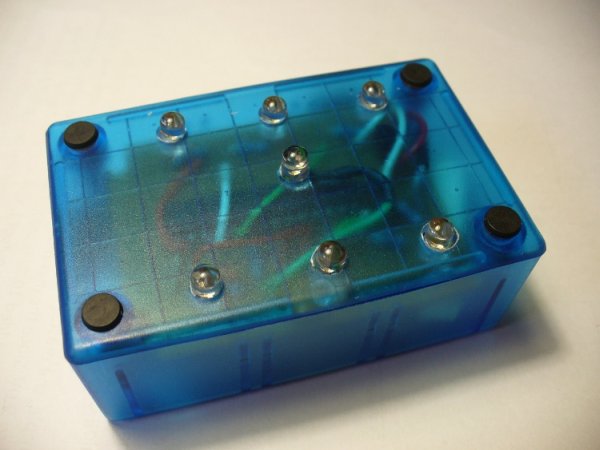
Naturally the cosmetic design is up to you, I have used this box, LEDs and switches as they were already in my stock of parts.
The die is quite a simple design – with a twist. Inside the unit is a mercury switch. This consists of a small glass tube with two wires at one end and a small amount of mercury. When the mercury rolls over the wires, they are shorted out. Just like a push button when it is pushed, for example:
We will make use of this switch to start the die “rolling” – to simulate the use of a non-electronic, under-engineered wooden die. For safety, I will be using a mercury switch that is enclosed with plastic:
Over the last few years several people have contacted me saying “don’t use mercury switches”. Fair enough, if you don’t want to either, use element-14 part number 540614.
First of all, the circuit is assembled on a breadboard using our Eleven Arduino-compatible board. There is no need to build the complete independent circuit yet, as we just want to test the aspects of the sketch, and try various LEDs out. I have some bright blue ones which match with the blue housing:
Project Code and other data:
There is a function in the sketch (below) called
showNumber(int z);
The sketch is quite simple – you can download it from here.
Once the behaviour of the die met my expectation, I used my ZIF-socket programming board to upload the sketch into a nice fresh ATmega328 with bootloader. One could also add a piezo buzzer for sound effects, as described in sketch. This will end up being a birthday present for a young niece, so I have omitted the sound effects.
For more detail: Make Electronic Dice using Arduino