
Summary of How to Make Your Own Arduino Clone Board
This DIY tutorial guides users in creating a custom Arduino clone board using affordable, locally sourced components. It covers sourcing hardware like the ATmega328 IC and LM7805 regulator, installing necessary software such as Arduino IDE and Avrdude, and utilizing tools like soldering irons. The guide details two methods for uploading bootloaders to blank chips: using an existing Arduino or an AVR pocket programmer. Finally, it explains how to assemble components on a PCB, breadboard, or dot board following provided schematics.
Parts used in the DIY Arduino Clone Board:
- ATmega328/168 compatible Atmel IC
- LM7805 IC
- 16 Mhz crystal
- Tactile button
- LEDs
- Capacitors (22pF, 10uF, 0.1uF)
- Resistors (220Ohm, 1k)
- Pin headers (Male)
- 28 pin IC socket
- Avr pocket programmer (Optional)
- Prototyping solder dot board/breadboard
Want to save money by making your own Arduino clone boards? Or want to make a custom board specifically for your needs, then this project is for you! Make Arduino board from cheap electronic components available at your local store. Just follow these simple step by step instructions. Have fun with this DIY hacking tutorial!
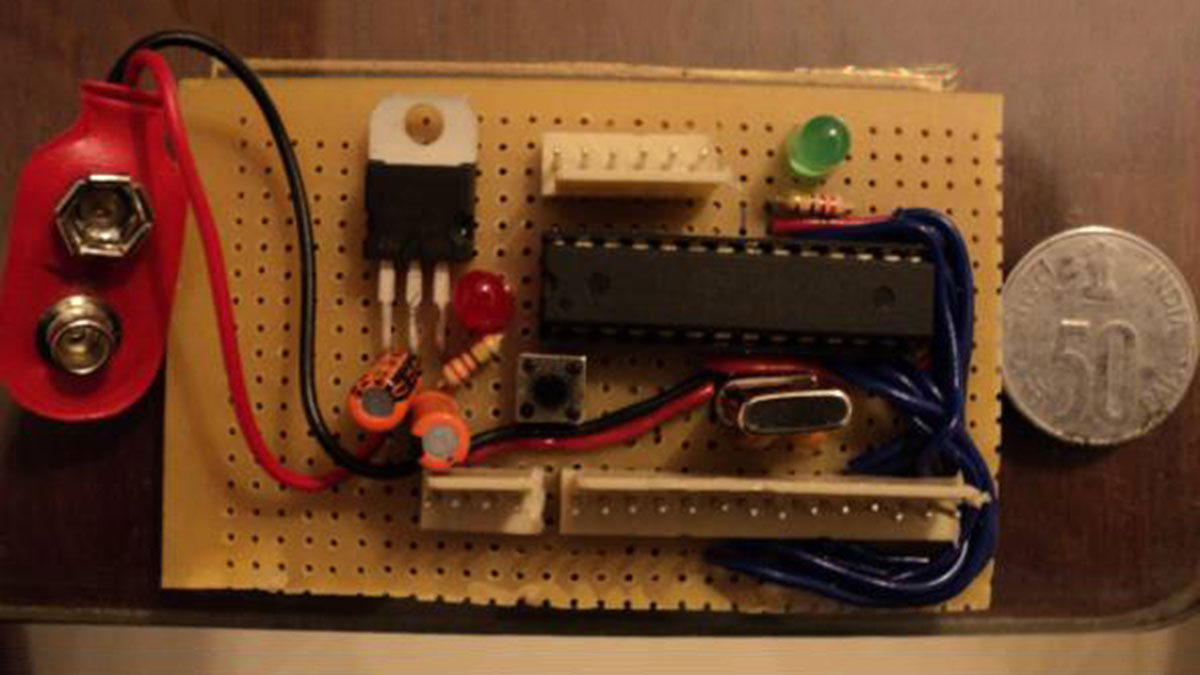
Required Materials
Hardware
- An Arduino bootloader ATmega328/168 or any compatible Atmel IC. Or a blank ATmega328, ATmega168, ATmega 8 IC, or any other compatible Atmel chips.
- LM7805 IC.
- 16 Mhz crystal.
- Tactile button.
- LED’s.
- Capacitors – 22pF (2 Nos), 10uF (2 Nos), 0.1uF (2 Nos).
- Resistors – 220Ohm (2 Nos), 1k (2 Nos).
- Pin headers (Male).
- 28 pin IC socket.
- Avr pocket programmer (Optional, only if uploading bootloader).
Software
- Arduino IDE
- Terminal for Linux users and Command prompt for windows.
- Avrdude.
Tools
- Soldering iron.
- Solder lead.
- Prototyping solder dot board/breadboard or materials to etch your own board.
Connecting the Components Together to Make an Arduino Board
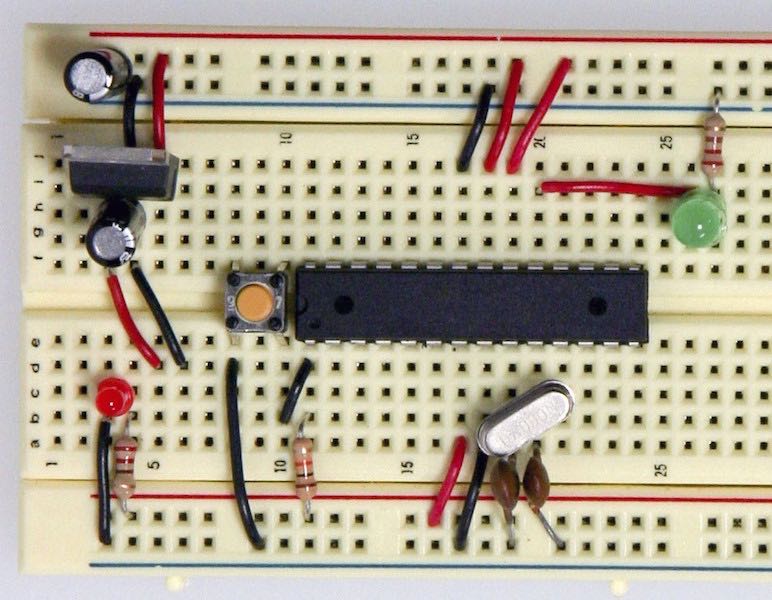
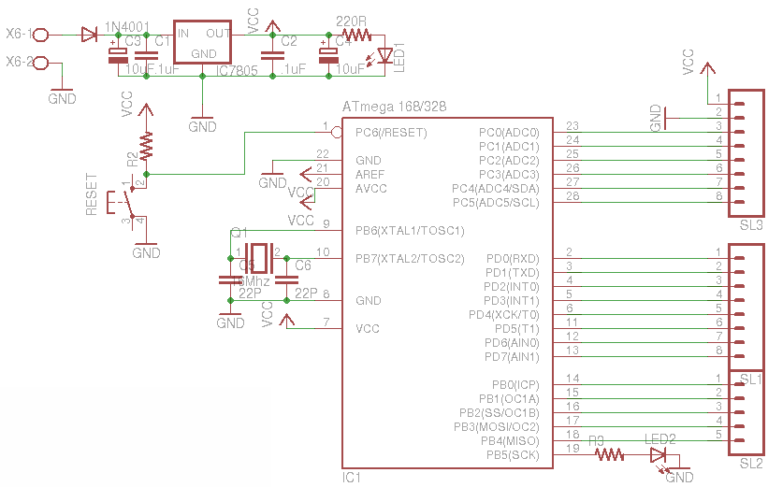
You can either etch a PCB to make your custom board, or use a prototyping dot board to solder the components on it, or arrange them on a breadboard. Connect the components with each other just like in the diagram below. There are only a few components required to make your custom Arduino board. A voltage regulator to supply 5V to the Arduino, its supporting circuitry to filter the voltage, then a 16Mhz crystal along with its parallelly connected 22pF capacitors that act as the clock to the Arduino. An LED is connected to pin no 19 of the ATmega for testing purposes. Use the schematic if you want to etch your own PCB. Modify the schematic to make your Arduino board suited for your projects. Use this eagle schematic file if you want to make a custom PCB: DIY Arduino Clone PCB
Uploading the Bootloader to the Blank ATmega Chip (Optional)
This step is for those who have a blank ATmega chip and want to upload the Arduino bootloader to it. Others who already have an Arduino boot loaded chip can ignore this step and merely insert their chip based on the schematic in the above step. You can either use another Arduino to bootload the blank chip or use an AVR pocket programmer. I will explain both the methods below.
Read More: How to Make Your Own Arduino Clone Board
- What is the primary goal of this project?
To save money by making your own Arduino clone boards or create a custom board specifically for your needs. - How can I upload a bootloader to a blank ATmega chip?
You can use another Arduino to bootload the chip or use an AVR pocket programmer. - Which software is required for this project?
The project requires Arduino IDE, Terminal for Linux users or Command prompt for Windows, and Avrdude. - Can I make the board without etching a PCB?
Yes, you can use a prototyping dot board to solder components or arrange them on a breadboard. - What component acts as the clock for the Arduino?
A 16Mhz crystal along with its parallelly connected 22pF capacitors acts as the clock. - Does every user need an AVR pocket programmer?
No, it is optional and only needed if you are uploading a bootloader to a blank chip. - Where can I find the schematic for a custom PCB?
You can use the provided eagle schematic file named DIY Arduino Clone PCB. - What tool is needed to connect the components together?
A soldering iron and solder lead are required to connect the components.
