Oh the weather outside is frightful, but hot cocoa is so delightful, so let’s order some hot cocoa on the go! An Arduino MKR1000 project.
Things used in this project
Story
Update:
The Hot Cocoa 3000 has moved on…
The end of Hot Cocoa 3000
Intro
Oh the weather outside is frightful, but hot cocoa is so delightful, so let’s order some hot cocoa on the go! After a night out in the cold and snowy holiday weather, wouldn’t it be nice to have a hot beverage waiting when you got home? The Hot Cocoa 3000 makes this dream a reality.
The Hot Cocoa 3000 is capable of preparing two cups of steaming hot cocoa ready as soon as you walk in your front door. Use the simple graphical user interface (GUI) available from any internet connected device to send in your order to the Hot Cocoa 3000.
Hot Cocoa 3000 – Overview
System Overview
The Hot Cocoa 3000 can be broken down into four systems:
- The water works
- The chocolate express
- The power plant
- The electric brain
The water works heats, and delivers the water through out the process. The chocolate express is responsible for delivering and mixing the cocoa powder. The power plant delivers power to all the systems. The electric brain includes the Arduino MKR1000 and the code it executes.
The Water Works
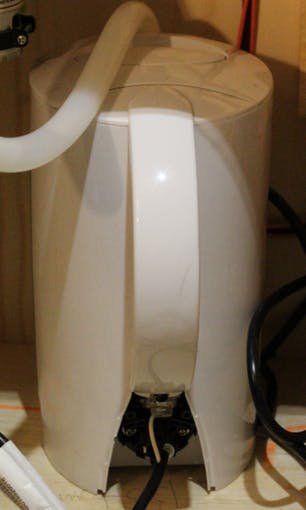
The water system begins with a modified hot water pot. The hot water pot switch is bypassed with the power cord leads directly soldered to the heating element. The heating element uses 10 Amps at 120 Volts and gives off 1200 Watts of heating power. The power comes from the wall and then is switched by a solid state relay.
The next step is pumping the water from the hot water pot to the mixing chamber. We use a 12 Volt diaphragm pump with 3/8″ inside diameter food grade silicone tubing. Home brew shops are a great place to find food grade tubing. Two main reasons for using this style of pump are 1) it is self priming and 2) it doesn’t burn up if it runs out of water. The power to the pump is switched using a MOSFET transistor.
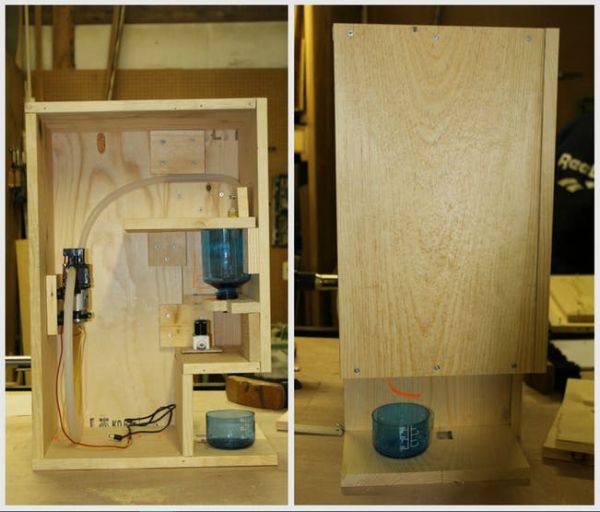
MThe mixing chamber is an narrow necked Nalgene bottle. The bottle is mounted upside down. The bottom is cut off which allows the water and powder to come in. The exit hose is sealed in a hole in with food grade silicone RTV.
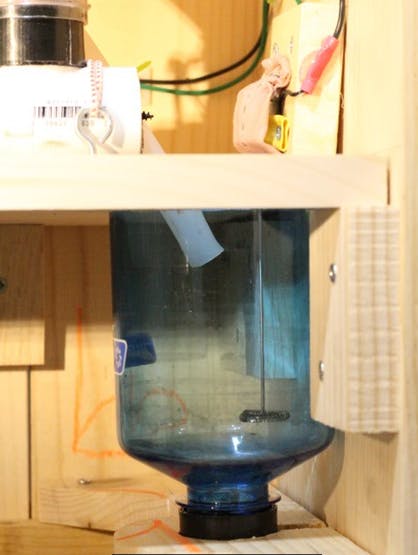
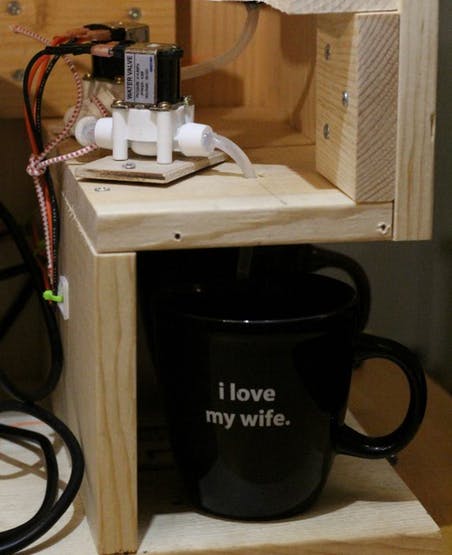
Once the water and cocoa powder are done mixing, the fresh made hot cocoa is ready to be dispensed. The hot cocoa flows out of the mixing chamber in 1/4″ outside diameter food grade silicone tubing. The reason for using 1/4″ tubing is due to the solenoid valves use this size of tubing. The only larger valves can easily purchase need pressurized liquid to open the valve, while these valves work fine with gravity feed. The logic in the program chooses which valve to open and the corresponding cup fills up ready to be enjoyed.
The Chocolate Express
Hot Cocoa 3000 – The Chocolate Express
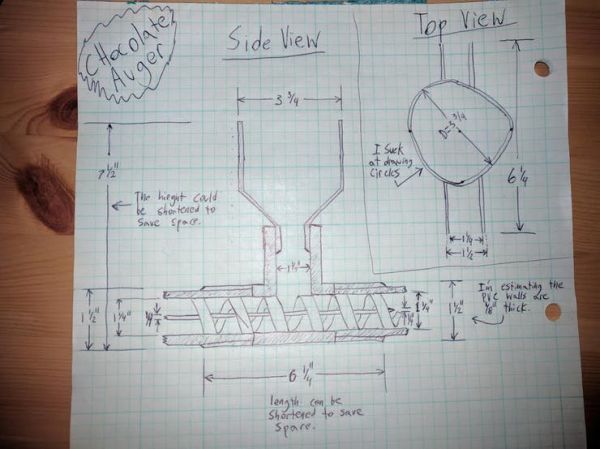
The chocolate express adds the hot cocoa powder and mixes it together with the water. The hot cocoa powder begins in the hopper which is just a modified plastic spice bottle. The powder then falls into a PVC T joint where an auger drill bit is waiting. The drill bit turns using a stepper motor connected to the SparkFun EasyDriver. The hot cocoa power then falls gracefully into the mixing chamber to do its job.
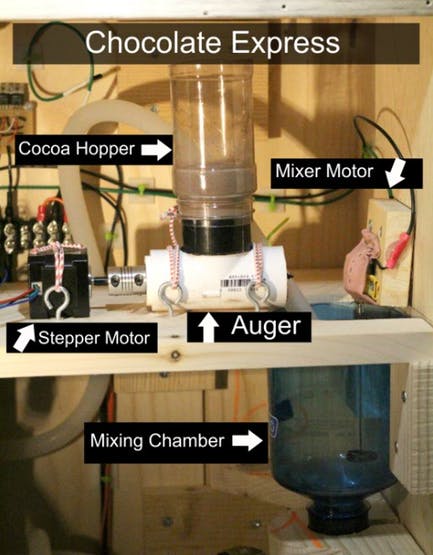
The mixing motor was taken from a milk frother, which we found for only $2.79 at Ikea. The great part about using the milk frother is that the motor is already attached to a great mixing stick. The frother is also very easily dissembled. The power for this motor is switched from a MOSFET transistor. The prototype uses 5 volts straight. For longevity future versions should step the voltage down to around 3 volts with pulse width modulation or a voltage regulator. During final assembly the mixing motor was broken likely due too high of voltage for an extended period of time.
The Power Plant
Hot Cocoa 3000 – The Power Plant
The 120 watt power supply is able to provide 8.33 amps. A portion of this is used for our 5 volt circuit. The 5 volt circuit is able to provide a maximum of 3 amps. It uses a buck converter to reduce the input voltage from 12 to 5 VDC. A key feature of the power supply system is that the two different voltages have different gender pigtails. This prevents plugging in the wrong voltages and destroying circuitry.
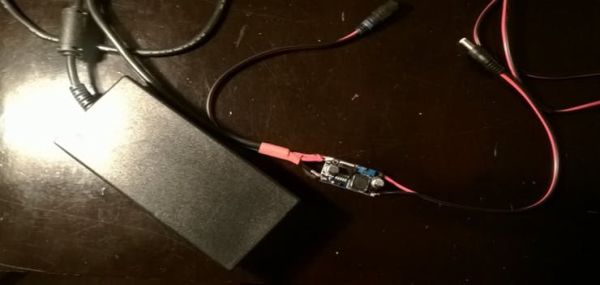
While taking a break during testing, the power was left on with a buggy version code on the Arduino. After the break, there was a slight smell of smoke, and a MOSFET was extremely hot. We may never know what exactly happened but what we found was a trail of destruction. The buck converter failed possibly due to to high of current draw from faulty code. The failed converter then provided 12 volts instead of 5 volts, compounding the problem. This definitely killed the MKR1000, but thankfully we had a backup. The mixing motor also connect to this circuit never worked again after this disaster. During final testing we used a bench top power supply to power the 5 volt circuitry and skipped the mixing step. Lesson learned, always power off during breaks!
The Electric Brain
The electric brain of this machine is an Arduino MKR1000. The MKR1000 controls all of the parts of the machine as well as acts as a simple web server waiting for orders. The code for this project is based off modeling the Hot Cocoa 3000 as a Finite State Machine (FSM). For those not familiar with FSMs, they provide a nice visual way to model complex systems. They also are very easy to turn into code once a diagram has been created. What you need to know to read a FSM diagram:
- The circles are the states
- The arrows connect states
- The “equation” contains the logic to follow the arrow
- Above the line is what must be true to follow the arrow
- Below the line is what to do when the arrow is followed
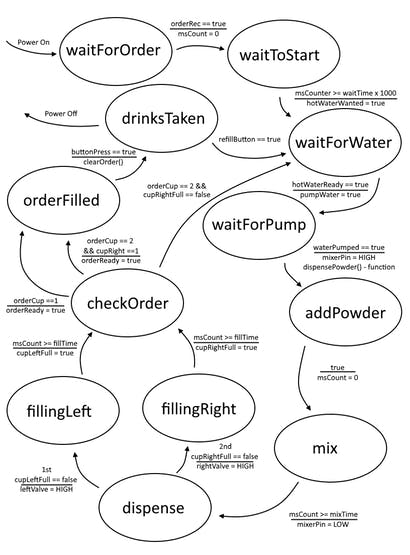
One thing to note about this diagrams is that the current machine code doesn’t completely follow this diagrams due to some simplifications due to time constraints. This is a great visual of the overall structure of the code though. The main simplification was using a timer instead of a thermometer to control the hot water pot. It will likely be implemented in the future, but had issues this time around.
The HTML server page which is where orders can be placed currently doesn’t allow for any options. All the choices are hard coded due to time constraints. It will however allow the user to monitor what state of the FSM the Hot Cocoa 3000 is in. We used port forwarding to test ordering hot cocoa when not on the local network. It worked great but port forwarding is outside the scope of this write up, but there are plenty of tutorials out there on this subject. It is fairly easy to do but requires configuring your WiFi router.
The complete code for the Hot Cocoa 3000 can be found at this Arduino Web Editor Link or as an attachment at the end of this project.
The circuitry of the Hot Cocoa isn’t too complex. It has 1 Solid State Relay Controlling the hot water pot. It has 4 MOSFET transistors Controlling the Pump, 2 Solenoid Valves, and the Mixer Motor. Sadly the MOSFETs used don’t follow the way I interpreted the datasheet. The threshold voltage for the gate is listed at 2.5V but really needs about 4-4.5V to work in this situation. This is more than the Arduino MKR1000 can provide so I placed a 1.5V battery in series with each MOSFET gate to bump each signal from 3.3V to 4.8V which has solved the problem. Eventually new MOSFETs that work with 3.3V will be incorporated into the design.
Construction
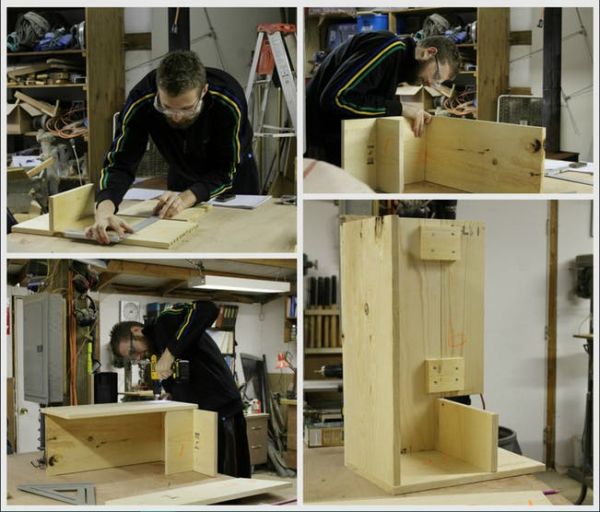
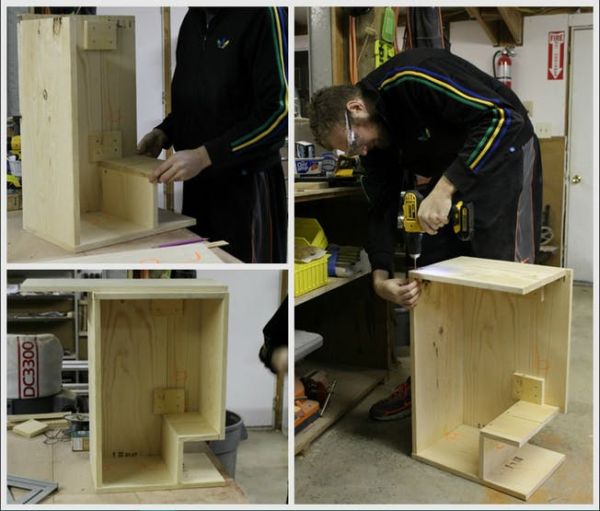
The enclosure for this prototype is made out of 3/4″ pine. This decision to use pine is due to the availability, easy of construction and low cost. We have access to a very well equipped wood shop that makes woodworking easy. The enclosure measures approximately 1’x1.5’x2′. ( ‘ Symbol means Feet.) These dimensions work well and allow for easy access to the components inside. There is potential for shrinking as there is a lot of empty space inside. Building the Hot Cocoa 3000 takes almost a solid week of time.
Schematics
Code
Source : Hot Cocoa 3000




An order for a cup of hot cocoa is immediately ordered in this version.