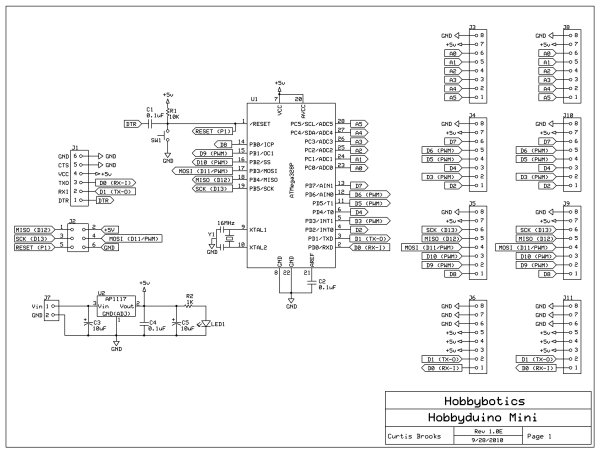
Hobbyduino Mini V1.0 using arduino

Introduction

The Hobbyduino Mini is a clone of the Arduino main-board.  It contains a ATMega328 processor programmed with the Arduino bootloader.

The Hobbyduino does not contain the circuitry for USB communication.  I opted to rely on the FTDI232R serial boards to handle the USB-to-Serial protocol.  Here is the one I use but, others are available.
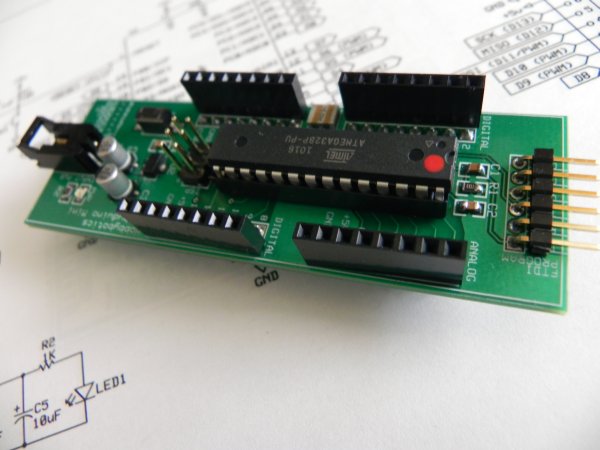
The schematic and PCB was developed with the freely available ExpressPCB software. Build It  Reference the B.O.M above for a list of the parts necessary to complete the Hobbyduino Mini.  Most of the components are surface mount devices (SMD) except for the connectors and pin headers.  As such, soldering may take a little more time and a little more experience.  I recommend starting with the low profile components first such as the 0805 resistors and capacitors.  I also recommend that consideration be given to the components that may be a little more difficult to solder because of location, such as the voltage regulator that is surrounded by the two 10uF capacitors.  The last device that should be installed on the board is the ATMega328 microcontroller.  The ATMega is susceptable to what is known as electrostatic discharge (ESD) which could damage the component without any visual signs.The Hobbyduino Mini contains an on-board voltage regulator that accepts 7 – 18V and outputs 5V @ 1A.  Optionally, power can be provided by the USB port when the FTDI adapter is plugged into the board.  Be advised, you can damage the USB port if more than 500mA is drawn from it.

Specifications

  • ATMega328 processor running at 5V
  • 16 MHz resonator
  • Input voltage 7-18V
  • Output voltage 5V @ 1A
  • USB or external power (requires FTDI adapter for USB power)
  • Size: 1.1875W” x 3.5L”
  • Digital (0 – 13), analog (0 – 5), serial, and I2C pins brought out to pin headers
  • Designed to plug into a breadboard for easy prototyping
  • Configured for auto-reset after programming
  • Manual reset button
  • 6-pin ISP connector

Documentation

  • Schematic – PDF
  • PCB – PDF
  • Schematic – SCH
  • PCB – PCB
  • Mechanical Drawing – DXF
  • Bill of Materials – TXT

The schematic and PCB was developed with the freely available ExpressPCB software.

The schematic and PCB was developed with the freely available ExpressPCB software. Build It  Reference the B.O.M above for a list of the parts necessary to complete the Hobbyduino Mini.  Most of the components are surface mount devices (SMD) except for the connectors and pin headers.  As such, soldering may take a little more time and a little more experience.  I recommend starting with the low profile components first such as the 0805 resistors and capacitors.  I also recommend that consideration be given to the components that may be a little more difficult to solder because of location, such as the voltage regulator that is surrounded by the two 10uF capacitors.  The last device that should be installed on the board is the ATMega328 microcontroller.  The ATMega is susceptable to what is known as electrostatic discharge (ESD) which could damage the component without any visual signs.

Build It

Reference the B.O.M above for a list of the parts necessary to complete the Hobbyduino Mini.

Most of the components are surface mount devices (SMD) except for the connectors and pin headers.  As such, soldering may take a little more time and a little more experience.  I recommend starting with the low profile components first such as the 0805 resistors and capacitors.  I also recommend that consideration be given to the components that may be a little more difficult to solder because of location, such as the voltage regulator that is surrounded by the two 10uF capacitors.  The last device that should be installed on the board is the ATMega328 microcontroller.  The ATMega is susceptable to what is known as electrostatic discharge (ESD) which could damage the component without any visual signs.


For more detail: Hobbyduino Mini V1.0


About The Author

Ibrar Ayyub

I am an experienced technical writer holding a Master's degree in computer science from BZU Multan, Pakistan University. With a background spanning various industries, particularly in home automation and engineering, I have honed my skills in crafting clear and concise content. Proficient in leveraging infographics and diagrams, I strive to simplify complex concepts for readers. My strength lies in thorough research and presenting information in a structured and logical format.

Follow Us:
LinkedinTwitter

Leave a Comment

Your email address will not be published. Required fields are marked *

Scroll to Top