Summary of Hexapoduino: tiny hexapod 3D printed, Arduino controlled
Summary: A 3D-printed Micro-Hexapod was enhanced with printable accessories and multiple control methods. Additions include a parametric battery holder and pen holder (for drawbot use). The hexapod can be driven via Bluetooth (with an Android app or PC), a Wii nunchuk, or act as a light follower using two LDRs. Instructions cover printed and electronic parts, assembly, wiring servos to Arduino, powering options, required libraries, test sketches, and customization.
Parts used in the Micro-Hexapod:
- Micro-Hexapod printed parts (body.stl & legs.stl from Thingiverse)
- Battery clip for 4AA (battery_clip_4AA.stl)
- Pen Holder (PenHolder_hexapoduino_front.stl & PenHolder_hexapoduino_back.stl)
- Arduino Mini or Arduino UNO (or compatible)
- 3x Microservo 9G
- 4x AA batteries (preferably rechargeable)
- Hot glue
- M3 screws (6), nuts (6), washers (12)
- 2x LDR (for light follower)
- 2x 10K resistor (for LDR circuit)
- 1x nunchuk (optional for control)
- 1x nunchuk adapter or extracted connector (optional)
- 1x 10K resistor (for nunchuk interface)
- 1x HC-05 or compatible Bluetooth module (optional)
- 1x 2K2 resistor (for Bluetooth interface)
- 1x TS2950 33 or compatible voltage regulator (for Bluetooth power)
A few time ago, i found out a 3d printed Micro-Hexapod on Thingiverse.
I started to work on it in the following ways:
– create new accessories/components 3D printable
– explore the possible ways to drive this hexapod.
Here the results:
– a parametric battery holder that fits perfectly on it, without screws
– a parametric pen holder that transforms this hexapod in a drawbot!
– you can drive this hexapod via bluetooth, from your smartphone (here you can find also an Android App!) or from your PC
– you can drive this hexapod by using your nunchuk
– the hexapod can act as a light follower (thanks to 2 LDR)
Now you’ll see how to build a full working hexapod!
Step 1: BOM
You need the following PRINTED PARTS:
1x Micro-Hexapod
http://www.thingiverse.com/thing:5156 (by ljon)
http://www.thingiverse.com/thing:34796 (remixed by carlosgs)
files: body.stl & legs.stl
1x battery clip for 4AA
http://www.thingiverse.com/thing:109807 (by me)
file: battery_clip_4AA.stl
1x Pen Holder
http://www.thingiverse.com/thing:110331 (by me)
files: PenHolder_hexapoduino_front.stl & PenHolder_hexapoduino_back.stl
You can eventually print an insect head / smile / other to put in front of the hexapod, to personalize it.
You need also the ELECTRONIC PARTS:
1x Arduino Mini or Arduino UNO (or compatible)
3x Microservo 9G
4x AA batteries (better if rechargable)
Then, if you want to make a light follower robot, you need:
2x LDR
2x 10K resistor
If you want to drive you robot using a nunchuk, you need:
1x nunchuk
1x nunchuk adapter (you can buy it or you can remove from an old / broken wiimote)
1x 10K resistor
If you want to drive you robot via bluetooth, you need:
1x HC-05 (or compatible) bluetooth module
1x 2K2 resistor
1x TS2950 33 (or compatible) voltage regulator
Step 2: Build the Hexapod

Build the hexapod is really easy.
You can fix the servo motors to the plate using hot glue.
Then using few m3 screws (6), nuts (6) and washers (12), you can fix the legs to the plate.
Use hot glue also to fix the legs to the servo motors.
Step 3: Connect motors to Arduino and power
Then you need to connect the servo motors to Arduino.
Servo motors have 3 pin:
– the red one is for power / vcc (5V)
– the black one is for ground (GND)
– the white one is for the signal that drives the motor itself
The central servo motor has to be connected to Arduino pin D2
The right servo motor has to be connected to Arduino pin D3
The left servo motor has to be connected to Arduino pin D4
That’s all.
As already told, you can use Arduino UNO or Arduino MINI, and the steps are exactly the same.
If you want to use the Arduino Mini, look at the commented photo.
All the pin usable in this project are explained.
Once connected the servo motors to Arduino, you can fit your Arduino Mini in the plate.
Then you need to power Arduino and the servo motors.
You can choose a 9v battery or 4AA batteries (that is better).
In this case, you need to prepare the battery holder, creating the circuit that serializes the batteries.
Step 4: First test! …and assemble all the pieces!
It’s time to do the first test.
The library to use with Arduino is ArduSnake:
github.com/Obijuan/ArduSnake
Download and install it.
If you don’t know how to install a new library on Arduino, follow this guide:
http://arduino.cc/en/Guide/Libraries
You can use for test the code available here:
http://www.thingiverse.com/download:100066
released by Thingiverse user carlosgs
Upload that skecth into your Arduino and you’ll see the first steps of your hexapod 🙂
If you don’t know how to upload sketch into your Arduino Mini, you can follow the “Programming” section here:
http://arduino.cc/en/Main/ArduinoBoardMini
If the test is OK, we can proceed to learn how to drive our hexapod!
Before that, you need to upload the full featured code!
All is available (updated) here:
https://github.com/pictux/Hexapoduino
anyway i attach here the Arduino sketch.
After upload, assemble all the pieces: put the battery holder in the top of the plate.
You can block it simply with a rubber!
Step 5: Hexapod as a light follower (thanks to 2 LDR)
For this step you need:
2x LDR
2x 10K resistor
The connections are quite simple, you can look at the attached schema (LDR connection).
You can secure the 2 LDR on the top of the hexapod, to grant more light as possible.
If you point a heavy light in front of your hexapod, it will start to increase its speed.
If you point a light on the left LDR, it will turn left.
If you point a light on the right lDR, it will turn right.
If you cover the LDRs, the hexapod will stop.
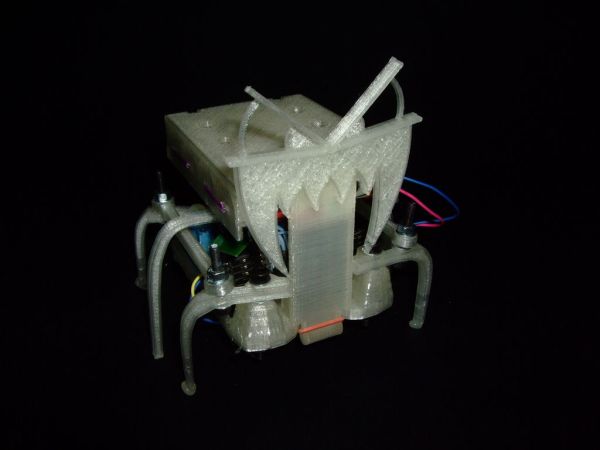
You can see in the images a monster head:)
This “mask” is based on http://www.thingiverse.com/thing:4412
This is one of the ways to customize the hexapod!
Thanks gnolo!
For more detail: Hexapoduino: tiny hexapod 3D printed, Arduino controlled
- What printed files are required to build the Micro-Hexapod?
Body.stl and legs.stl from the Micro-Hexapod Thingiverse entry, plus optional battery_clip_4AA.stl and PenHolder_hexapoduino_front/back.stl. - How many servos are needed and where do they connect on Arduino?
Three microservo 9G are needed: center to D2, right to D3, left to D4 on the Arduino. - What power options are recommended?
Use 4 AA batteries (preferred) or a 9V battery; a 4AA battery holder and serialized battery circuit are recommended. - How do you attach servos and legs to the printed plate?
Fix servos to the plate with hot glue, then use M3 screws, nuts, and washers to attach the legs; hot glue the legs to servos as needed. - What library is used to test the hexapod movements?
Use the ArduSnake library from github.com/Obijuan/ArduSnake and the test sketch provided on Thingiverse by carlosgs. - Can the hexapod follow light and what components are required?
Yes; it requires 2 LDRs and 2 10K resistors wired as shown in the provided LDR connection schematic. - How can you control the hexapod via Bluetooth?
Use an HC-05 (or compatible) Bluetooth module plus a 2K2 resistor and a TS2950 33 voltage regulator as listed. - Is it possible to control the hexapod with a nunchuk?
Yes; use a nunchuk and a nunchuk adapter or connector from a wiimote, plus a 10K resistor for the interface. - Where can I find the full featured code for the hexapod?
The updated code is available at https://github.com/pictux/Hexapoduino and example sketches are linked from the Thingiverse post.