After playing around with Freetouch to make a knitted fabric switch, it was found that the sensor reading varied depending on the type of interactions. For example, prodding the fabric resulted in a much lower sensor reading than grabbing the fabric. Based on this observation, I played around with how to use Freetouch and knitted e-textiles to make a gesture sensing e-textile based on capacitive sensing.
This project is designed to be guidance for making your own gesture sensing e-textiles, based on what I found to work, and not work so well.
Supplies
Adafruit microcontroller with ATSAMD11 or ATSAMD21 e.g. Feather M0, Trinket M0
Freetouch library https://github.com/jgilbert20/Adafruit_FreeTouch/…
Conductive yarn
Yarn for knitting
Breadboard
Crocodile clips
Jumper Wires
USB wire for microcontroller
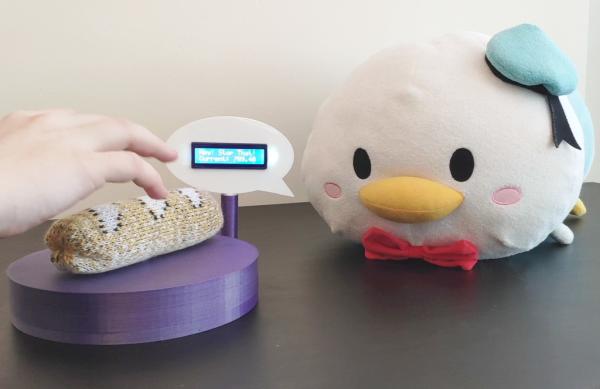
Step 1: Demo: Donald’s Bread
Donald’s Bread is slightly silly toy I designed to demonstrate the gesture sensing functionality. Donald is my rotund duck son whose hunger for bread is matched only by his size. As such, he does not like it when people take his bread.
For this toy, Donald responds differently depending on how to interact with his bread. This is shown on the LCD screen. When the bread is left untouched, he will proclaim his love of bread. If you hover over the bread, there is a warning message. If you touch or grab the bread, there are two other strongly worded messages. Finally, if you remove the bread he will exclaim “It’s Gone!”
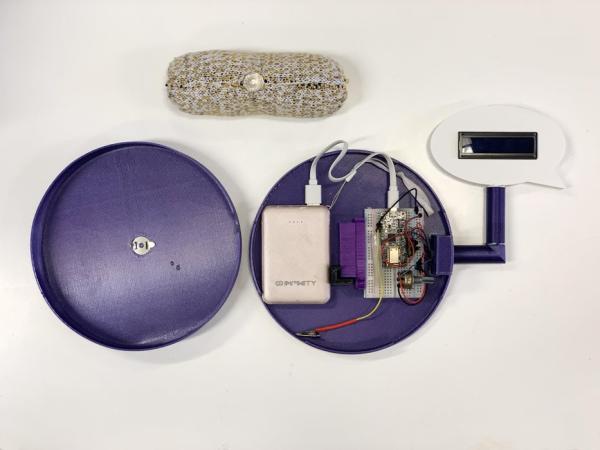
The bread is knitted using an AYAB modified knitting machine. It uses acrylic yarn and conductive yarn with Jacquard knit to create the bread look. All controlled with an Adafruit Powered by a power bank.
Step 2: Making E-textiles for Gesture Sensing
The key aspect to consider when making an e-textiles gesture sensitive is ensuring that the conductive material is partly concealed.
Things to consider:
Conductive Material
The conductive yarn that I have been using is silver-coated nylon (purchased from Taobao). Stainless steel should work, I just opt to use the silver yarn since it is more pleasant to knit. You may have to experiment with the conductive material you have available. The conductive thread should be relatively easy to purchase. For instance, from kitronic.com or adafruit.com
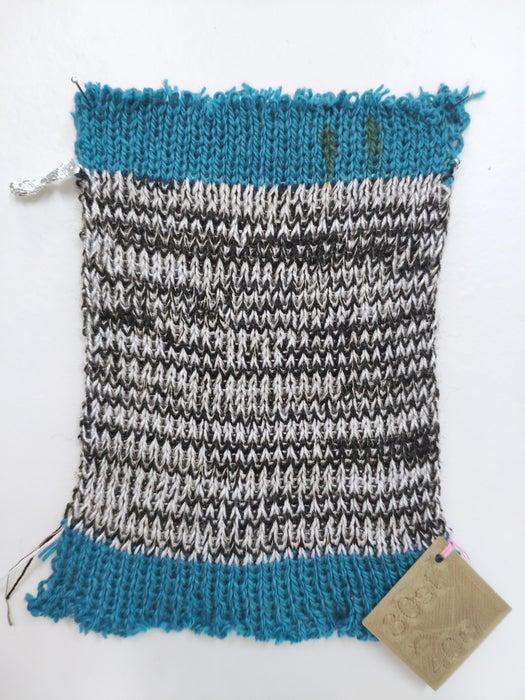
Concealing through structure & Non-conductive material
The black and white, and white samples pictured use a full needle rib structure. Both work reasonably well although the white sample, which uses a fluffy yarn works a bit better than the black and white sample, which uses plain acrylic yarn.
But completely covering the conductive yarn can also be a problem!
For Donald’s bread, plain acrylic is used too. However, the structure is a bit more complicated. The conductive yarn is knitted with the yellow acrylic yarn only. It does mean that the section that is all white or all black are less gesture sensitive since those areas conceal too much of the conductive yarn. Those areas completely cover the conductive material.
Size limits
While it is unlikely you will be making a huge gesture sensing e-textiles area, it is worth mentioning that the gesture-sensing does not work so well when the area is too big. This is because the baseline sensor reading increases with the increase in area size, and it makes the sensing ranges very narrow. This means it is easier for the gestures to be sensed incorrectly. For your reference, the samples pictured area about 10cm x 12cm in size.
Step 3: Electronics
For the electronics, I have been using an Adafruit Feather M0 BLE microcontroller. Any Adafruit microcontroller with ATSAMD11 or ATSAMD21 will work with Freetouch.
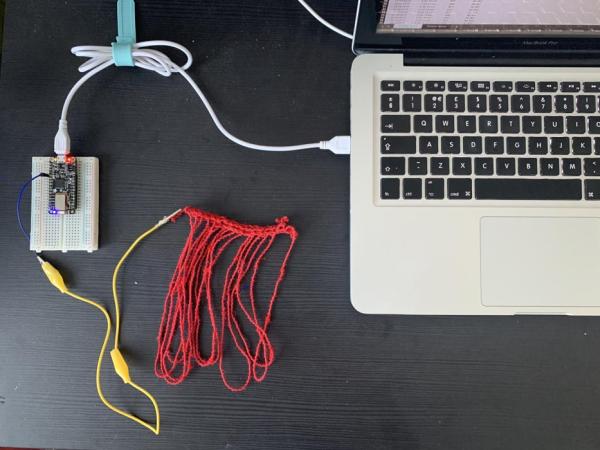
Connecting electronics to e-textiles
The nice thing about this method of gesture sensing is that the connection to electronics is very simple and only requires one connection to the e-textiles material. For the knitted e-textiles, connecting one part of the textiles to the electronics works well, since the conductive material is knitted throughout and it is all interconnected in the fabric structure. Same situation with the braid in the picture.
When testing, I use a crocodile clip connected to an exposed conductive section of the fabric. For Donald’s bread, I used a magnetic metal snap, the male part connected to the e-textiles and the female part connected to the electronics and fixed onto the stand. This allows the e-textile to be removed from the stand.
Power supply choices
One thing to consider is the choice of power supply. I found that the maximum sensor reading changes depending on the power supply. When the microcontroller is connected over USB to the computer, the maximum reading is around 1015, while it is lower when the microcontroller is powered by a power bank. This shouldn’t matter too much, since the programming provided in the next step takes this into account, but it is something to be mindful of.
Step 4: Programming
I have included two Arduino programming files. First, a programme that is designed to output the sensor reading to an Excel spreadsheet, and second the programming for Donald’s Bread. Both work under the same principle, in that there is firstly a calibration phase, in which the sensor value range and the gesture threshold values are calculated, before going into the main sensing phase.
Calibration phase
The main difference is in the calibration phase. When connected to the computer, the maximum sensor value tends to be at the maximum, around 1015, hence this programme does not require user action during calibration.
In contrast, Donald’s bread requires that the user perform a strong gesture, like a cover or grab gesture, during calibration so that the highest sensor value can be recorded as the maximum. Battery power does not result in the sensor value for a strong gesture reaching the maximum value, as seen in the other programme.
Adjusting the programmed thresholds
You’ll notice that the gesture thresholds differ between the two programmes. That is because each programme is for a different electronic setup. In your own version, you may find that gesture sensing doesn’t work as well as you’d like. You may have to adjust the thresholds since your choice of materials and electronics may differ from what I used. These can have an impact the gesture sensing accuracy. On the other hand, part of it can be user error i.e. the way that gestures are performed. There may just be a bit of a learning curve for learning the gestures.
Step 5: Final Thoughts
I hope this set of instructions helps you in making your own gesture sensing e-textiles for your project. While it is not some super accurate, AI-enhanced gesture recognition system that will give you the abilities of a wizard, it is a simple way of adding a bit more sensing capability to your e-textiles project without a lot of added complexity.
Since all the experiment work was using knit, it’ll be interesting to see if it works with other textiles techniques like crochet, embroidery or weave.
Source: Gesture Sensing E-textiles