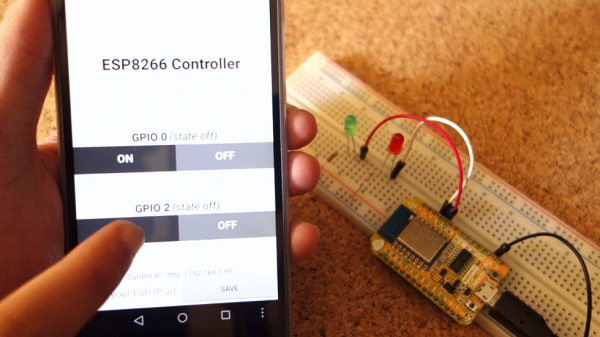
Summary of ESP8266 controlled with Android app (MIT App Inventor)
This article outlines building an Android app with MIT App Inventor to control ESP8266 GPIOs. It covers flashing NodeMCU firmware, using ESPlorer IDE, wiring an FTDI programmer for serial communication, and uploading Lua code to enable remote control via smartphone.
Parts used in the ESP8266 Android Control Project:
- ESP8266
- FTDI programmer
- LEDs
- 220Ω Resistors
- Breadboard
- Android Phone
In this project, you’re going to build an Android app using the MIT App Inventor software that allows you to control the ESP8266 GPIOs.
First, watch the video demonstration
To learn more about the ESP8266 use the following tutorials as a reference:
If you like the ESP and you want to do more projects you can download my eBook Home Automation using ESP8266 here.
Let’s get started!
Parts List
Here’s the hardware that you need to complete this project:
- 1x ESP8266 -read Best ESP8266 Wi-Fi Developmento Boards
- 1x FTDI programmer
- 2x LEDs
- 2x 220Ω Resistors
- 1x Breadboard
- 1x Android Phone
You can use the preceding links or go directly to MakerAdvisor.com/tools to find all the parts for your projects at the best price!
Flashing Your ESP with NodeMCU
In this tutorial we are going to use the NodeMCU firmware. You have to flash your ESP with NodeMCU firmare.
Downloading ESPlorer IDE
I recommend using the ESPlorer IDE which is a program created by 4refr0nt to send commands to your ESP8266.
Follow these instructions to download and install ESPlorer IDE:
- Click here to download ESPlorer
- Unzip that folder
- Go to the main folder
- Run “ESPlorer.jar” file
- Open the ESPlorer IDE
Schematics (3.3V FTDI Programmer)
The schematics for this project are very straight forward. You only need to establish a serial communication between your FTDI programmer and your ESP8266. You can buy one FTDI programmer on eBay.
Wiring:
- RX -> TX
- TX -> RX
- CH_PD -> 3.3V
- VCC -> 3.3V
- GND -> GND
Uploading Code
You should see a window similar to the preceding Figure, follow these instructions to upload a Lua file:
- Connect your FTDI programmer to your computer
- Select your FTDI programmer port
- Press Open/Close
- Select NodeMCU+MicroPtyhon tab
- Create a new file called init.lua
- Press Save to ESP
Everything that you need to worry about or change is highlighted in red box.
Read more: ESP8266 controlled with Android app (MIT App Inventor)
- How do I flash my ESP8266?
You must flash your ESP with NodeMCU firmware. - What software is recommended for sending commands?
The ESPlorer IDE created by 4refr0nt is recommended. - How do I start the ESPlorer IDE program?
Unzip the folder, go to the main folder, and run the ESPlorer.jar file. - How should I wire the FTDI programmer to the ESP8266?
RX connects to TX, TX connects to RX, CH_PD connects to 3.3V, VCC connects to 3.3V, and GND connects to GND. - What steps are required to upload a Lua file?
Connect the programmer, select the port, press Open/Close, select the NodeMCU+MicroPtyhon tab, create init.lua, and press Save to ESP. - Can I use eBay to find parts?
Yes, you can buy one FTDI programmer on eBay.