Dear friends welcome to another Instructable! Today we are going to learn how to get the data that this Xiaomi Temperature and Humidity monitor transmits using the Bluetooth functionality of the ESP32 board.
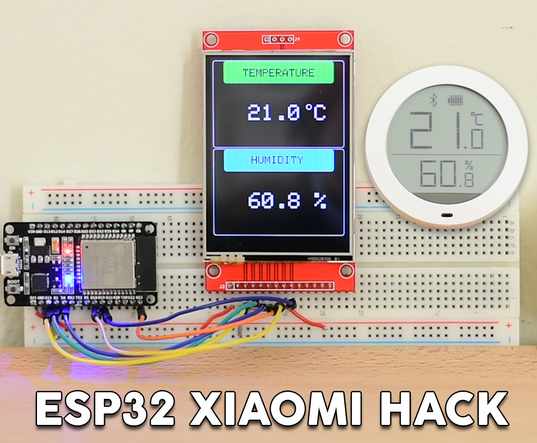
As you can see, I am using an ESP32 board and a 2.8” color TFT display. On the display, we display the temperature and the humidity. The cool thing is that I haven’t connected any sensors to the ESP32 board. I get the temperature and the humidity wirelessly from this commercial Xiaomi Temperature and Humidity monitor. How cool is that! The display on the Xiaomi device is updated every second but I update the display that is connected to the ESP32 board every 10 seconds to conserve power on the Xiaomi device.
This cool Xiaomi temperature and humidity sensor displays the temperature and the humidity on its LCD display and it can also transmit the data to other Xiaomi Devices or apps using the Bluetooth protocol. The devices use a single AAA battery and since it is a commercial product, the battery life of the device is excellent. It can last on a single AAA battery for months, something we can’t achieve on our DIY projects. A few weeks ago, I discovered that some clever guys managed to reverse engineer the protocol that Xiaomi uses to transmit the data from the sensor and managed to get that data using an ESP32 board. So I tried it, and as you can see it works!
Step 1: Get All the Parts
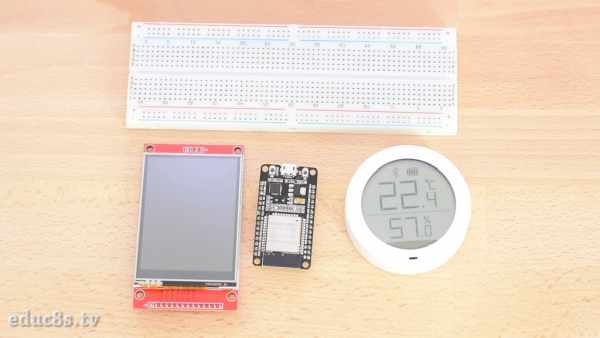
Let’s now see how to build this project. We need an ESP32 board, a 2.8” ILI9341 display, the Xiaomi temperature and humidity sensor, a breadboard and some wires.
Here are some links to the parts I am going to use in this Instructable.
- ESP32 ▶ http://educ8s.tv/part/ESP32
- 2.8″ Display ▶ http://educ8s.tv/part/28ILI9341
- Xiaomi Sensor ▶ http://educ8s.tv/part/XiaomiThermometer
- Breadboard ▶ http://educ8s.tv/part/LargeBreadboard
- Wires ▶ http://educ8s.tv/part/Wires
- USB Meter ▶ http://educ8s.tv/part/UsbDoctorOLED
- Powerbank ▶ http://educ8s.tv/part/Powerbank
Step 2: The ESP32 Board
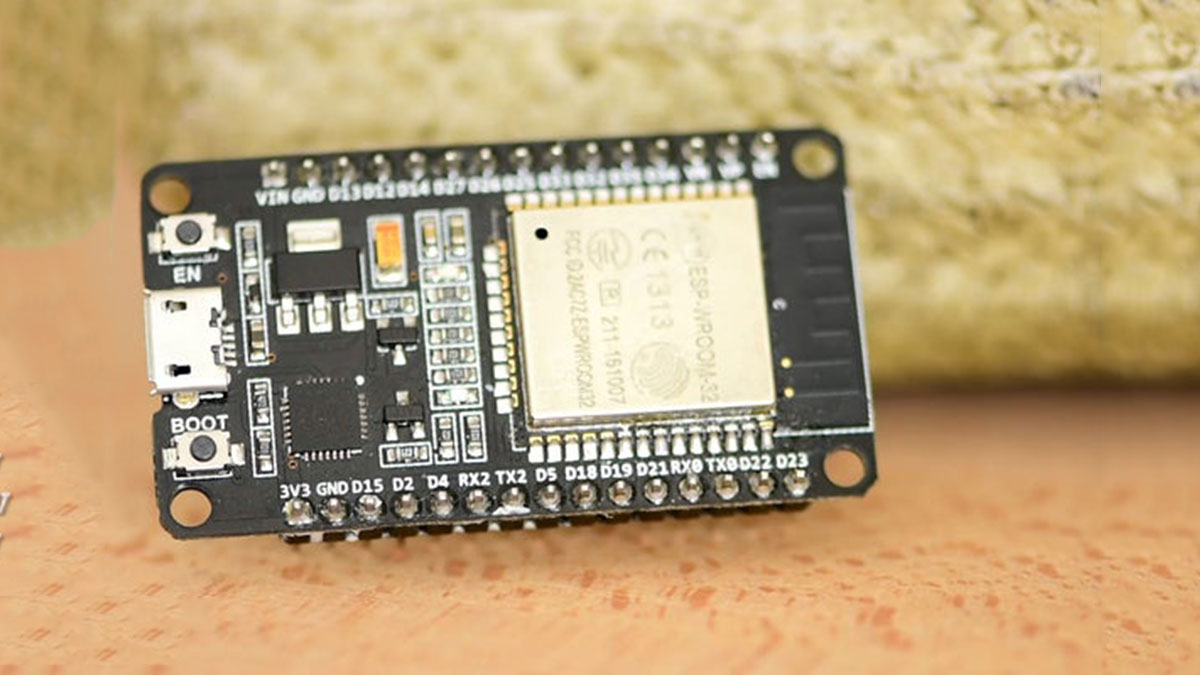
If you are not familiar with it, the ESP32 chip is the successor of the popular ESP8266 chip we have used many times in the past. The ESP32 is a beast! It offers two 32 processing cores which operate at 160MHz, a massive amount of memory, WiFi, Bluetooth and many other features with a cost of around 7$! Amazing stuff!
Please watch the detailed review I have prepared for this board. I have attached the video on this Instructable. It will help understand why this chip will change the way we make things forever! One of the most exciting things about the ESP32 is that even though it is so powerful, it offers a deep-sleep mode which requires only 10μΑs of current. This makes the ESP32 the ideal chip for low power applications.
Step 3: 2.8″ TFT Display for Arduino and ESP32
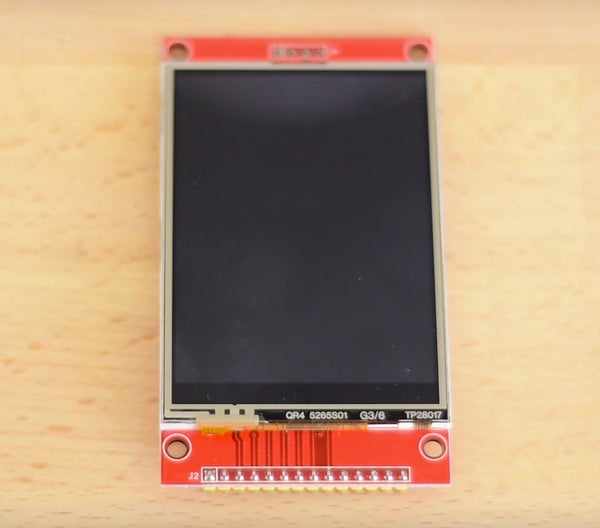
The display is big, and it offers a resolution of 320×240 pixels. Compared to one of my favorites displays, the 1.8” Color TFT display you can see it a lot larger. The screen also offers touch functionality which is an added bonus and an SD card slot at the back. It uses the SPI interface, so the connection with the Arduino or the ESP32 board is very straightforward. The cost of the display is relatively low; it costs around 11$ which in my opinion is a fair price for what this display offers.
Another thing like about this display is that it does not come as a shield like the touch display we were using so far. This way, we can connect the display to any board, the Arduino Pro mini, the STM32, the ESP8266, and the ESP32. This is very important because we now have a low-cost display that we can use with every board. Until now, the only touch display we could use with these boards were the Nextion displays which are more expensive, and to be honest even though I use them from time to time, I don’t really like them.
Step 4: Connecting the Display
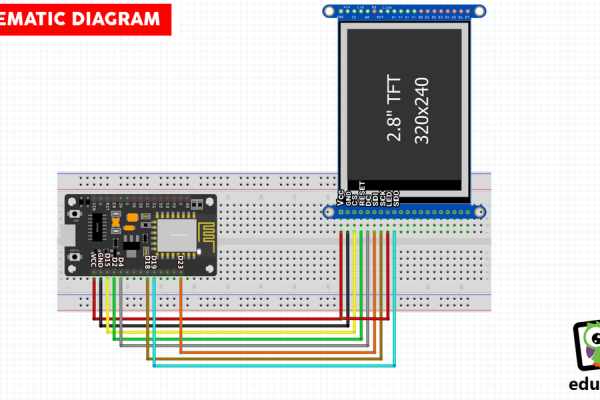
First, we have to connect the ESP32 Board to the 2.8” display. You can find the schematic attached to Instructable. I am using this DOIT ESP32 board which was released about two years ago. This version of the board is no longer available since there is now a newer version of it available which offers more pins, this one. The only reason I am using the old version of the board is that the GND pin of the board placed next to the SPI pins, at the same side of the board, which makes it breadboard friendly.
After connecting the display to the board we can power up the project. After a few seconds, we receive live data from the nearby Xiaomi Device. Since the device uses Bluetooth 4 the range of it is pretty good. We can easily get the data this device transmits from distances up to 10 meters or more! We can also receive the battery level of the Xiaomi Device but I don’t display this value on the screen.
If we use this USB meter, we can see that the current draw of this project is around 120-150 mA using this big display. If we use an e-paper display, put the ESP32 board in deep sleep mode, and get data from the sensor every few minutes we can make this project battery friendly. I will try this in a future video. This project is just a demonstration that we can get data from this device wirelessly.
Step 5: The Code of the Project
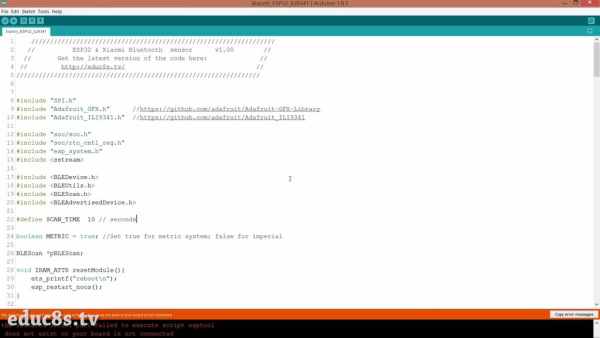
Let’s now see the software side of the project.
The code of the project is based on this project: https://github.com/turlvo/KuKuMi
I used the code which gets that data from the Xiaomi device and built a standalone project with it.
In this variable, we declare that we need to get fresh data every 10 seconds.
<p>#define SCAN_TIME 10 // seconds</p>
Here, we declare that we want to display the temperature in degrees Celsius. If you want to use the Imperial system just set this variable to false.
<p>boolean METRIC = true; //Set true for metric system; false for imperial</p>
At the setup function we initialize the display and the Bluetooth module of the ESP32 board and then we draw the user interface on the screen.
<p>void setup() {</p><p>  WRITE_PERI_REG(RTC_CNTL_BROWN_OUT_REG, 0); //disable brownout detector

  tft.begin();</p><p>  Serial.begin(115200);
  Serial.println("ESP32 XIAOMI DISPLAY");

  initBluetooth();</p><p>  drawUI();
}</p>
Next, we search for Bluetooth devices nearby every 10 seconds. We don’t make a connection to the Xiaomi Device since it is not needed. We only scan for nearby Bluetooth low energy peripherals and check the broadcast advertisement packets.
<p>void loop() {<br>
    char printLog[256];
    Serial.printf("Start BLE scan for %d seconds...\n", SCAN_TIME);
    BLEScanResults foundDevices = pBLEScan->start(SCAN_TIME);
    int count = foundDevices.getCount();
    printf("Found device count : %d\n", count);</p><p>    delay(100);
}</p>
The humidity and temperature values are stored in those packets, so we only need to read them. After we read the values we display them on the screen. As always you can find a link to the code of this project in the description attached to this Instructable.
Step 6: Final Thoughs & Improvements
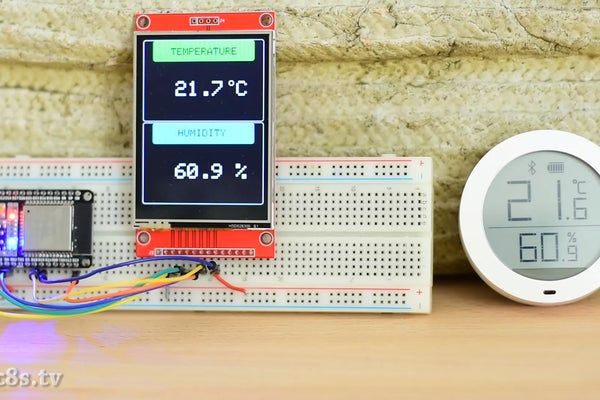
Now that we know how to get data wirelessly from this sensor we can build a complete battery-powered weather station. Since this Xiaomi Device is a commercial product, it offers great battery life. Unfortunately, we can’t achieve similar battery consumption on our projects yet. So, I plan to use this sensor as an outdoors sensor for a weather station project which will use a big e-paper display. It will be cool. Also, I am going to search for other Xiaomi Bluetooth enabled devices that we can hack in a similar way. Stay tuned.
I would love to know your opinion about this project. Do you find it useful that we can get data from some commercial Bluetooth devices? What are you going to build using this functionality? I would like to read your ideas so please post them in the comments section below. Thanks!
Source: ESP32 Xiaomi Hack – Get Data Wirelessly
