When I saw a COREXY (or H-Bot) plotter, I thought I would make it someday. Since most of its components were made from 3D printers so I have postponed it. Fortunately, once again the PVC pipes gave me an idea to build it with a special version. My Dual-Task CoreXY DrawBot can perform double tasks simultaneously, eg: plotting 2 same drawings at the same time, or using pen plotting and laser engraving simultaneously.
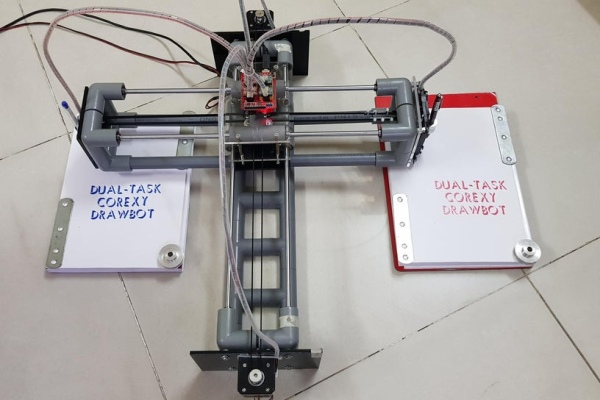
Please check my introduction video before getting started.
Step 1: Supplies
a. Main materials:
⦾ 1pcs x DFRduino UNO R3 – Compatible with Arduino Uno
⦾ 1pcs x Arduino CNC Shield V3 GRBL.
⦾ 1pcs x 3 Axis Control Board GRBL With Laser Engraver Supported. (Optional if we use Laser engraving mode)
⦾ 1pcs x 2500mW Laser Module (Optional if we use Laser engraving mode).
⦾ 4pcs x Stepper Motor Driver A4988
⦾ 2pcs x Stepper motor NEMA 17.
⦾ 2pcs x CD/DVD Rom Player Drive.
⦾ 2pcs x 50 mm L Stepper Motor Support.
⦾ 3meter x GT2 6mm Timing Belt.
⦾ 4pcs x GT2 5mm Bore Aluminum Toothless Idler Pulley for 6mm Width Timing Belt.
⦾ 1pcs x GT2 Idler Timing Pulley 5mm Bore 20 Teeth.
⦾ 2pcs x GT2 Timing Pulley 20 Teeth.
⦾ 4pcs x Round Shaft Diameter 8mm, Length 500mm.
⦾ 8pcs x Ball Flanged Shielded Bearings 8 x 22 x 7mm.
⦾ 8pcs x Horizontal Ball Bearing Bracket or Vertical Ball Bearing Bracket.
⦾ 2pcs x Aluminum Flexible Shaft Coupling, Inner Hole Size: 10mm x 10mm.
⦾ 1pcs x Power Supply 12/24VDC.
⦾ 2pcs x Clear/White Acrylic, size A3, thickness at least 5mm.
⦾ 4pcs x Copper Brass Pillars L-10mm.
⦾ 2 meter x 8P/16P Rainbow Ribbon Cable.
⦾ 1pcs x 5mm DC Female Power Plug.
⦾ Some small cable ties, cable spiral wrap, bolts and nuts and small zinc wires.
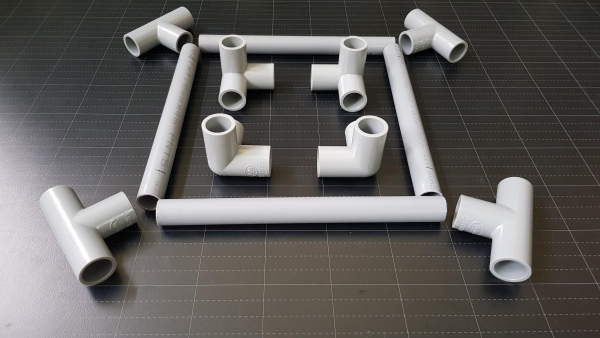
b. PVC pipes and fittings:
⦾ 14pcs x PVC Pipe Tee Ø21mm.
⦾ 16pcs x PVC Three Way Tee Ø21mm.
⦾ 4 meter x PVC Pipe Ø21mm.
c. Tools:
⦾ Drilling machine.
⦾ Hand saw.
⦾ Soldering machine.
d. Firmware & Softwares:
⦾ GRBL.
⦾ Inkscape.
⦾ LaserGRBL.
⦾ Universal Gcode Platform (UGS).
Step 2: How It Works
My DrawBot is based on GRBL firmware and used built-in CoreXY kinematics in GRBL. Its mainframe and supports are made of PVC pipes and acrylic sheets. It has working range about Y350mm x X320mm and detail configuration is shown below:
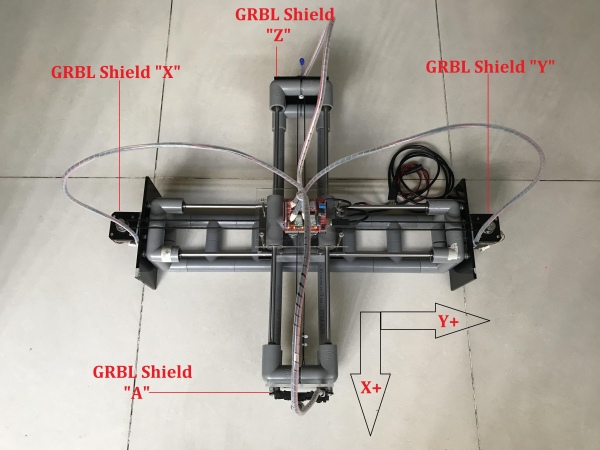
It has two Z axes (“A” is cloned from Z axis) so it is possible to draw two identical images or texts at the same time.
My DrawBot movement is described as follows:
⦾ X and Y rotate clockwise: Y-
⦾ X and Y rotate counterclockwise: Y+
⦾ X rotate clockwise and Y rotate counterclockwise: X-
⦾ X rotate counterclockwise and Y rotate clockwise: X+
Go to the next steps to see how I built it.
Step 3: Fixed Frame – Y Axis
Firstly, I joined 4 pcs x PVC three-way tees Ø21mm together. I made two sets like that (called Y supports) for 2 ends of the Y axis. Later, two stepper motors X and Y would be mounted on them.
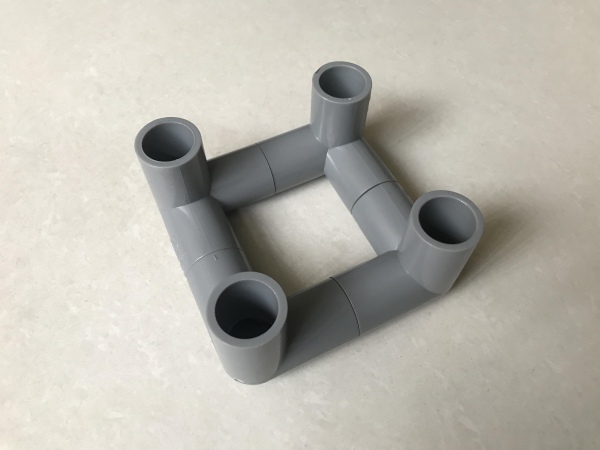
To build Y slider, I connected 2 pcs x PVC tees Ø21mm together and inserted ball bearings into 4 ends of this assembly.
Then I jointed 10pcs x PVC tee Ø21mm together. It was not only used to connect two Y supports, but also used as a footbase for my CNC DrawBot.
There’re 4 open holes for each Y support. I inserted locked bearings into 2 open holes of each assembly. I threaded 2pcs x T8 shafts, length 500mm through Y slider and they were fixed by two Y supports at open holes with locked bearings. To keep the frame strong enough, the remaining two open holes of the Y supports are connected to 10-tees support assembly above.
Step 4: Mounting X & Y Stepper Motors
I cut 2 acrylic sheets, dimension L180 x W120 x T5mm and drilled 8 holes. Four holes were used to mount stepper motors by L supports and the other for connecting to Y supports.
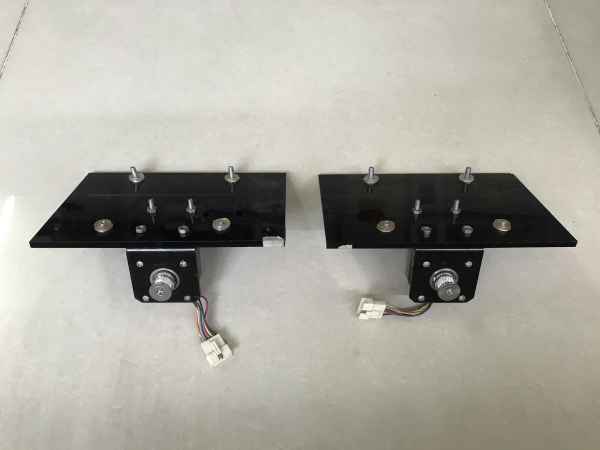
I drilled 4 holes in each Y supports corresponding to 4 holes on the acrylic motor supports above.
The first acrylic support was mounted to Y axis frame at one side.
And the second acrylic support was done in a same way at opposite side. The bottom level of PVC frame and acrylic sheets should be the same, making sure that both rested on a flat floor.
These acrylic sheets keep the DrawBot from falling down when the X axis moves far away from the DrawBot’s centerline. They also fix the Y pipe supports, pulleys and shafts do not move when the DrawBot is in operating.
Step 5: Moveble Frame – X Axis
Same as Y axis, I made two sets of X supports which were built from 4 pcs x PVC three-way tees Ø21mm. Detail’s as follow:
⦾ The first X support: inserted lock bearings at 2 open holes, and installed one idler timing pulley 20 teeth as below picture:
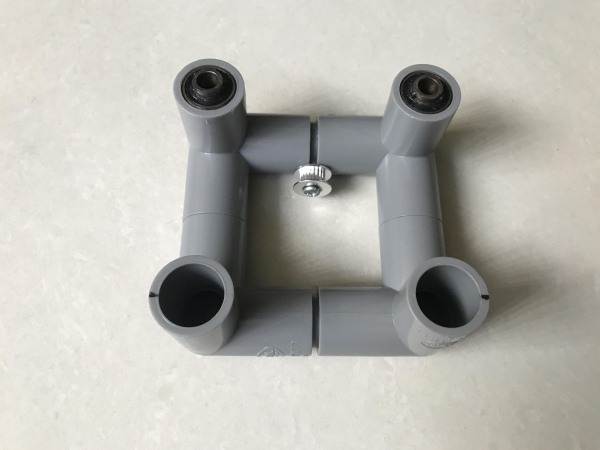
⦾ The second X support: inserted lock bearings at 2 open holes, and installed two bolts M4 – L20mm. The distance between them was equal to the diameter of idler timing pulley 20 teeth – about 12mm. They were used to fix the belt system.
X slider was contructed from 2 pcs x PVC tees and ball bearings were inserted into 4 ends of this slider.
Then I cut 2pcs x PVC pipes Ø21mm, length about 500mm.
I threaded 2pcs x T8 shafts, length 500mm into X slider and they were fixed by two X supports at open holes with lock bearings. To reinforce the X frame, the remaining two open holes of X supports were connected to 2 pipes Ø21mm above.
Now I had 2 main seperated parts of a DrawBot.
Step 6: Belt Support
I cut an acrylic sheet, dimension L120mm x W120 x T5mm, drilled and installed 4 toothless idler pulleys in the center. The distances between them were still 12mm.
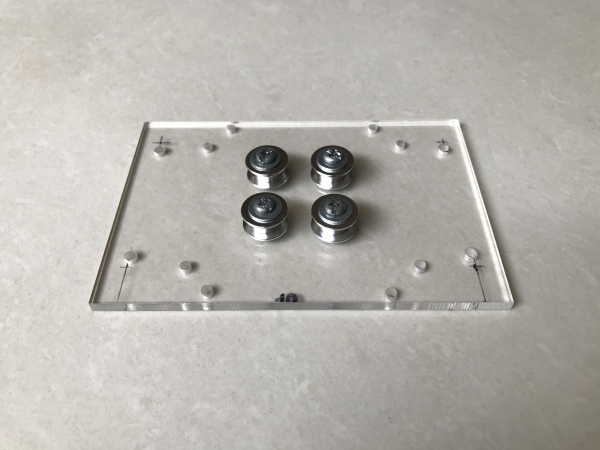
I disassembled X & Y sliders from their PVC frames, then did following works:
⦾ X slider: drilled 4 holes at bottom and connected 4 copper brass pillar L-10mm on these holes.
⦾ Y slider: drilled 4 holes on top.
Connect X slider to acrylic belt support through 4 copper brass pillars.
Cut 2 more acrylic sheets which had same size with acrylic support above (dimension L120 x W120 x T5mm)
⦾ Black one: reinforce the slider system and it was install at Y slider bottom.
⦾ Clear one: mount Arduino Uno and GRBL shield.
Acrylic belt support was mounted to Y frame.
Thread 2pcs x T8 shafts, length 500mm into X slider.
Step 7: Double Z Axis
I cut 2 acrylic sheets, dimension L120 x W100 x T5mm, drilled holes to mount 2pcs x CD/DVD frame and installed 2 aluminium flexible coupling 10 x 10mm for clamping the pens.
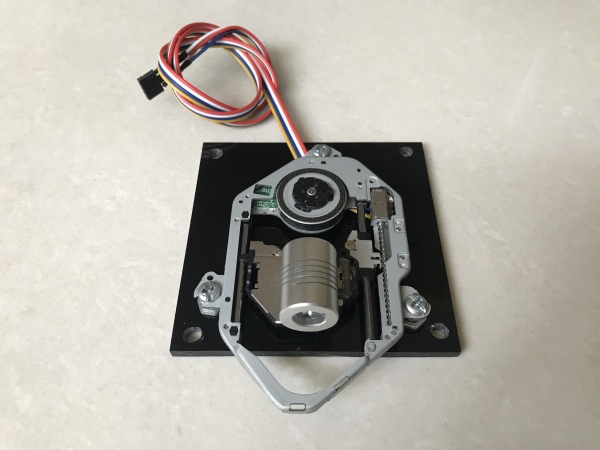
I disassembled X supports from X frame and drilled 4 holes on the each support.
Source: Dual-Task CoreXY DrawBot
