
Summary of Displaying on Paper – Thermal Printer + Arduino
This article introduces a project connecting a thermal printer to an Arduino to print physical data copies, such as fortunes. It explains that thermal printers use heat rather than ink and require an external power supply (5-9V, 1400mA+) because they draw up to 1A during printing, exceeding USB capabilities. The guide details two power connection methods: separate supplies or powering the printer via the Arduino board.
Parts used in the Thermal Printer + Arduino Project:
- Arduino microcontroller
- Thermal printer
- External power supply (5V to 9V)
- Thermal paper rolls (34ft long)
- Connecting wires for power and data
Outputting data can be extremely useful, and typically when we look at doing this, it is either to the Arduino’s serial terminal, or to some sort of display. But what about making physical copies of the data? So a few months back, SparkFun started selling a thermal printer that you could connect to a microcontroller (or via adafruit ). That same day my brain filled with crazy thing you could do with it, like a giant fortune cookie that could print your fortune on the fly.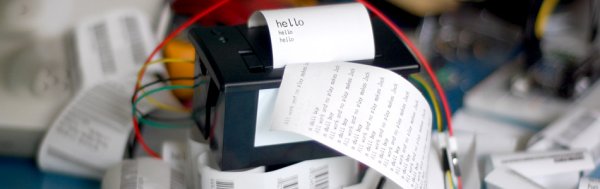
Anyways… If you dont know about thermal printers, they are most often the printers your store’s receipts are printed on. The reason for this is that they dont use ink, or use a cartridge of any sort. The paper it prints on turns black when heated. So this printer simply applies heat where another printer would apply ink. Eventually the printers head will wear out, but this after several miles of printing. Yes, miles – about 30 of them. So given that the rolls of paper are 34ft long, you can print about 4,600 rolls before the print head dies, meaning for most of us, you will never see that happen.
Hooking it up
So this printer can be powered off of 5V, but NOT the 5v pin on your arduino, and no via USB. It uses very little power when it is is just sitting by, but uses around a full amp when it is printing! And because the most USB can handle is half of that, we need an external power supply. Something between 5 and 9V, and a minimum of 1400ma output (larger is fine). I found that powering the printer with 9v, it printed much faster, and slightly darker than 5v, and if you have it available, I recommend using 9v.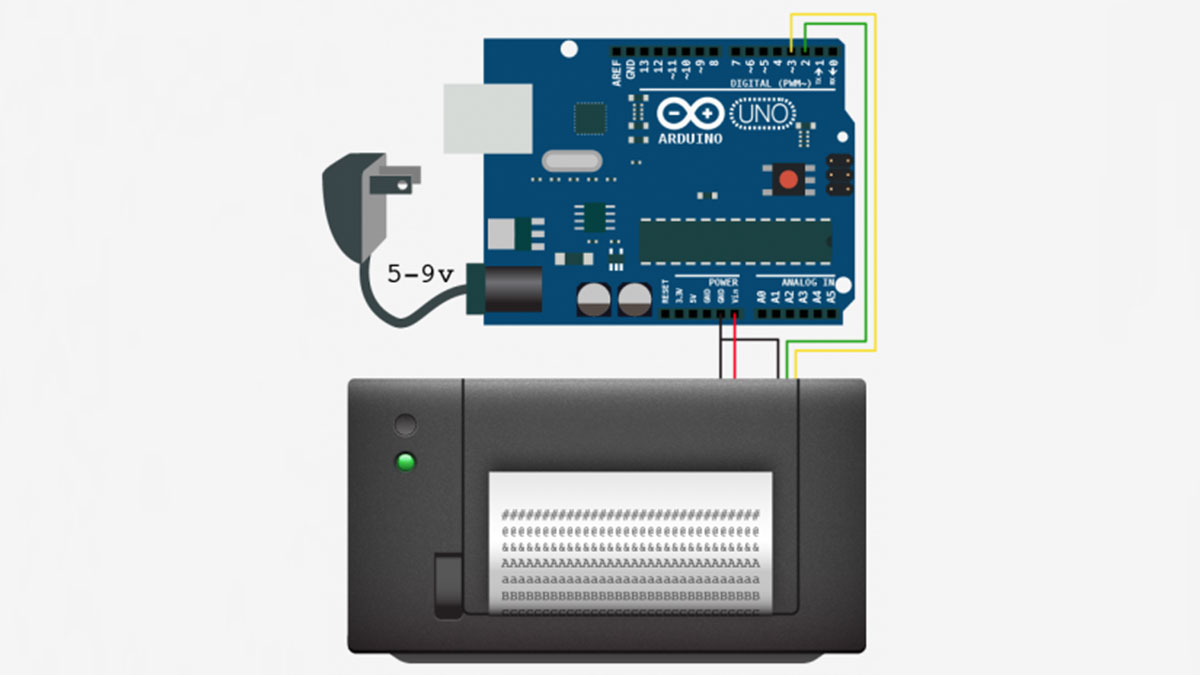
There are two ways of connecting the power supply as shown in the illustrations. You can either power your arduino and the printer separately, or you can power the arduino, and power the printer off of the arduino.
For more detail: Displaying on Paper – Thermal Printer + Arduino
-
What is the primary mechanism of a thermal printer?
The printer applies heat to special paper to turn it black instead of using ink or cartridges. -
How much power does the thermal printer consume when printing?
The printer uses around a full amp when it is printing. -
Can I power the thermal printer directly from the Arduino's 5V pin or USB?
No, you cannot use the Arduino's 5V pin or USB; an external power supply is required because USB handles only half the needed current. -
What voltage range is recommended for the external power supply?
The recommended voltage is between 5 and 9V, with 9V suggested for faster and darker printing. -
What is the minimum current output required for the power supply?
The power supply must have a minimum output of 1400ma, though larger outputs are fine. -
How many rolls of paper can be printed before the print head wears out?
You can print about 4,600 rolls before the print head dies, based on 30 miles of printing capacity. -
What are the two ways to connect the power supply for this project?
You can either power the Arduino and printer separately, or power the Arduino and then power the printer off of the Arduino.
