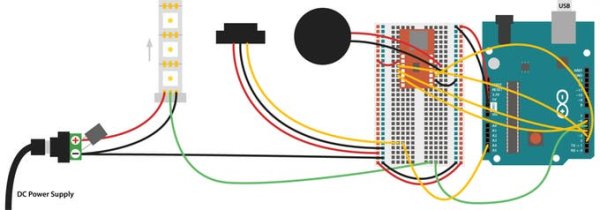
How to wire up your own DishShamer.
1. Wire up your electronics as shown above.
2. Download camera.py, DishBlamer.ino, index.html, update.js, and style.css from the GitHub repository below.
3. Upload the Arduino code to your Arduino.
4. Check the port that your Arduino is using and change line 11 of camera.py to indicate that port.
5. ‘cd’ into your project directory.
6. Run ‘python -m SimpleHTTPServer 8000’.
7. Point your browser to http://localhost:8000.
8. For each user of your DishShamer, add an entry in the emails dictionary in camera.py. The key should be the user’s name, and the value should be the user’s email address.
9. For each user of your DishShamer, take a photo of the user, name it <name>.jpg, where <name> is the same string that was used for the user’s entry in the emails dictionary in Step 8. Put these images in the ‘images/training’ directory.
10. Select the Gmail account from which your DishBlamer emails should be sent. In camera.py, set GMAIL_USER to be the username and GMAIL_PASS to be the password.
11. Run ‘python camera.py‘.
12. You should be up and running!
Logging User Activity
On every change in the dish stock, DishShamer automatically photographs the user adding or removing a plate. This image is used to identify who completed the action, which allows us to maintain a log of user interactions with DishShamer.
The web application allows users to see the current leaderboards at any time. It updates in real time, so when a user adds or removes dishes, the web application displays the captured photograph along with its guess about who is in the photograph. Changes in the leaderboards are briefly highlighted.
Shelf Unit
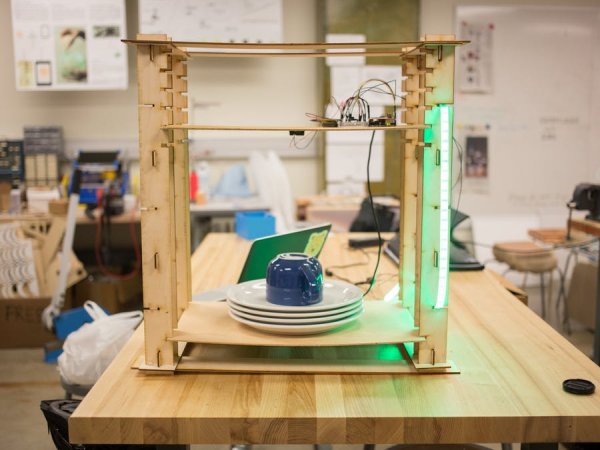
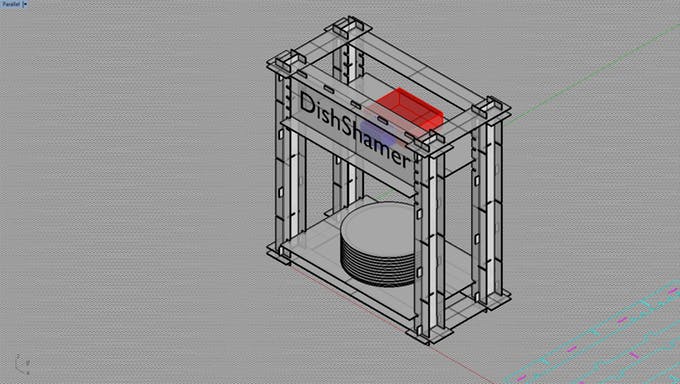
In order to test our sensor in a live setting we needed a kitchen cabinet. In order to conveniently prototype and later demonstrate and explore how DishShamer functions in different locations, we needed a portable shelf. We decided on on a light weight design able to be collapsed and “flat packed” for easy deconstruction, reconstruction, moving and storage. A series of simple joints and notches created structural redundancy, resulting in an open frame able to hold dishes and electronic equipment. Plywood, used for its strength in tension and compression and light weight properties, made up the entire shelf unit.
A further iteration would include a housing unit for the sensor and electronics. This housing would be self contained with a battery and could be installed on the underside of the shelf above the target dishes. This idea would meet renters’ needs in that the device could be installed without having to drill or screw into existing cabinetry. In order to achieve this, the housing could be slid onto removable plastic hooks, installed with sticky backed tape.


