At University, Alexander Zenger and I decided to realize a weatherstation with an Arduino Microcontroller. We wanted to measure temperature, pressure and humidity. It should be also possible to get every 5 min a value update on an external server.
Our basic idea was to develop a weatherstation which is easy to use with different technologies (Smartphone, Internet, Microcontroller, …). It should also be possible to add new sensors quite easy and adapt the station to your own needs. Therefore we developed a weatherstation and a smartphone application to use with the weatherstation.
Requirements
A short overview of my requirements:
- measure temperature
- measure pressure
- measure humidity
- 5 min interval for weather values
- send data to extern server
- generate graphic of values
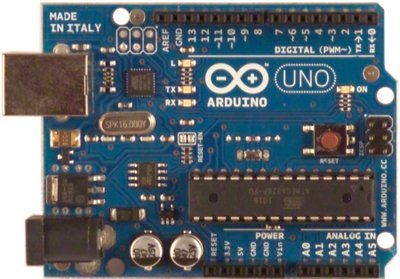
Arduino
I use a Arduino Uno. The Arduino Uno is a microcontroller board based on the ATmega328.
Summary
| Microcontroller | ATmega328 |
| Operating Voltage | 5V |
| Input Voltage (recommended) | 7-12V |
| Input Voltage (limits) | 6-20V |
| Digital I/O Pins | 14 (of which 6 provide PWM output) |
| Analog Input Pins | 6 |
| DC Current per I/O Pin | 40 mA |
| DC Current for 3.3V Pin | 50 mA |
| Flash Memory | 32 KB of which 0.5 KB used by bootloader |
| SRAM | 2 KB |
| EEPROM | 1 KB |
| Clock Speed | 16 MHz |
Used Sensors
I use five sensors to measure the required values. My experience with the soldering iron is not bad, but not the best, so I use for temperature, humidity and pressure sensors on simple breakout boards.
To pressure, temperature and humidity sensors and to minimize code in the main Arduino file (weatherstation.ino) I extracted the code into own cpp classes.
To measure windspeed, winddirection and precipitation I use the following sensor:
bmp085
This is a simple breakout board for the BMP085 high-precision, low-power barometric pressure sensor. The BMP085 offers a measuring range of 300 to 1100 hPa with an absolute accuracy of down to 0.03 hPa. It’s based on piezo-resistive technology for EMC robustness, high accuracy and linearity as well as long term stability. This sensor supports a voltage supply between 1.8 and 3.6VDC. It is designed to be connected directly to a micro-controller via the I2C bus
Get data on Arduino
I catch the values of the bmp085 through the I2C-Bus. It was a long and hard work, and I don’t really want to explain the whole source file.
You can download it at GitHub.
hih4030
This is a breakout board for Honeywell’s HIH-4030 humidity sensor. The HIH-4030 measures relative humidity (%RH) and delivers it as an analog output voltage. You can connect the output of the sensor directly to an ADC on a microcontroller; and, thanks to the sensor’s near linear voltage output, the data is very easy to process.
Voltage applied to the supply pins should be within 4-5.8VDC, and optimally at 5V. The sensor will typically only consume about 200μA.
Get data on Arduino
To get data is quite easy. The hih4030 sensor can be handled with analog input signals on the Arduino.
To receive just the sensor signal we can use something like:
pinMode(HIH4030_PIN, INPUT);
    hih4030_value = analogRead(HIH4030_PIN);
Here you get just the plain value of the sensor. This has to be calculated to get the real humidity. Everything we need for this calculation can be found in the data sheet.
First the analog input has to be calculated to the right voltage according to the Arduino Page.
voltage = hih4030_value / 1023.0 * SUPPLYVOLTAGE;
    sensorRH = voltage - ZERO_OFFSET / SLOPE;
    trueRH = sensorRH / (1.0546 - 0.00216 * temp);
wind speed
The wind speed sensor (anemometer) is provided with a reed switch (NO = normally open). With each revolution, the contact closes. A resolution (pulse) corresponds to a wind speed of 2.4 km/h.
Get data on Arduino
To get data is quite easy. The wind speed sensor can be handled with digital input signals on the Arduino.
To receive just the sensor signal we can use something like:
pinMode(WIND_SPEED_PIN, INPUT);
    digitalWrite(WIND_SPEED_PIN, HIGH);
    ....
    windSpeedValue = digitalRead(WIND_SPEED_PIN);
wind direction
The unit for displaying the wind direction sensor is the most complicated of the wind and rain unit. Here the schematic diagram:
There are eight magnetic switches, each connected to a different resistance. The magnet can connect two switches simultaneously, so that we can recognize a total of 16 states/positions.
I use an external resistor of 10K as a voltage divider and measure the output voltage with an AC converter (analog pin 2).
This table (from datasheet) shows the various states and the resultant values:
More detailed information are available at the datasheed.
Get data on Arduino
To get sensor values of the wind direction sensor, we can use analog input signals on the Arduino.
To receive a signal, do something like:
sensorValue = analogRead(WIND_DIRECTION_PIN);
After we received a value, we have to map the incoming scale (0-1024) to volts (0-5). This can be done with a function called map:
sensorVolt = map(sensorValue, 1, 1024, 1, 5000);
rain
The rain sensor triggers after filling (0.2794 mm) one pulse, the open contact is closed and the sensor emptied himself (by the way: 1 mm corresponds to one liter of rain per square meter).
We can not query this sensor at predictable intervals. A meaningful measurement of wind speed should last about 10 minutes. During this time, our program would therefore measure the wind speed and can answer no pulses of precipitation sensor.
So we need a way that allows us to capture and process each pulse of the precipitation sensor while we just measure the wind speed. To this end, we use the interrupts of our Arduino microprocessor. The standard Arduino provide us 2, the Arduino Mega 6 interrupts. Each of the interrupt is tied to a particular pin. The pins used are therefore NOT optional. The Interrupt 0 is digital pin 2, pin 3 to 1, the interrupt digitally.
These interrupts can be addressed by the attach Interrupt function.
For more detail: Develop A Arduino Weatherstation