Summary of Debounce an input using Arduino
This article explains how to debounce an Arduino input using the `millis()` function to prevent multiple readings from a single button press. It details a circuit where a momentary button connects to pin 2 with a 10K resistor, and an LED is attached to pin 13. The code toggles the output when the input transitions from LOW to HIGH, ensuring noise is ignored during short intervals.
Parts used in the Debounce Input Project:
- Arduino Board
- Momentary button or switch
- 10K ohm resistor
- Breadboard
- Hook-up wire
This example demonstrates how to debounce an input, which means checking twice in a short period of time to make sure it’s definitely pressed. Without debouncing, pressing the button once can appear to the code as multiple presses. Makes use of the millis() function to keep track of the time when the button is pressed.
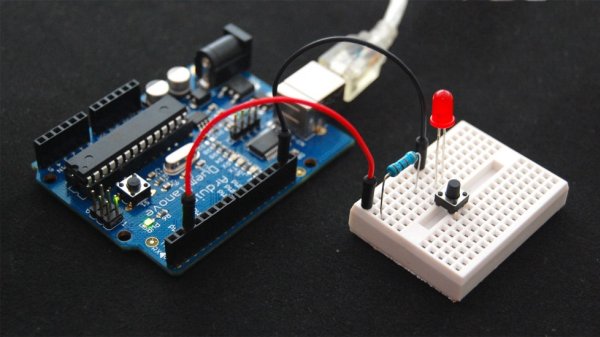
Circuit
image developed using Fritzing. For more circuit examples, see the Fritzing project page
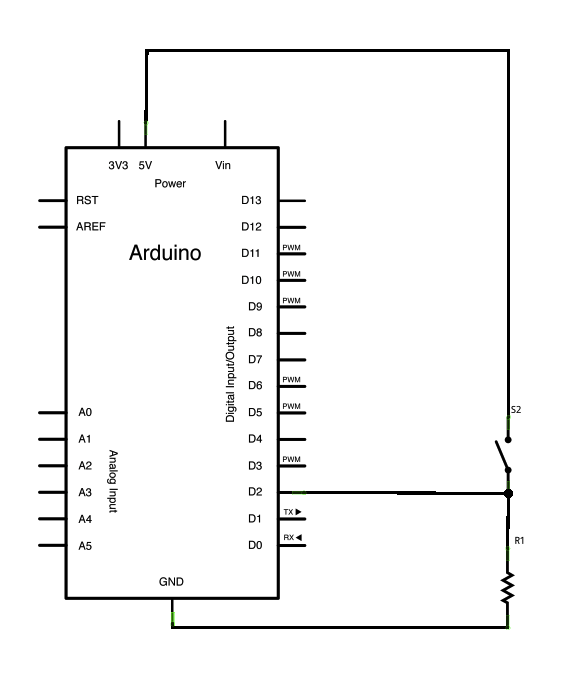
Schematic
Code
The code below is based on Limor Fried’s version of debounce, but the logic is inverted from her example. In her example, the switch returns LOW when closed, and HIGH when open. Here, the switch returns HIGH when pressed and LOW when not pressed.
Debounce
Each time the input pin goes from LOW to HIGH (e.g. because of a push-button
press), the output pin is toggled from LOW to HIGH or HIGH to LOW. There’s
a minimum delay between toggles to debounce the circuit (i.e. to ignore
noise).
The circuit:
* LED attached from pin 13 to ground
* pushbutton attached from pin 2 to +5V
* 10K resistor attached from pin 2 to ground
* Note: On most Arduino boards, there is already an LED on the board
connected to pin 13, so you don’t need any extra components for this example.
Hardware Required
- Arduino Board
- momentary button or switch
- 10K ohm resistor
- breadboard
- hook-up wire
For more detail: Debounce an input using Arduino
- What does debouncing an input mean?
It means checking twice in a short period of time to ensure the button is definitely pressed. - Why is debouncing necessary for a button?
Without it, pressing the button once can appear to the code as multiple presses. - Which function is used to keep track of time in this project?
The millis() function is used to track the time when the button is pressed. - How does the switch logic differ from Limor Fried's example?
In this project, the switch returns HIGH when pressed and LOW when not pressed, whereas her example is inverted. - What happens to the output pin when the input goes from LOW to HIGH?
The output pin is toggled from LOW to HIGH or HIGH to LOW. - Is an extra LED required for this example on most Arduino boards?
No, because there is already an LED connected to pin 13 on most boards. - What is the minimum delay purpose in this circuit?
The minimum delay is used to debounce the circuit and ignore noise. - How is the pushbutton connected in the schematic?
The pushbutton is attached from pin 2 to +5V.