Summary of Clock Four – Scrolling text clock using Arduino
This article introduces "Clock Four," a scrolling text clock that displays time as spoken words using an Arduino-compatible board, a DS1307/DS3232 real-time clock module, and a Freetronics DMD. The project allows for indoor use with standard power or high brightness with an external 5V supply. Users can set the time via code or simple buttons, making it a customizable quick-start hardware and software project.
Parts used in the Clock Four:
- Arduino Uno-compatible board
- DS1307 or DS3232 real-time clock module
- Freetronics DMD (Dot Matrix Display)
- External 5V power supply (optional for full brightness)
- Buttons (optional for user interface)
- Sugru (for mounting)
Introduction
Time for another instalment in my highly-irregular series of irregular clock projects. In this we have “Clock Four” – a scrolling text clock. After examining some Freetronics Dot Matrix Displays in the stock, it occurred to me that it would be neat to display the time as it was spoken (or close to it) – and thus this the clock was born. It is a quick project – we give you enough to get going with the hardware and sketch, and then you can take it further to suit your needs.
Hardware
You’ll need three major items – An Arduino Uno-compatible board, a real-time clock circuit or module using either a DS1307 or DS3232 IC, and a Freetronics DMD. You might want an external power supply, but we’ll get to that later on.
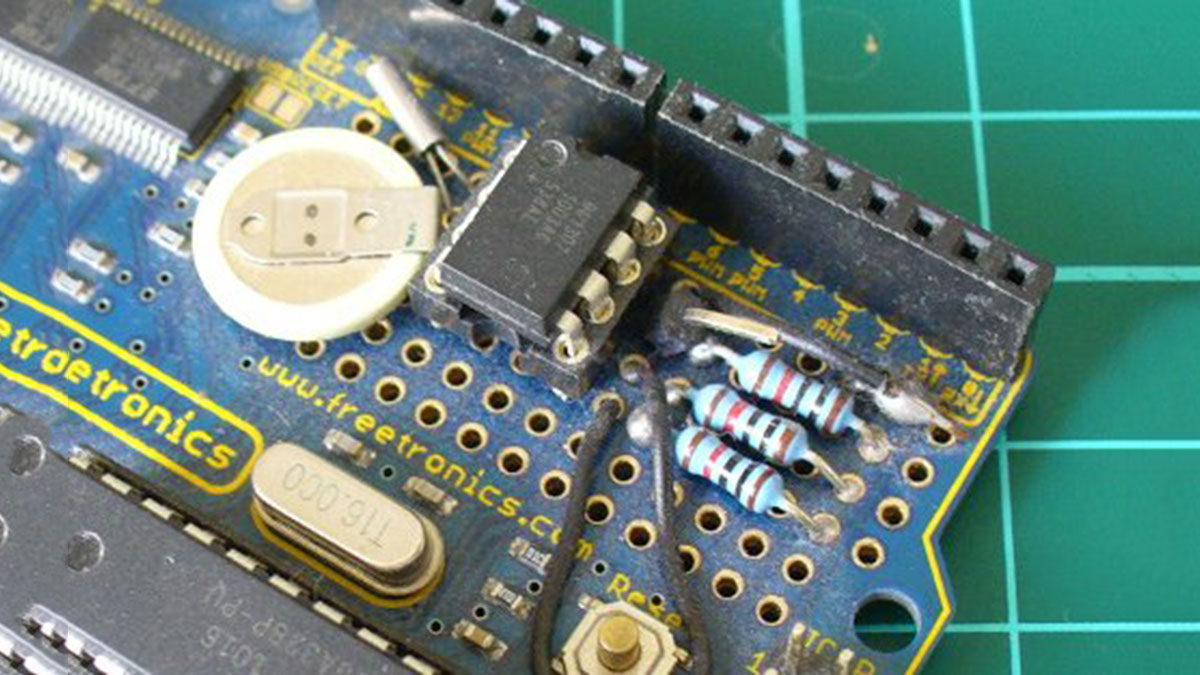
The first stage is to fit your real-time clock. If you are unfamiliar with the operation of real-time clock circuits, check out the last section of this tutorial. You can build a RTC circuit onto a protoshield or if you have a Freetronics Eleven, it can all fit in the prototyping space as such:
If you have an RTC module, it will also fit in the same space, then you simply run some wires to the 5V, GND, A4 (for SDA) and A5 (for SCL):
By now I hope you’re thinking “how do you set the time?”. There’s two answers to that question. If you’re using the DS3232 just set it in the sketch (see below) as the accuracy is very good, you only need to upload the sketch with the new time twice a year to cover daylight savings (unless you live in Queensland). Otherwise add a simple user-interface – a couple of buttons could do it, just as we did with Clock Two. Finally you just need to put the hardware on the back of the DMD. There’s plenty of scope to meet your own needs, a simple solution might be to align the control board so you can access the USB socket with ease – and then stick it down with some Sugru:
With regards to powering the clock – you can run ONE DMD from the Arduino, and it runs at a good brightness for indoor use. If you want the DMD to run at full, retina-burning brightness you need to use a separate 5 V 4 A power supply. If you’re using two DMDs – that goes to 8 A, and so on. Simply connect the external power to one DMD’s terminals (connect the second or more DMDs to these terminals):
The Arduino Sketch
You can download the sketch from here. It was written only for Arduino v1.0.1. The sketch has the usual functions to set and retrieve the time from DS1307/3232 real-time clock ICs,
For more detail: Clock Four – Scrolling text clock using Arduino
- What is the main function of Clock Four?
It displays the time as spoken words on a scrolling text display. - Can I run one DMD from the Arduino directly?
Yes, you can run one DMD from the Arduino at good brightness for indoor use. - How do I set the time on the clock?
You can set it in the sketch if using a DS3232, or add a simple button interface. - What power supply is needed for full brightness?
A separate 5V 4A power supply is required for full retina-burning brightness. - Does the accuracy of the DS3232 require frequent updates?
No, you only need to upload the sketch twice a year to cover daylight savings unless you live in Queensland. - How many DMDs can be connected to an external power supply?
Multiple DMDs can be connected by linking them to the terminals of the first DMD powered externally. - Is the provided sketch compatible with newer Arduino versions?
The sketch was written only for Arduino v1.0.1. - What are the two major components besides the microcontroller?
A real-time clock circuit/module and a Freetronics DMD.