
Summary of The Clamshell Stompbox
This DIY project creates a sensitive variable resistor stompbox for live audio performance, designed for classroom use. It utilizes a clamshell CD case and conductive materials to achieve resistance ranging from 0 to 18k ohms based on pressure. When paired with an Arduino, the device functions as a reliable foot-powered on/off switch or toggle, offering a flat and quiet alternative to metal switches.
Parts used in the Clamshell Variable Resistor Stompbox:
- Clamshell CD case
- Adhesive-backed copper foil
- Hot glue
- Solder
- Wire (22 AWG)
- Velostat
- Craft foam
- Plywood board
- Arduino
- 10k resistor
This is a DIY variable resistor I created as an interface for live performance– like a stomp box. I designed it as a project my audio students could build with materials we already have in the classroom.
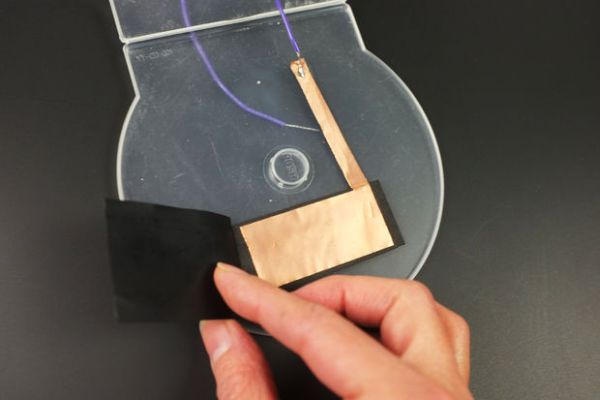
The result is a variable resistor that can be triggered with just a little pressure from hands or feet. Resistance ranges from 0 to about 18k ohms, and it’s very sensitive to slight changes in pressure. (With no pressure, resistance is infinite.)
With an Arduino, the clamshell’s big jumps in resistance can work as an on/off switch– perfect for foot-powered control! Depending on the code, you can use it as a toggle switch or a momentary switch. And as a stompbox, it’s flat and quiet(unlike metal stompswitches).
clamshell CD case
adhesive-backed copper foil
hot glue
solder
wire (22 AWG)
velostat
craft foam
plywood board (cardboard could also work)
Arduino
10k resistor (approximately)
glue gun
box cutter
hole punch (or use the box cutter)
drill (optional)
soldering work station (soldering iron, helping hands, goggles, etc.)
pen
ruler
multimeter
test leads
Step 1: The Clamshell Variable Resistor
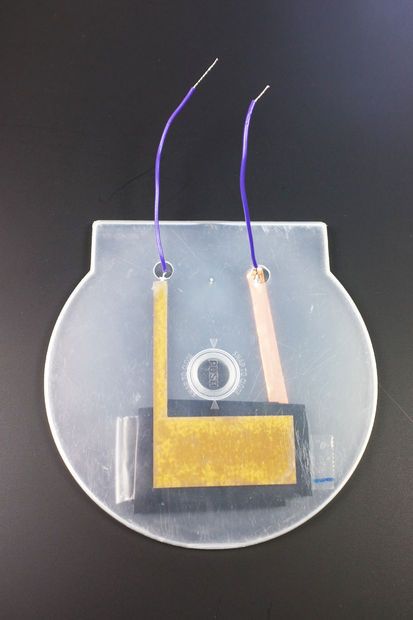
Two holes punched on the same side of the case provide an exit for two wire leads, and prevent the case from crushing the wires.
The wire leads are soldered to two identical flag-shaped pieces of copper foil stuck to the insides of the case (on opposite sides). When the case is closed, the “tails” of foil extend up opposite sides, not touching (very important).
(I didn’t take pictures while modifying the clamshell case so I’m hoping you can follow from the photos of the finished piece. I’ve included a suggested order of steps, later on.)
For more detail: The Clamshell Stompbox
- What is the primary function of this project?
It serves as a variable resistor interface for live performance that acts like a stomp box. - How does the resistance behave when no pressure is applied?
The resistance becomes infinite when there is no pressure. - Can this device be controlled by feet?
Yes, it is designed for foot-powered control using an Arduino. - What resistance range does the device cover?
Resistance ranges from 0 to about 18k ohms depending on pressure. - What are two possible switch modes for the Arduino code?
The code can configure it as either a toggle switch or a momentary switch. - Why is this preferred over metal stompswitches?
It is flat and quiet unlike metal stompswitches. - What material is used inside the case to create conductivity?
Adhesive-backed copper foil is stuck to the insides of the case. - What tool is suggested for punching holes in the case?
A hole punch or a box cutter can be used to make holes.
