This Instructable is for the build instructions for our new AVR ISP Shield Kit for Arduino. Its development owes a great deal to Instructables and our own community (particularly Nick!) and I hope to explain some of that along the way.
Some astute Instructablites have asked. What does this do? Well essentially this shield can turn your Arduino into a quite capable chip programmer. What’s more is that it can allow your Arduino to make more Arduino compatible devices. So with this shield, a bit of code and some some spare chips you can replicate what your Arduino does for a fraction of the cost. Not only using the same chip as your Arduino uses but also some smaller cheaper ones too. Like the ATTiny85.
Let me start by saying to program an AVR chip with an Arduino you don’t need a shield or even a crystal if you’re programming Arduino bootloaders. But if you plan on doing it more than once a shield is going to save you some headaches as setting up a breadboard each time and then worrying about debugging is a pain…
The project is open sourced and the PCB files can be found on our Github.
The kit itself on our website at www.phenoptix.com
Step 1: The BOM and Tools
First things first. You don’t need to buy our kit to do this and if you really like the kit you can even build them for yourself / hackspace / makerspace and sell them! For that you’re going to need a bill of materials
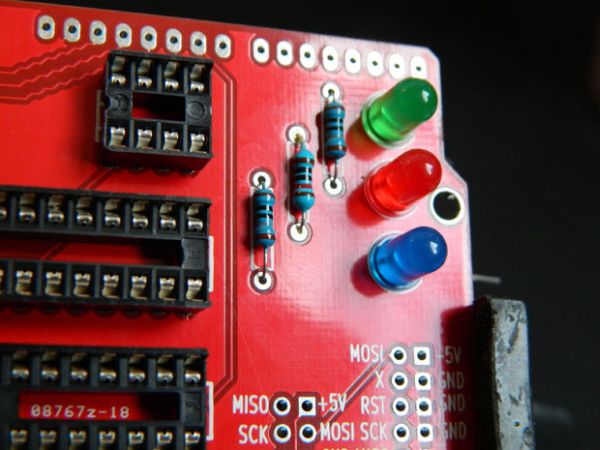
The BOM
- PCB – Check out our github
- Pin Headers
- Sockets for 8 pin, 20 pin and 28 pin
- 3 x LEDs
- 3 x Appropriate Resistors
Tools
Right so you’ve got the gear. Now plug in that soldering iron!
Step 2: Stick on the sockets!
Put the sockets into the board from the top side, paying attention to the notches on the sockets and the markings on the PCB. Now I normally load up my soldering iron tip with a great glob of solder and hold the opposite end of the socket and dot one corner in. But it’s more sensible just to tape the three sockets in place then flip the board and solder the whole lot at once.
This really is the most boring bit of soldering, think of it as practice. Remember heat the pad and pin and add the solder to the union of the two. You’ll want it to look like a lush little cone. Pro tip is to use thin (0.5mm) leaded solder. I started this using some thick lead free solder and you can probably spot the joints where I used it, they’re dull and over filled!
For more detail: Building an ISP Shield for Arduino