
Summary of Build A Firefighting Robot Using Arduino
This article details the construction of a budget-friendly ($300) firefighting robot featuring a water cannon and Arduino control. Built by the author and their mentor, the project utilizes repurposed 18V drill motors, ABS piping for the water tank, and a custom-designed chassis. The guide covers sourcing materials, designing custom parts via CAD software and Shapeways, disassembling drills for motor/battery integration, assembling a wooden frame, and connecting wheels to the motors.
Parts used in the Firefighting Robot:
- 2 x 18 volt drills (for motors, batteries, and chargers)
- Components to create custom cables
- ABS piping (with caps)
- 1 x Schrader Valve
- 1 x Solenoid Valve
- ¼ Thick Wood (or similar material for the frame)
- 1 x Infrared Thermometer
- 1 x Arduino Board
- 2 x Skate wheels
- 1 x Caster
- 1 x bike pump
- 3 x 540 MOSFET's
- 1 x Servo motor
- Assorted Wires (Stranded Core)
- Electrical Tape
- 1 x Potentiometer
- Wood Screws
- Anderson Power Connectors
- Soldering Iron and Solder
- Multi meter
- Wire strippers and cutters
- Wood Glue
- Custom piece designed in Google SketchUp
- Tap and tapping wrench
- Small and Large breadboards
- Wire Knuts
- Jumper Cables
- Angle Grinder
- Power Tools (Drill, Jigsaw, Screwdriver)
Step 1: Make Parts List/Gather Materials
2 x 18 volt drills (for motors, batteries, and chargers)
Components to create custom cables
ABS piping (With caps for either side – the diameter you choose depends on how much water you want your tank to hold)
1 x Schrader Valve
1 x Solenoid Valve
¼ Thick Wood (or any other material you want to use to make the frame)
1 x Infrared Thermometer
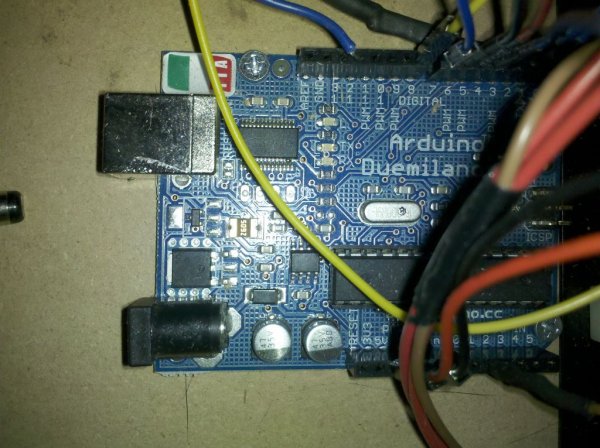
1 x Arduino Board
2 x Skate wheels
1 x Caster
1 x bike pump (to pressurize ABS piping)
3 x 540 MOSFET’s
1 x Servo motor
Assorted Wires (Preferably Stranded Core) – some red, some black
Electrical Tape
1 x Potentiometer
Wood Screws (10’s, 12’s, 14’s)
Power Tools (Drill, Jigsaw, Screwdriver, etc.)
Anderson Power Connectors
Soldering Iron
Solder
Multi meter
Wire strippers
Wood Glue
Custom piece designed in google sketch up and created using shapeways.com
Tap and tapping wrench
Small breadboard
Large breadboard
2 x Wire Knuts
Lots of Anderson Power Connectors (4 Bags)
Jumper Cables (to connect the Arduino to the breadboard)
Taps and Tap Wrenches
Wire Cutters/Strippers
Angle Grinder
Step 2: Creating the Custom Part
In order to create the custom part you will need to screw the skate wheels directly onto the motors, you will need to use Google Sketch-up or whatever CAD program you feel comfortable working with (solid works, adobe illustrator, etc.). These instructions should walk you through our method of doing it:
1. Put the camera in Parallel Projection Mode and Standard View -> Front.
2. Imagine that your part will rotate on the Blue (vertical) axis – draw a cross section of the half that will be to the right of the blue axis… start by drawing a rectangle that begins at the origin, that extends upwards equal to the length of your part and to the right equal to the maximum radius of your part. Then cut away rectangles for the center holes, and parts that have a smaller outer diameter.
3. Change to Standard Views -> Top (your cross section will now look like a thin line on the red axis.
4. Draw a Circle centered on the origin, with a radius that just touches the left edge of your cross-section, but then delete the face of the circle, so only the circle path is left.
5. Change to Standard Views -> ISO
6. Select the Circle path, then choose the Follow Me tool and click on your cross-section.
7. Rotate the part around and delete the little circle path..
Once the part is finished and has the correct dimensions, upload it to http://www.shapeways.com/ and order two of them. When they arrive, use the taps and tap wrench to tap the holes of the part. You should then be prepared to put them through the middle of the skate wheels and screw them onto the motors.
Step 3: Disassemble the Drills into Three Parts (Motors, Drills, and Charger)
Step 4: Create the Frame
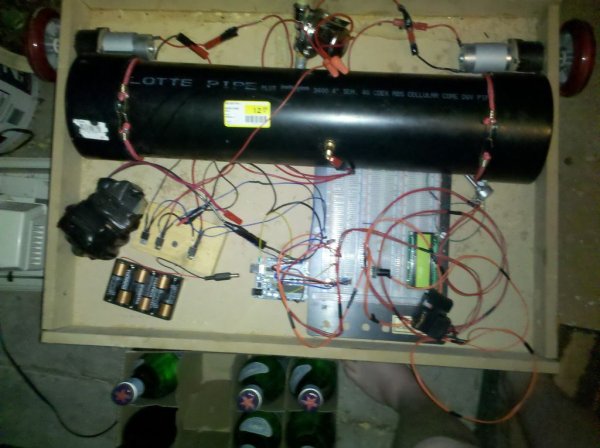
Step 5: Connect the Wheels to the Frame
To do this, drill a hole big enough to fit the drill (it must be a tight fit), and jam the drill into the slot. The next step is to pop the bearings out of two skate wheels. To do this, apply sufficient force to the small hole in the middle (you could do this by hitting something jammed in there with a hammer). Then, shove the custom part into the wheel. Then, drill a small hole in order to be able to screw in a caster to the back end of the robot. The image below is the custom part screwed onto one of the drill motors.
For more detail: Build A Firefighting Robot Using Arduino
-
How much did the project cost?
The project was built in a budget of around $300, excluding necessary equipment. -
What motors were used to power the robot?
Drill motors powered by 18 volt drill batteries were used. -
How do you design the custom part for the wheels?
You can use Google Sketch-up or other CAD programs like Solid Works to draw a cross-section, use the Follow Me tool to rotate it, and then upload the file to Shapeways.com to order the parts. -
How do you connect the battery wires to the Anderson connectors?
Strip ¼ inch of insulation from the wire, crimp a small metal piece onto the stripped end, and clip the red or black Anderson connector onto that metal piece. -
What tools are required to disassemble the drills?
You need a drill with a small drill bit or a screwdriver to unscrew the plastic casing. -
How is the wooden frame constructed?
Cut strips of wood two inches tall and a foot and a half wide for the sides, cut a larger slab for the bottom, and glue all pieces together using wood glue. -
How do you attach the skate wheels to the motors?
Push the bearings out of the skate wheels, shove the custom part into the wheel, and then screw the custom part directly onto the motors. -
Which microcomputer is used to control the robot?
An Arduino microcomputer is used to control the entire system. -
How do you pressurize the water tank?
A bike pump is used to pressurize the ABS piping. -
What components are needed to create custom cables?
You need stranded core wires (red and black), electrical tape, soldering iron, solder, and Anderson Power Connectors.
