Summary of Buddy the on-screen seal Robot
This article documents a midterm project for a 544 class, creating "Buddy," an on-screen autonomous seal prototype. The author used Processing and Arduino concepts to build a creature with personality, focusing on light sensor input to trigger animations like waving or detecting presence. Although a physical robot body is planned for later, this phase uses a temporary digital face to demonstrate code logic and sensor integration without a full chassis.
Parts used in the Buddy Robot Prototype:
- Photoresistor
- 10k resistor
- Arduino (implied via circuit context)
- Processing software
- Adobe Illustrator
- Adobe CS4 Flash
- GifAnimation library
- Animated GIF files (.gif)
- PNG image files
I’ve made a video documentation of my midterm project for my 544 class. To keep it shorter, I didn’t detail in the video that this is only a completed phase of a larger project: an autonomous robot seal. I was originally going to incorporate a whole body that hid his components, but this current prototype is not at a stage that calls for a full body. So, I made a temporary head/face for Buddy that is meant to hold the place of a full body that will be built at a later time this semester. This temporary face keeps the circuitry from showing and helps give a sense that real world actions affect Buddy.

The assignment was to make a “creature” that exhibits “personality.” Since I have no experience with robots, Arduino, or Processing previous to this class, I realized, with some disappointment, that the midterm was too short a span to create a wholly functioning autonomous robot. By creating an on-screen simple representation of some of the seal’s behavior and focusing on just one sensor that will eventually be part of his “senses” as a robot, I’ve learned a lot about how to write code that can receive data from the sensor and carry out tasks accordingly. Though “Buddy” the on-screen robot currently just displays different animations depending on the light input, the light input and the code to manipulate responses are going to be essentially the same.
This may seem simple and basic, but giving Buddy the ability to distinguish a presence (hold your hand over his head) and a wave (wave your hand over his head) is a very difficult task. I still have not worked out perfect finesse in my code. Depending on the location and exactly how fast you move your hand, he may wave at you a few times in a row or he may not realize you waved and just think you’re there. Buddy’s ability to be accurate has gotten better and now in most decently lit rooms with a practiced wave, Buddy will give the response expected of him according to the input you’re trying to give him.
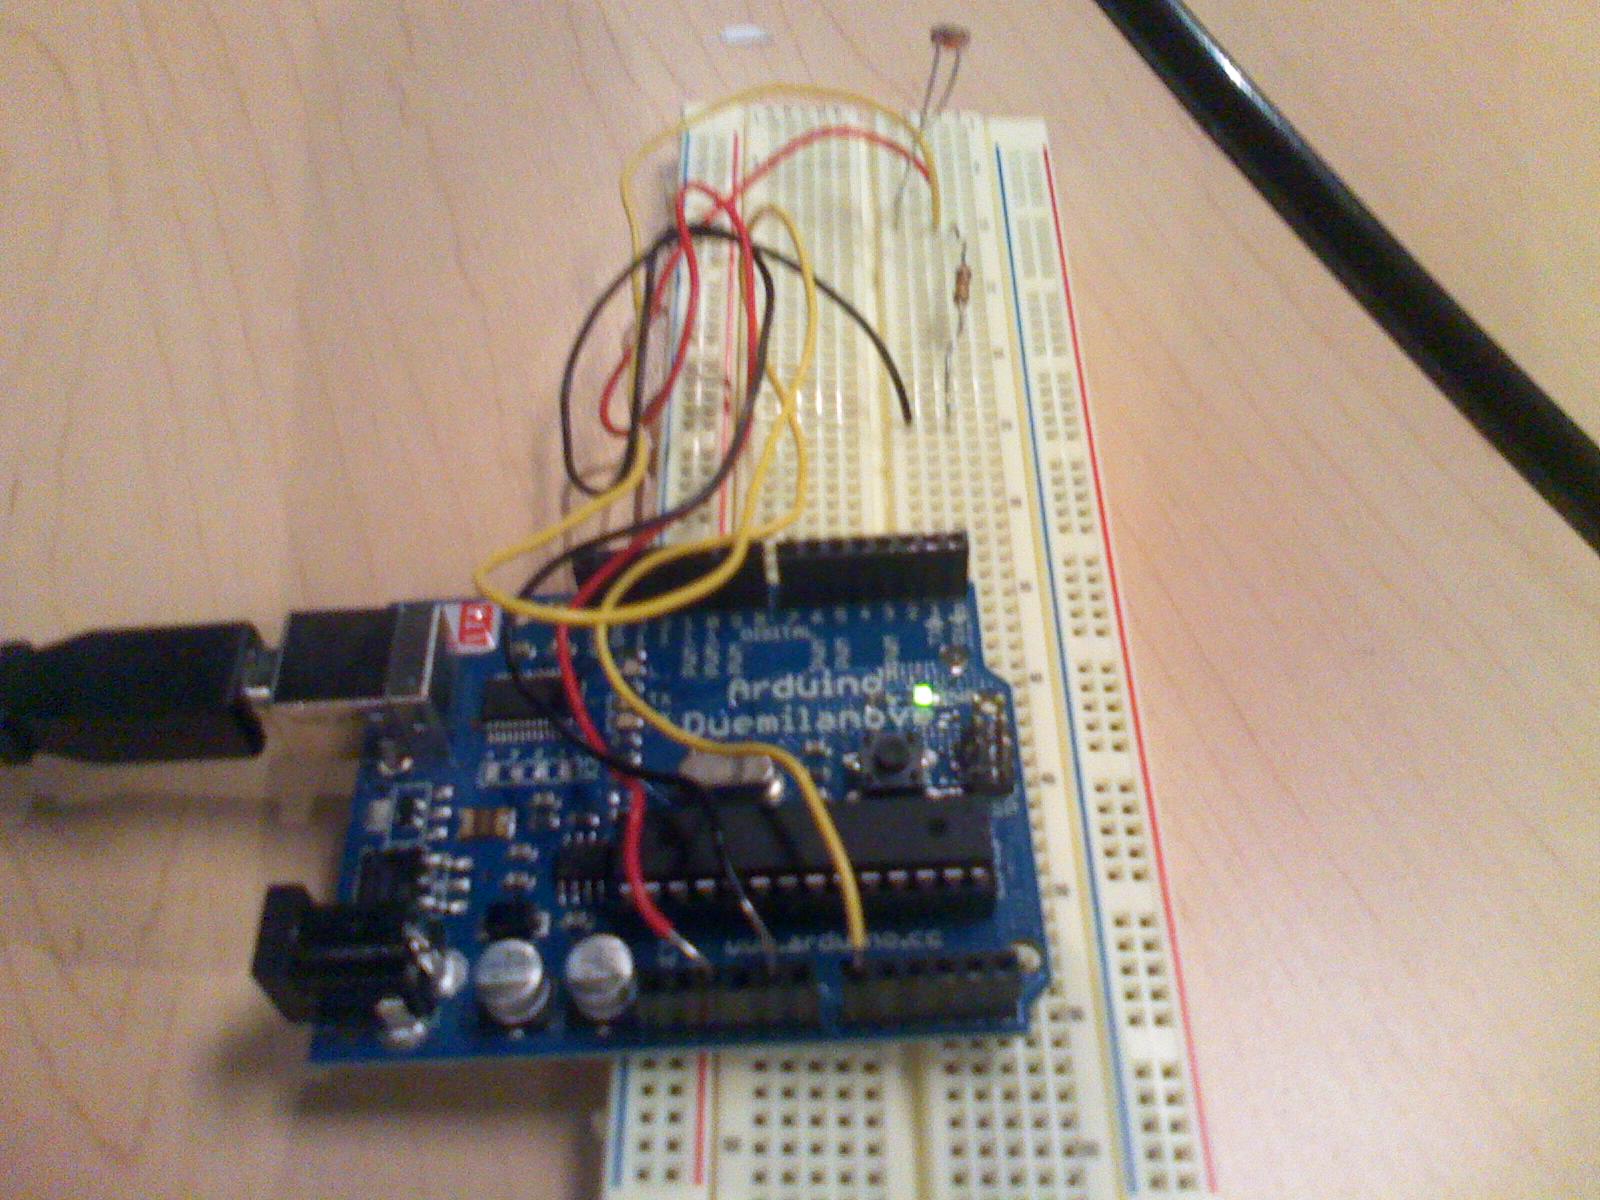
Hardware set up is basic (although after encountering so many issues, it wasn’t so simple!). An ordinary sensor circuit with a photoresistor and a 10k resistor to ground.
Thanks to Teddy for sending me a link on how to use gif animations in Processing. This took me a bit of time to code correctly for, but eventually by using this link, I properly installed the library that allows for gif animations to load and play in Processing and understood what was happening. For example, in my code you see “import gifAnimation.*;” which uses the information that I installed in the library for Processing in order to play the animation. Next, I had to make the animation file a variable: “Gif sealdefault;” is the variable type and name I chose for the default animation. Then, in the setup function, these two lines:
“sealdefault = new Gif(this, “sealdefault.gif”);
sealdefault.play();”
call the file from the data folder with my code (where the file “sealdefault.gif” can be located) and play the file. I call all of them and play all of them at once in the setup so that they load, but since they are all playing simultaneously for a brief time, it may look messy for a second but if you blink you will probably miss it altogether.
Finally, in my draw function, since this is the default, I start out with this line: “image(sealdefault, 0, 0);” and this places the animation at the x and y positions of (0, 0) on screen. I drew these animations so that if I placed them at (0, 0) this way, my seal would never jump around the screen at random. Each animation has the seal (or at least his body, his head and flippers do move depending on the action) at the same distance from (0, 0).
I drew each image in Adobe Illustrator and imported .png files into Adobe CS4 Flash to animate them. I gave each animation a frame rate of 30 since my frame rate in Processing is 30. After animating in Flash, I then exported these files as Animated Gifs and put them into the data folder with my Processing code.
With each different state that Buddy changes to, a new line in the draw function can be written so that the appropriate animation plays. Since everything’s already been assigned a variable and loaded, the only thing necessary to write in the code is the new “image( //different_animation_variable_here// , 0, 0);” line appropriate to the animation desired.
Read more: Buddy the on-screen seal Robot
- What is the primary goal of the Buddy project?
The goal is to create a creature that exhibits personality using an on-screen representation that responds to sensor input. - How does the system detect user interaction?
The system uses a photoresistor to measure light input, distinguishing between a hand presence and a wave motion. - Can I use animated GIFs in Processing?
Yes, by installing the GifAnimation library which allows loading and playing .gif files within the code. - What tools were used to create the animations?
Images were drawn in Adobe Illustrator and imported into Adobe CS4 Flash to animate them before exporting as Animated Gifs. - How are the animations positioned on the screen?
Animations are placed at coordinates (0, 0) in the draw function to prevent the seal from jumping around randomly. - What frame rate was set for the animations?
A frame rate of 30 was used for both the Flash animation and the Processing environment. - Does the current prototype have a physical body?
No, the current prototype is an on-screen representation; a full physical body will be built at a later time. - How many sensors are currently active in this phase?
The project focuses on just one sensor, the photoresistor, which will eventually become part of the robot's senses.