Summary of Automatic Hand Sanitzer for Your Car
This article describes a DIY automatic hand sanitizer dispenser designed for car cup holders to reduce viral spread. Powered by USB, it uses an ultrasonic sensor to detect hands and triggers a servo motor to dispense sanitizer via a standard spray bottle. The project includes 3D-printed parts, assembly instructions, and Arduino code for operation.
Parts used in the Automatic Hand Sanitizer:
- Arduino UNO
- Motion Servo MG996R
- Ultrasonic Sensor HC-SR04
- Buzzer
- 10-Ohm resistor
- Arduino project wires
- 9 pieces of 4-40 screws and nuts
- 3 pieces of 6-32 screws and nuts
- USB A to B cord
- Standard 3 ounce spray bottle
- Isopropyl alcohol
- PLA filament (for 3D printing)
- Sandpaper or Dremel tool
- Screwdriver
The United States of America currently holds 20% of the infected individuals with the COVID-19 virus. Considering the ongoing pandemic, an automatic hand sanitizer would result in a decrease of viral spread when placed in the center dash, whenever travel is necessary using a car.
This is a handy unit you can build to place in the cup holder in your center console. It is powered by a USB cord. It utilizes a standard 3 ounce spray bottle from Target and Isoprpyl alcohol. It’s easy to use and refill!
When you turn the car on, the unit will alert you with a series of beeps to remind you to use the hand sanitizer. Then simple place your hand by the sprayer and it will pump 3 short pumps delivering the right amount disinfect your hands. This way it you don’t have to touch anything before you sanitize your hands.
Supplies
1 Arduino UNO
1 MG996R servo
1 Ultrasonic sensor HC-SR04
1 buzzer
1 10 -OHM resistor
Arduino project wires
9 4-40 screws and nuts
3 6-32 screws and nuts
1 USB A to B cord. The standard USB cord that comes with the Arduino might be too short. Determine the length of cord you will need to go from the unit to a USB plug.
Step 1: 3D Print Your Parts
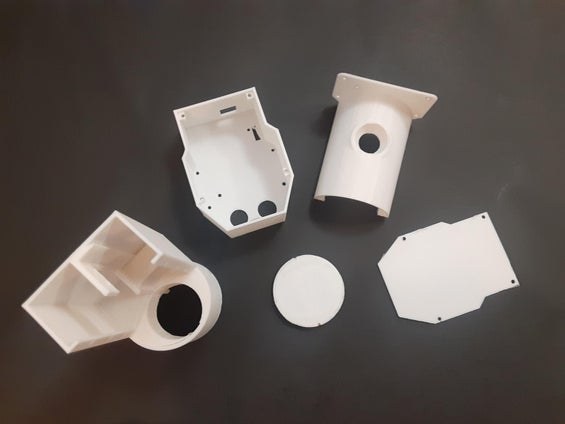
SLT files below.
Also, Solidworks 2019 file included below. You can alter if needed.
We used PLA to print the parts.
Determine the best orientation for quickest print in your software.
After printing the parts, use sandpaper or a Dremmel to clean up the edges.
If you wish, this is a good time to paint the parts, whether you used a colored PLA and want to add some character, or if you are using a base color PLA, you can liven it up with some vibrant colors.
This is a good time to lay everything you need for the project.
Remember a screw driver, you’ll need it!
Step 2: Place the Horn and Actuator on the Servo
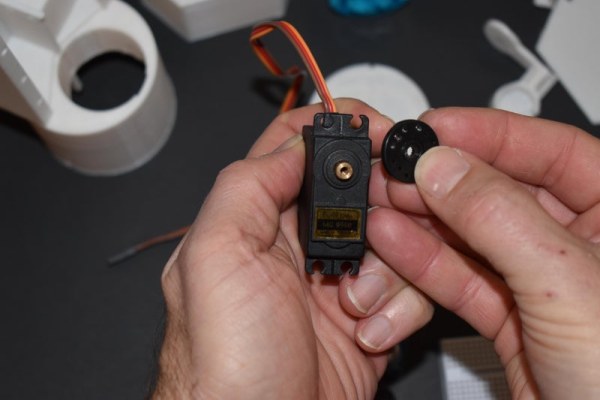
- Push the round horn onto the servo
- line the middle hole of the actuator with the middle of the horn.
- use a 4-40 screw to the actuator to the servo shaft.
- Use the the second screw to secure the actuator to the servo horn
- Remember to align the actuator as in the last picture. The servo is upside down. You will need this for spacing.
Step 3: Install and Test Servo
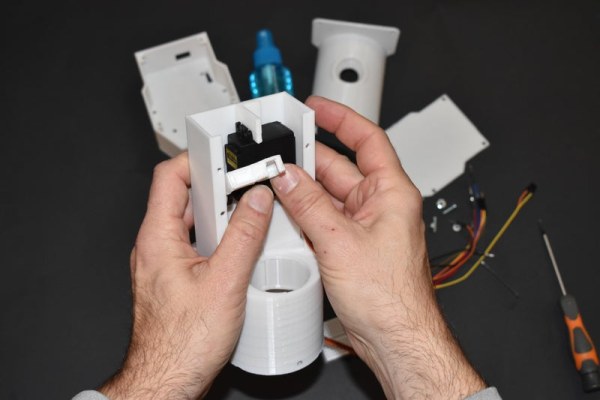
- Place the servo in the main body and use screws and bolts to secure.It’s tight quarters!
- The top two are not so bad, but on the bottom I just did the outside one. It’s plenty strong
- You will need to hook the servo up the Arduino to make sure the starting angle is right. you want to have the actuator at the angle about 60 degree off horizontal with the servo upside down, like the last picture.
- Hook the servo up to the Arduino, red wire to 5V, brown/black to ground and yellow to pin 6. Run this code to set servo to 195 degrees.
- If you have to, remove the set screw on the actuator and rotate until it looks like the picture, then put set screw in. This will insure that when it’s all put together the servo is starting from the right spot.
#include
Servo servo;
void setup(void) {
servo.attach(6);
servo.write(195);
}
void loo() {}
Step 4: Put Front Panel and Top Deck Together
- Align The front panel and the top deck and secure with 4 screws and buts.
- If you push the screw from the bottom up and have the nut be on the inside, the project will look cleaners.
Step 5: Add the Arduino
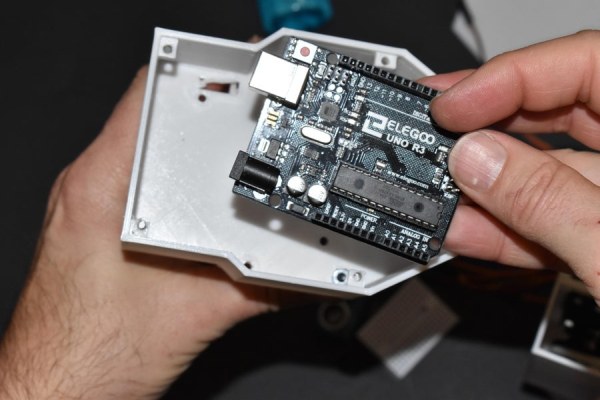
- Place the Arduino into the top deck with the USB port in the square hole in the back and aligned with two holes in the bottom for screws.
- Use a screw and nut. At the end of the Arduino close to the front =, use the screw going from bottom to top for a better look.
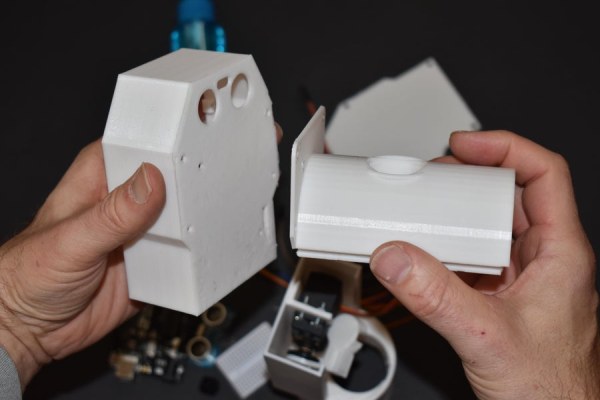
Step 6: Join Front Panel and Main Body

- First thread the servo wire through the square hole on the floor of the top deck
- Slide the front panel onto the main body along the groove.
- Easy peasy!
Step 7: Hooking Up the Guts
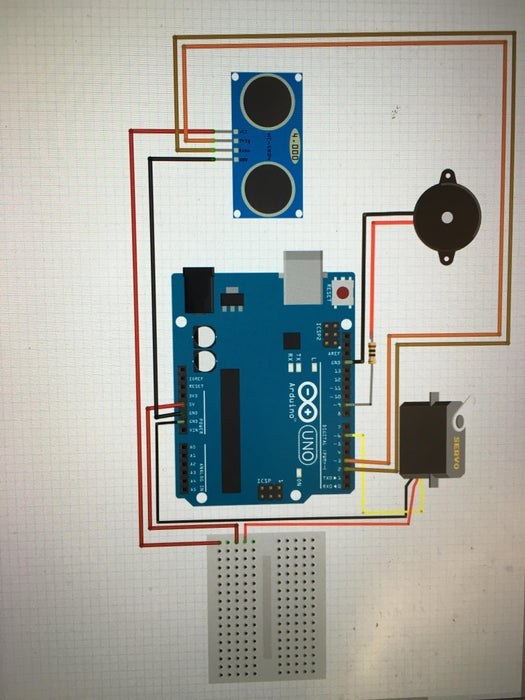
- First add the wires to the components as per wiring diagram
- and you will have a bird’s nest!
- It’s pretty tight in there, but there is enough room. Be careful to arrange the components and the wires such that they don’t interfere with each other because the end is near, only the top lid left!
Step 8: Screw Top and Bottom Lid On

- Place the top lid on being careful with the wires and used 4 screws to secure
- Push the spray bottle up into the body
- ** Make sure the spray nozzle is facing to the hole in the front.
- Place bottom lid on and use 4 screws to secure.(This is how you will refill the bottle later)
YOU ARE DONE!
Step 9: Add the Code
Attach the Arduino to your computer and upload this code.
#include
Servo servo;
#define echoPin 2 // attach pin D2 Arduino to pin Echo of HC-SR04
#define trigPin 3 //attach pin D3 Arduino to pin Trig of HC-SR04
// defines variables
long duration; // variable for the duration of sound wave travel HC-SR04
int distance; // variable for the distance measurement HC-SR04
int distance2;
int loopcount;
const int buzzer = 9; //buzzer to arduino pin 9
void setup(void) {
// serial port for trouble shooting
Serial.begin(9600);
////Servo
servo.attach(6);
////US Sensor
pinMode(trigPin, OUTPUT); // Sets the trigPin as an OUTPUT
pinMode(echoPin, INPUT); // Sets the echoPin as an INPUT
pinMode(buzzer, OUTPUT); // Set buzzer – pin 9 as an output
for(int i=0; i<10; i++){ // This loop increases the tone of the buzzer
tone(buzzer, 1500+ i*50); // Send sound signal…
delay(100); // …for tenth of a sec
noTone(buzzer); // Stop sound…
delay(100); // …for tenth of a sec
}
}
// main loop
void loop() {
sensor_function();
Serial.println(distance);// Trouble shooting
delay(200);
if (distance == 6) { // this looks for the distance to actuate the sprayer
if (distance == distance2) { // because the ultrasonic sensor data moves quickly and sometimes sends flase signal
// so I want two readings of six before I trip the servo
Serial.println(“spraying”);// troubleshooting
///// three pumps
servo.write(195);
delay(200);
servo.write(145);
delay(200);
servo.write(195);
delay(200);
servo.write(145);
delay(200);
servo.write(195);
delay(200);
servo.write(145);
delay(200);
servo.write(170);
}
}
distance2 = distance;// this stores the current distance and will be comared to next reading for two in a row
}
void sensor_function() {
// Clears the trigPin condition
digitalWrite(trigPin, LOW);
delayMicroseconds(2);
// Sets the trigPin HIGH (ACTIVE) for 10 microseconds
digitalWrite(trigPin, HIGH);
delayMicroseconds(10);
digitalWrite(trigPin, LOW);
// Reads the echoPin, returns the sound wave travel time in microseconds
duration = pulseIn(echoPin, HIGH);
// Calculating the distance
distance = duration * 0.034 / 2; // Speed of sound wave divided by 2 (go and back)
// Displays the distance on the Serial Monitor
}// end of code.
Source: Automatic Hand Sanitzer for Your Car
-
How does the unit alert the driver when the car starts?
The unit emits a series of beeps from the buzzer to remind the user to sanitize their hands. -
What triggers the sanitizer pump mechanism?
An ultrasonic sensor detects a hand at a distance of approximately 6 units, prompting the servo to activate. -
How many pumps of sanitizer are delivered per use?
The system delivers three short pumps to provide the correct amount of disinfectant. -
Can the device be refilled easily?
Yes, the bottom lid can be removed with four screws to access and refill the spray bottle later. -
What power source is required for this project?
The unit is powered by a USB cord connected to the Arduino. -
Why does the code check for two consecutive distance readings?
The code requires two identical readings of six to prevent false signals caused by rapid data movement from the sensor. -
What material was used to print the parts in this guide?
The author used PLA filament to 3D print the components. -
Which Arduino pin connects to the servo signal wire?
The yellow signal wire from the servo connects to pin 6 on the Arduino.