Summary of Arduino Text I/O for Real World Applications
This tutorial explains using the SafeString library (V3+) for non-blocking, robust text I/O on Arduino: SafeStringReader for input, SafeString for parsing, BufferedOutput for non-blocking output, SafeStringStream for testing, and BufferedInput for extra input buffering. It shows reading commands, parsing GPS NMEA, avoiding Serial.print blocking, increasing baud rate, and BufferedOutput modes to drop or block output safely. Examples and installation steps for Arduino UNO and optional Adafruit hardware are included.
Parts used in the SafeString Text I/O Tutorial:
- Arduino UNO (or any Arduino IDE supported board)
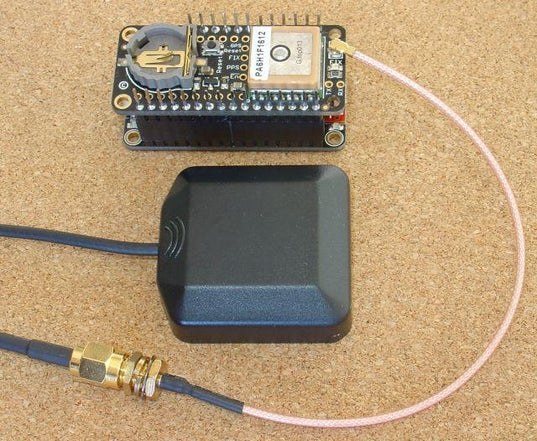
- Adafruit GPS Feather Wing (optional)
- Adafruit GPS antenna (optional)
- Adafruit 32u4 Feather (optional)
- SafeString library (V3+)
- BufferedOutput class (part of SafeString library)
- SafeStringReader class (part of SafeString library)
- SafeStringStream class (part of SafeString library)
- BufferedInput class (part of SafeString library)
- Arduino IDE V1.8.9+ (software)
Quick Start
This tutorial will take you through the steps you can use to successfully process Real World text I/O
You should avoid using any Serial methods in your loop() code and any code it calls. (see below)
Install the SafeString library (V3+) from the Arduino Library Manager or the zip file
- For text input use a SafeStringReader – a non-blocking robust high level reader for reading lines of data or general text with delimiters, with optional echo and optional non-blocking timeout
- For text processing use the SafeString methods – what Arduino Strings was meant to be, but with out the memory problems and odd errors and with detailed error messages.
- For text output write to a BufferedOutput – the non-blocking replacement for Serial print, so your debug msgs and results do not delay the rest of the loop and cause missed input.
- For testing use a SafeStringStream – stress tests your sketch’s text processing.
- If you need a larger input buffer use a BufferedInput – for when the sketch processing delays the reading of the input and chars are lost
Often all you need is to set the baud rate of your Serial connection as high as possible and use a SafeStringReader for input and BufferedOutput for output to avoid missing any incoming data and SafeString to process the text to avoid coding errors.
The examples below often use less then optimum settings in order to illustrate how to solve the problems that can arise in the Real World.
Tutorial Outline:-
- SafeStringReader :- replacement for Serial.read()
Reading User Commands
Reading and Parsing Instrument Data – GPS - BufferedOutput :- non-blocking replacement for Serial.print() to output results and debugging messages with out blocking the loop() from processing more input.
Using a higher Serial baud rate
Increasing the output buffer and skipping some output using BufferedOutput
BufferedOutput Options - SafeStringStream :- automate input for testing sketches.
- BufferedInput :- adding extra Input buffering so you don’t miss input data while processing the last input. Provides statistics to help choose the correct buffer size.
- A Real World GPS Example
Together these classes provide a complete non-blocking text I/O that is makes Real World Arduino applications practical.
Arduino Serial is not suitable for handling Text I/O in Real World applications
Instead this tutorial shows you how to use the SafeString library (V3+) to collect and process text input and output text and debugging messages without delaying the execution of the rest of your loop() code.
You should avoid using any Serial methods in your loop() code and any code it calls. This is because almost all Serial methods will block the rest of your loop() code from running so you will miss real world inputs and your outputs will be delayed. Print() statements are the primary means of debugging Arduino sketches, but adding Serial.print()s adds more delays and often causes more problems then they find.
The SafeString library can be installed from the Arduino Library manager, just search for SafeString. A full tutorial on SafeString is available here
The tutorial covers reading text input, parsing for commands, parsing text to numbers, e.g. GPS data, and outputting results and debugging messages. All without blocking the rest of the sketch so that your Arduino won’t miss the real world inputs and be able to reliably control real world devices, stepper motors, relays etc. The non-blocking SafeString input methods let your Arduino accept input for processing, and for control of your your Arduino, while continuing to run the rest of the sketch at full speed. The non-blocking output class, BufferedOutput, lets you output results and add debugging without interfering with the running of the code you are trying to debug. The tutorial also has an example of automated, repeated, testing of sketches that process text input.
This entire tutorial came be completed with just an Arduino UNO. Optionally at the end of the tutorial there is a second GPS example that runs on an Adafruit GPS Feather Wing and an Adafruit 32u4 Feather
Also see these tutorials for Arduino Beginners – Next Steps
How to write Timers and Delays in Arduino
Safe Arduino String Processing for Beginners
Simple Arduino Libraries for Beginners
Simple Multi-tasking in Arduino
Arduino Serial I/O for the Real World (this one)
Supplies
Hardware
Arduino UNO or any other board supported by the Arduino IDE. All the code developed here can be tested with just an Arduino UNO.
Optional – an Adafruit GPS Feather Wing and GPS antenna and Adafruit 32u4 Feather.
Software
Install the Arduino IDE V1.8.9+
Install the SafeString library (V3+) from the Arduino Library Manager. this includes millisDelay and loopTimer as well
Optional – install Adafruit 32u4 support, see ESP32 Arduino support, see the Adafruit Feather 32u4 Bluefruit LE installation tutorial
Step 1: Why Not Just Use Arduino Serial?
Arduino provides a Serial object that allows reading from, and writing to, the outside world. Why not just use that class? Well ALL of output methods, i.e. the print and write methods, will stop the rest of you sketch from running once the Serial Tx buffer fills up. The size of the Tx buffer varies between different Arduino boards. Uno/Meg2560 has a 63 byte Tx buffer. The NanoBLE has none. So if you want the rest of your sketch to keep running while you output results or debugging messages, you should not use any of the Serial print/write methods in your loop() code. This tutorial will show you how to use the BufferedOuput class to avoid blocking, add extra buffering.
Except for read() and peek(), all the Serial read methods, find(), findUntil(), readBytes..() , readString(), parse..(), etc, can block for up to 1 second waiting for more input. During that 1 second the rest of your loop is not running, so you should not use any of those methods. That leaves only read() and peek(). Those are low level methods that deal in single bytes. They, together with available(), can be used to build high level non-blocking input, but it requires very careful programming. SafeString methods, read(), readUntil() and readUntilToken() provide non-blocking, practical, high level methods that are easy to use, safe and robust and void you having to manipulate ‘unsafe’ byte arrays.
SafeStrings which are robust, debuggable and safe from buffer overflows. SafeStrings avoid the memory fragmentation problems of Strings and completely remove the possibility of char[] buffer overflow coding errors. Arstechnica has a detailed article on buffer overflows which says in part “writing more to a buffer (e.g. char[]) than the buffer has space for, sounds like something that should be simple to avoid. It’s an exaggeration (but only a slight one) to lay the blame entirely on the C programming language and its more or less compatible offshoots, namely C++” (i.e. Arduino sketches). The wikipedia entry says, “Programming lanuguages commonly associated with buffer overflows include C and C++ (i.e. Arduino), which provide no built-in protection against accessing or overwriting data in any part of memory and do not automatically check that data written to an array is within the boundaries of that array.”
Even experienced programmers make coding mistakes when working with char[] and pointers. The lastest IPhone security failing is a recent example (of many others) of a buffer overflow bug from ‘professional’ coders. Also see “Buffer overflow and buffer management errors are common issues in C++” The SafeString library is easy to use and provides in-built protection against buffer overflows.
This tutorial only deals with Text I/O, it does not deal with reading or writing non-text (i.e. binary) data. If you need to send and received binary data, like a compiled program file or .hex file, then you are back to using low level methods and very careful coding.
Step 2: Basic Serial Hardware Settings
Serial communications consists of sending a sequence of 0’s and 1’s. Sparkfun provides a good introduction to the Serial communication protocol. While there are many options for the low level format of the bytes sent, 8N1 is most common and is the default for Arduino Serial. The data can be sent at any one of a number of speeds (called baud rate). 9600 is common for Uno boards. A common faster speed is 115200, while GPS (NMEA) modules often uses 4800. It is important that number in your code’s Serial.begin(.. ) statement matches the speed of the attached device, e.g. Serial.begin(9600) for a 9600 baud device.
The hardware connections for Serial on Uno are pins D0 (Rx) and D1 (Tx). Many Arduino boards only have one hardware serial (the Arduino Mega2560 has 4). A software emulation is needed to add an extra serial to most boards. The suggested software serial library for AVR processors (Uno, Nano, Micro, Leonardo, Mega, Nano, Yún) is the AltSoftSerial library.
Step 3: SafeStringReader for Text Input
There are two common uses for serial text input.
- reading user commands to control the running of the programs (sketches) and
- reading streaming text data from external instruments and parsing it, e.g a GPS module, gas sensor, etc
Reading User Commands
Reading user commands will be dealt with first. Here is a simple robust sketch (SafeStringReader_Cmds.ino) that reads text input and returns commands delimited by space, comma, CarrageReturn or NewLine. This sketch is non-blocking. That is the loopCounter continues to count while waiting for use input.
The sketch picks out commands from unlimited length inputs without failing. Any group of characters, up to the specified length (maxCmdLength), separated by delimiters will be returned. The code then checks if that token equals one of the commands. As you can see below the SafeStringReader read() method handles all the non-blocking char reading, checking for overflow and finding delimiters and returning the result in the sfReader as a SafeString. This code is much simpler and more robust then the equivalent Serial.read() char by char code.
void loop() {
  if (sfReader.read()) {
    if (sfReader == "start") {
      handleStartCmd();
    } else if (sfReader == "stop") {
      handleStopCmd();
    } // else ignore unrecognized command
  } // else no delimited command yet

  // rest of code here is executed while the user typing in commands
  . . .
}
Note about SafeString::setOutput(Serial);
Adding this statement in setup() will enable SafeString error messages. You should normally add this when developing your sketch and then remove it once your are finished. If you get any errors later your sketch won’t reboot, the SafeStrings will just not contain the text that would not fit. In those cases just add the statement back into setup() and check for the error messages.
Note carefully, here we are using the ‘bad’ blocking Serial print statements. These will be replaced later in this tutorial with non-blocking BufferedOutput.
#include "SafeStringReader.h"

// create an sfReader instance of SafeStringReader class
// that will handle commands upto 5 chars long
// delimited by space, comma or CarrageReturn or NewLine
// the createSafeStringReader( ) macro creates both the SafeStringReader (sfReader) and the necessary SafeString that holds input chars until a delimiter is found
// args are (ReaderInstanceName, expectedMaxCmdLength, delimiters)
createSafeStringReader(sfReader, 5, " ,\r\n");

bool running = true;
unsigned long loopCounter = 0;

void setup() {
  Serial.begin(9600);

  SafeString::setOutput(Serial); // enable error messages and SafeString.debug() output to be sent to Serial

  if (running) { Serial.println(F(" Counter Started")); }

  sfReader.connect(Serial); // where SafeStringReader will read from
  sfReader.echoOn(); // echo back all input, by default echo is off
}

void handleStartCmd() {
  running = true;  Serial.println(); Serial.print(F("> start at Counter:")); Serial.println(loopCounter);
}
void handleStopCmd() {
  running = false; Serial.println(); Serial.print(F("> stop at Counter:")); Serial.println(loopCounter);
}

void loop() {
  if (sfReader.read()) {
    if (sfReader == "start") {
      handleStartCmd();
    } else if (sfReader == "stop") {
      handleStopCmd();
    } // else ignore unrecognized command
  } // else no delimited command yet

  // rest of code here is executed while the user typing in commands
  if (running) {
    loopCounter++;
    if ((loopCounter % 100000) == 0) { // print the current counter every now and again
      Serial.print(F("Counter:")); Serial.println(loopCounter);
    }
  }
}
Here some example output for the input (with the Arduino monitor set for Newline or Carriage return or Both NL & CR)
this_is_a_very_looooooooooooooooooooooong_input then stop
 Counter Started
Counter:100000
looooo
 sfReader -- Input exceeded buffer size. Skipping Input upto next delimiter.
oooooongInput then stop
> stop at Counter:171779
If you have called SafeString::setOutput( ) to turn on error msgs and SafeString.debug() output you will get a message if the input is longer then the maximum command size you specified (i.e. 5 in this case). In any case the input will just be ignored without any errors. If you comment out the SafeString::setOutput( ) statement is setup() all SafeString error messages will be suppressed, but the error checking is still done. If the input is too long sfReader.read() returns with sfReader empty.
Note that using SafeStringReader you don’t need to count input chars, check for overflow, check for the delimiter, and correctly terminate the result. SafeString does all of that for you, safely and robustly.
If you want to treat upper and lower case commands the same, just add
token.toLowerCase();
i.e.
if (sfReader.read()) {
    sfReader.toLowerCase()
    if ( sfReader == "start") {
Adding your own commands
You can add a non-blocking read timeout to SafeStringReader by calling setTimeout(..) i.e in setup( ) add
sfReader.setTimeout(2000); // 2000mS => 2sec timeout
Then if no more chars read for 2secs, sfReader will automatically terminate and return the current text.
The sketch SafeStringReader_CmdsTimed.ino has a 2sec timeout added. Set the Arduino monitor to “No line ending” and enter stop (no trailing space). After 2sec the command will be recognised and processed.
stop
 sfReader_InputBuffer -- Input timed out.
> stop at Counter:60215
Again if you comment out the SafeString::setOutput( ) statement is setup(), the Input timed out message will disappear, but the timeout will still happen.
Skipping Input
SafeStringReader will skip to the next delimiter if the input is longer then the maximum specified, but you can also call skipToDelimiter() to force it to discard all the input upto the next delimiter. For example if you call
sfReader.skipToDelimiter();
in setup() the initial chars read upto the first delimiter will be discarded. This will ignore inputs that are possibly part way through being received when the sketch starts up.
Adding your own commands
You can easily add more commands to this sketch. Just add another } else if (sfReader == .. ) { section and add another handle..( ) method to do what you want. If the new command is longer then 5 characters, then increase the number in createSafeStringReader( ) That number need not be precise, you can make it larger than necessary, for example 20 will cover most commands.
Checking the delimiter
In this example, the commands can be delimited by space or comma or CR or NL. You can check which one terminated the command by calling getDelimiter(), e.g. sfReader.getDelimiter() when sfReader.read() returns true.
Step 4: Reading and Parsing Instrument Data – GPS
The second common use for serial text input is to read text data from an external device and parse the data received. A simple GPS data parser will be used as an example, SafeString_GPS.ino. The SafeString_GPS.ino sketch is non-blocking and can handle GPS messages up to 80 char long. Longer lines will just be ignored, with an error message if SafeString::setOutput( ) has been called, but will not cause the sketch to fail. Only the $GPRMC message is picked out and parsed, you can add others as needed. Unlike other GPS libraries, the SafeString_GPS.ino sketch does not use any low level c-string functions or char[], which are very prone to programming errors.
As you can see the loop() code is very simple. Note carefully,
here we are using the ‘bad’ blocking Serial print statements. These will be replaced later in this tutorial with non-blocking BufferedOutput.
void loop() {<br> if (sfReader.read()) {<br> sfReader.trim(); // remove and leading/trailing white space<br> if (!checkSum(sfReader)) { // is the check sum OK<br> Serial.print("bad checksum : "); Serial.println(sfReader);<br> } else { // check sum OK so select msgs to process<br> if (sfReader.startsWith("$GPRMC,")) { // this is the one we want<br> if (parseGPRMC(sfReader)) {<br> printPosition(); // print new data<br> }<br> } else { // some other msg<br> }<br> }<br> } // else token is empty<br>}
The parsing of the GPS messages uses the SafeString stoken() method to pick out the fields one at a time. Using SafeStrings avoids the low level array and pointer code found in Adafruit’s, and other, GPS parsing libraries. See the SafeString Tutorial for more details on the SafeString processing methods.
bool parseGPRMC(SafeString &msg) {<br> cSF(sfField, 11); // temp SafeString to received fields, max field len is <11;<br> char delims[] = ",*"; // fields delimited by , or *<br> bool returnEmptyFields = true; // return empty field for ,,<br> size_t idx = 0; // idx keeps track of where we are upto.<br> idx = msg.stoken(sfField, idx, delims, returnEmptyFields);<br> if (sfField != "$GPRMC") { // first field should be $GPRMC else called with wrong msg<br> return false;<br> }<br><br> cSF(sfTimeField, 11); // temp SafeString to hold time for later passing, after checking 'A'<br> idx = msg.stoken(sfTimeField, idx, delims, returnEmptyFields); // time, keep for later<br><br> idx = msg.stoken(sfField, idx, delims, returnEmptyFields); // A / V<br> if (sfField != 'A') {<br> return false; // not active<br> }<br> // else A so update time<br> parseTime(sfTimeField);<br> . . . <br> return true;<br>}
The idx keeps track of where the last field ended and where to start looking for the next field
The number fields are converted using the SafeString toFloat, toLong, toInt and hexToLong methods which apply strict checking to the input and leave the result unchanged if there are any errors. e.g.
void parseDate(SafeString &dateField) {
  long lDate = 0;
  if (!dateField.toLong(lDate)) {
    return; // invalid
  }
  day = lDate / 10000;
  month = (lDate % 10000) / 100;
  year = (lDate % 100);
}
dateField.toLong(lDate) will return false if the SafeString dateField is not a valid long number. See the SafeStringToNum example sketch in the SafeString library, under SafeString_Tests, for more examples of these conversion methods.
Here is the output for these test inputs (set the Arduino Monitor to Newline or Both NL & CR)
$GPRMC,194509.000,A,4042.6142,N,07400.4168,W,2.03,221.11,160412,,,A*77
Set Newline on Monitor and Enter GPS msg $GPxxx,...<br> e.g. $GPRMC,194509.000,A,4042.6142,N,07400.4168,W,2.03,221.11,160412,,,A*77<br>$GPRMC,194509.000,A,4042.6142,N,07400.4168,W,2.03,221.11,160412,,,A*77 <br> > > > 2012/04/16 19:45:8.98 -74 0.42', 40 42.61'
Using SafeStrings to read and parse the input makes the code robust and more readable. Calling SafeString::setOutput(Serial); in setup() will print out a detailed error message if you try and access outside the bounds of the SafeString. If you comment out that setOutput() statement, then the code is still safe. The error checking still takes place and an ’empty’ result returned, but no error message is printed.
SafeString substring methods return empty results if the text won’t fit or the index is out of range. This together with the strict checking of the hexToLong() method means we can skip some of the checks that would normally need to be done in low level c-string coding to prevent index out of range accesses. At the top of the checkSum() method there are two checks we can ignore because SafeString does that index out of range checking for us.
bool checkSum(SafeString &msg) {<br> size_t idxStar = msg.indexOf('*');<br> // could do these checks also<br> // BUT SafeString will just return empty sfCheckSumHex and so fail to hexToLong conversion below<br> // if (idxStar == msg.length()) {<br> // return false; // missing * //this also checks for empty string<br> // }<br> // // check for 2 chars<br> // if (((msg.length()-1) - idxStar) != 2) { // msg.length() -1 is the last idx of the msg<br> // return false; // too few or to many chars after *<br> // }<br> cSF(sfCheckSumHex, 2);<br> msg.substring(sfCheckSumHex, idxStar + 1); // next 2 chars SafeString will complain and return empty substring if more than 2 chars or idxStar+1 out of range<br> long sum = 0;<br> if (!sfCheckSumHex.hexToLong(sum)) {<br> return false; // not a valid hex number<br> }<br>
For example entering the test input (missing the * check sum) $GPRMC,194509.000,A,4042.6142,N,07400.4168,W,2.03,221.11,160412,,,A
gives the output, with SafeString::setOutput(Serial); called in setup()
Error: sfReader.substring() beginIdx 68 > sfReader.length() : 67<br> sfReader cap:81 len:67 '$GPRMC,194509.000,A,4042.6142,N,07400.4168,W,2.03,221.11,160412,,,A'<br>bad checksum : $GPRMC,194509.000,A,4042.6142,N,07400.4168,W,2.03,221.11,160412,,,A<br>
The sfReader.substring() failed because the message did not contain the * char and so msg.indexOf(‘*’) returned an index equal to the length of the msg and so the starting index for the substring was beyond the end of the msg and an empty sfCheckSumHex was returned and an error message output. Then hexToLong fails because the empty sfCheckSumHex does not contain valid hex digits and the checkSum() returns false.
In general you can just code your SafeString processing and call SafeString::setOutput(Serial); called in setup() and let SafeString tell you what is out of range or too large to fit in the SafeStrings you have setup.
Step 5: BufferedOutput
As well as sending messages to external devices, like GPS modules, and displaying messages for the user, serial text output is the primary means for debugging your sketch to find out what it is doing. However as we will see now, just adding a Serial.print() statement changes the way your sketch runs and can introduce more errors then is finds.
The following trivial sketch, Print_at_9600.ino, illustrates the delays introduced by using Serial.print( ) (and any of the other Serial output methods)
const uint32_t BAUD_RATE = 9600;<br>unsigned long loopCounter = 0;<br>unsigned long startTime = 0;<br>void setup() {<br> Serial.begin(BAUD_RATE);<br> for (int i = 10; i > 0; i--) {<br> Serial.print(' '); Serial.print(i);<br> delay(500);<br> }<br> Serial.println();<br> Serial.print("BAUD_RATE = "); Serial.println(BAUD_RATE);<br>}<br><br>void loop() {<br> if (loopCounter == 0) {<br> startTime = millis();<br> }<br> loopCounter = loopCounter + 1; // or loopCounter++; i.e. add one each loop<br> Serial.println(" a very looooooooooooog msg with looooooooooooots of data");<br> Serial.print("Loop:"); Serial.print(loopCounter);<br> Serial.print(" mS:");<br> Serial.println(millis() - startTime);<br><br> // rest of loop<br> delay(1); // assume the rest of your sketch code takes 1mS to execute<br>}<br>
The first few lines of output are:-
BAUD_RATE = 9600
 a very looooooooooooog msg with looooooooooooots of data
Loop:1 mS:24
 a very looooooooooooog msg with looooooooooooots of data
Loop:2 mS:101
 a very looooooooooooog msg with looooooooooooots of data
Loop:3 mS:178
 a very looooooooooooog msg with looooooooooooots of data
Loop:4 mS:255
 a very looooooooooooog msg with looooooooooooots of data
Loop:5 mS:331
 a very looooooooooooog msg with looooooooooooots of data
Loop:6 mS:408
 a very looooooooooooog msg with looooooooooooots of data
Loop:7 mS:485
. . .
At 9600 baud it takes about 1mS per char for the hardware Serial to output a character, so for this ~80char message it takes about ~80mS for the HardwareSerial UART to send the data. Once the first loop’s output fills up the Uno’s 63 byte Tx buffer, the Serial.print() blocks waiting for the UART to send a char so there is space in the Tx buffer for the next char. So the rest of the loop is blocked while the print() is blocked waiting for the slow UART to send the chars. As we saw above this can lead to you missing the inputs your program needs.
There are a number of ways you can combat this problem of Serial output delaying the rest of your code.
- use a higher Serial baud rate
- increase the buffer size and skip some output so Serial does not block using BufferedOutput
- print less data
Step 6: Using a Higher Serial Baud Rate
The first step is to use a higher Serial baud rate. You should always do this. For the Uno you can choose up to 115200 in the Arduino Monitor and increase the BAUD_RATE in the sketch
const uint32_t BAUD_RATE = 115200;
After increasing the baud rate to 115200 (Print_at_115200.ino), first few lines of the output are now :-
BAUD_RATE = 115200
 a very looooooooooooog msg with looooooooooooots of data
Loop:1 mS:2
 a very looooooooooooog msg with looooooooooooots of data
Loop:2 mS:8
 a very looooooooooooog msg with looooooooooooots of data
Loop:3 mS:14
 a very looooooooooooog msg with looooooooooooots of data
Loop:4 mS:20
 a very looooooooooooog msg with looooooooooooots of data
Loop:5 mS:26
 a very looooooooooooog msg with looooooooooooots of data
Loop:6 mS:32
 a very looooooooooooog msg with looooooooooooots of data
Loop:7 mS:39
. . .
The HardwareSerial is still filling up and the Serial.print() is still blocking, but for less time now as the characters are being sent out faster. While using a faster baud rate should always be the first step, it only reduces the problem. It does not remove it.
Step 7: Increasing the Output Buffer and Skipping Some Output Using BufferedOutput
The BufferedOutput class, in the SafeString library, ‘solves’ the
problem by
- providing a larger buffer for the output and
- discarding output that would cause the loop to block.
The sketch BufferedOutput_at_115200.ino does this.
// BufferedOutput_at_115200.ino
#include "BufferedOutput.h"
createBufferedOutput(output, 66, DROP_UNTIL_EMPTY); // modes are DROP_UNTIL_EMPTY, DROP_IF_FULL or BLOCK_IF_FULL

const unsigned long BAUD_RATE = 115200;
unsigned long loopCounter = 0;
unsigned long startTime = 0;
void setup() {
  Serial.begin(BAUD_RATE);
  for (int i = 10; i > 0; i--) {
    Serial.print(' '); Serial.print(i);
    delay(500);
  }
  Serial.println();
  Serial.print("BAUD_RATE = "); Serial.println(BAUD_RATE);
  output.connect(Serial);  // <<<<< connect the buffered output to Serial
}

void loop() {
  output.nextByteOut(); // <<<<<<<<<< need to call this each loop to release next byte from buffer
  if (loopCounter == 0) {
    startTime = millis();
  }
  loopCounter = loopCounter + 1; // or loopCounter++; i.e. add one each loop
  output.println(" a very looooooooooooog msg with looooooooooooots of data");  // <<< use output instead of Serial
  output.print("Loop:"); output.print(loopCounter);
  output.print(" mS:");
  output.println(millis()- startTime);
  // rest of loop
  delay(1); // assume the rest of your sketch code takes 1mS to execute
}
There are three addition statements:-
createBufferedOutput(output, 66, DROP_UNTIL_EMPTY);
which creates a 66 byte buffer and a buffered output called output. The mode is DROP_UNTIL_EMPTY which means once both the buffer and the Serial tx buffer fill up any extra output is discarded until they are both empty. By default if a print( ) statement will not all fit in the buffer, none of it will be printed. These settings usually give the most usable output (the other BufferedOutput options are discussed below). In your sketch you then print using output instead of Serial.
output.connect(Serial);
This tells the the buffered output where to send the characters it has buffered. The other important addition is
output.nextByteOut();
This MUST be called at least once, or more, each loop() to release the buffered characters to Serial. If you forget to add output.nextByteOut() , you will only get the first few print()’s !!
The 66 byte buffer created by createBufferedOutput is added to the existing Serial tx buffer when buffering output. Different Arduino boards have different sizes of Serial tx buffers :-
- Uno – 63 byte buffer,
- ESP32 – 127 byte buffer,
- ESP8266 – 128 byte buffer,
- Mega2560 – 63 byte buffer,
- Arduino NanoBLE – 0 byte buffer. The NanoBLE is a special case. See connect( ) baud rate option section below.
The first few lines from the BufferedOutput_at_115200.ino sketch displayed on the Arduino monitor are shown below. The ~~ indicates that some output is missing (has been dropped / skipped over).
DROP_UNTIL_EMPTY mode example output
BAUD_RATE = 115200
 a very looooooooooooog msg with looooooooooooots of data
Loop:1 mS:1
 a very looooooooooooog msg with looooooooooooots of data
Loop:2 mS:3
~~
 a very looooooooooooog msg with looooooooooooots of data
Loop:9 mS:13
 a very looooooooooooog msg with looooooooooooots of data
Loop:10 mS:15
~~
 a very looooooooooooog msg with looooooooooooots of data
Loop:17 mS:28
 a very looooooooooooog msg with looooooooooooots of data
Loop:18 mS:30
~~
. . .
This shows the time for a loop() has dropped from ~6mS to ~2mS by skipping output that would cause the print() statement to block.
Step 8: BufferedOutput Options
The createBufferedOutput( ) macro has three (3) modes and one flag, allOrNothing, which defaults to true.
The modes do the following:-
- DROP_UNTIL_EMPTY – (output shown above) once both the buffer and the Serial tx buffer have filled up, then all the output is discarded (skipped/dropped) until both buffers are completely empty. This mode usually gives the cleanest, most readable output.
- DROP_IF_FULL – once both the buffer and the Serial tx buffer have filled up then all output is discarded (skipped/dropped) until there is enough space for an more output. See the example output below
- BLOCK_IF_FULL – this mode does not skip any output. When the the buffer and the Serial tx buffer are both full, it just blocks the loop() waiting for space to become available to output the next char. (The allOrNothing flag is ignored.)
DROP_IF_FULL mode example output
Changing the createBufferedOutput to createBufferedOutput(output, 66, DROP_IF_FULL); gives
BAUD_RATE = 115200
 a very looooooooooooog msg with looooooooooooots of data
Loop:1 mS:1
 a very looooooooooooog msg with looooooooooooots of data
Loop:2 mS:3
~~
Loop:3 mS:4
~~
Loop:4 mS:6
~~
 . . .
BLOCK_IF_FULL mode example output
Changing the createBufferedOutput to createBufferedOutput(output, 66, BLOCK_IF_FULL); gives output that looks just like the normal Serial.print( ) output. Nothing is skipped and the loop() is blocked waiting for space in the buffers. However because you have added 66 byte buffer space, you can print( ) more data before it starts blocking.
BAUD_RATE = 115200
 a very looooooooooooog msg with looooooooooooots of data
Loop:1 mS:2
 a very looooooooooooog msg with looooooooooooots of data
Loop:2 mS:5
 a very looooooooooooog msg with looooooooooooots of data
Loop:3 mS:8
 a very looooooooooooog msg with looooooooooooots of data
Loop:4 mS:13
 a very looooooooooooog msg with looooooooooooots of data
Loop:5 mS:20
 a very looooooooooooog msg with looooooooooooots of data
Loop:6 mS:27
 a very looooooooooooog msg with looooooooooooots of data
Loop:7 mS:33
 . . .
allOrNothing flag
There is an optional 4th argument to the createBufferedOutput( ) , the allOrNothing flag. If not specified this flag defaults to true and the DROP_.. modes will not output a write(msg,size) unless there is enough space in the buffer for the whole message. Not all print( ) statements use the underlying write(msg,size) method. print(“message”) and print(10) do, but print(F(“ “)) does not and println(…) adds the newline separately.
Here is some example output for DROP_UNTIL_EMPTY but with the allOrNothing flag false.
createBufferedOutput(output, 66, DROP_UNTIL_EMPTY,false);
As you can see below, when the buffers are almost full the long print( ) is truncated half way through.
BAUD_RATE = 115200
 <span style="font-weight: normal">a very looooooooooooog msg with looooooooooooots of data</span>
Loop:1 mS:0
 <span style="font-weight: normal">a very looooooooooooog msg with looooooooooooots of data</span>
Loop:2 mS:2
 <span style="font-weight: normal">a very looooooooooooog msg ~~</span>
14
 <span style="font-weight: normal">a very looooooooooooog msg with looooooooooooots of data</span>
Loop:11 mS:16
 <span style="font-weight: normal">a very looooooooooooog msg with looooooooooooots of data</span>
Loop:12 mS:18
 <span style="font-weight: normal">a very looooooooooooog ms~~</span>
 <span style="font-weight: normal">a very looooooooooooog msg with looooooooooooots of data</span>
Loop:20 mS:32
 <span style="font-weight: normal">. . .</span>
Source: Arduino Text I/O for Real World Applications
- How do I avoid blocking the loop with Serial.print?
Use BufferedOutput instead of Serial.print and call output.nextByteOut() each loop to release buffered bytes. - Can SafeString handle long input tokens?
Yes; SafeStringReader returns tokens up to the specified max length and skips inputs longer than that, optionally logging an error if SafeString::setOutput is enabled. - What should I use for non-blocking text input?
Use SafeStringReader which provides non-blocking high level read methods like read(), readUntil(), and readUntilToken(). - Does increasing baud rate help missing input?
Yes; using a higher Serial baud rate (e.g. 115200) reduces blocking time but does not eliminate the problem entirely. - How does BufferedOutput handle full buffers?
BufferedOutput supports modes DROP_UNTIL_EMPTY, DROP_IF_FULL, and BLOCK_IF_FULL to control behavior when buffers fill. - How do I enable SafeString error messages?
Call SafeString::setOutput(Serial) in setup() to send error and debug messages to Serial. - Can SafeString parse GPS NMEA messages?
Yes; the tutorial demonstrates parsing $GPRMC messages using SafeString stoken and conversion methods like toLong and toFloat. - How do I test text processing sketches automatically?
Use SafeStringStream to automate and stress test text input processing in sketches. - What if my sketch processing delays reading input?
Use BufferedInput to add extra input buffering and gather statistics to choose an appropriate buffer size. - Do SafeString numeric conversions check validity?
Yes; methods like toLong, toInt, toFloat, and hexToLong perform strict checking and return false on invalid input.