Summary of Arduino Relay Motor Control Circuit
This article outlines building an Arduino-controlled elevator system using either relay or H-bridge motor control. It details wiring a 5V Arduino to relay coils or an L298 H-bridge while powering the motor separately with a 9–12V battery. The guide instructs writing sketches to move the car up and down one floor, adjusting for speed differences caused by weight.
Parts used in the Arduino Elevator Project:
- Arduino board
- Relay coils
- L298 H-bridge module
- Elevator drive motor
- 9 or 12 volt battery
- Auxiliary wires for power connections
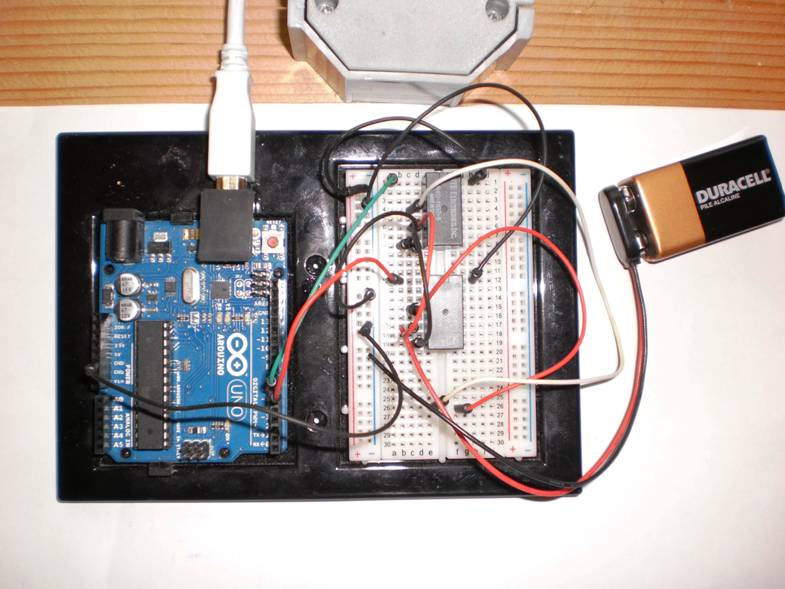
Connect the Arduino outputs with 5 volt power to the relay coils. Use a separate 9 or 12 volt battery for powering the motor. Connect the 9 or 12 volt power to the relay contacts and the motor. Be sure to avoid connecting the 9 or 12 volt power to any of the Arduino input or output pins.
Write an Arduino sketch to run the elevator up and down in the center of the “hoistway” for a fixed length of time in each direction. Note the difference of speed in each direction due to the weight of the car. Account for that in your sketch and get the car to move up and down one floor in each direction.
Team two should build an H-bridge control circuit for one of the elevator drive motors.
Connect the Arduino 5 VDC to Vss (Pin 9) and enable A (pin 6) on the L298. Connect the Arduino output pins to the H-bridge inputs 1 and 2. Use a separate 9 -12 volt battery for powering the motor. Connect the 9 -12 volt power to the H-bridge Vs (Pin 4) and the ground to Pins 1 and 8. Connect the Arduino and motor power grounds together. The H-bridge isolates the logic voltage from the motor voltage. Be sure to avoid connecting the 9 -12 volt power to any of the Arduino input or output pins.
Write an Arduino sketch to run the elevator up and down in the center of the “hoistway” for a fixed length of time in each direction. Note the difference of speed in each direction due to the weight of the car. Account for that in your sketch time constants and try to get the car to move up and down one floor in each direction.
For more detail: Arduino Relay Motor Control Circuit
- How should the Arduino outputs be connected to the relay coils?
Connect the Arduino outputs with 5 volt power to the relay coils. - What voltage battery is recommended for powering the motor?
Use a separate 9 or 12 volt battery for powering the motor. - Can the 9 or 12 volt power be connected to Arduino input pins?
No, you must avoid connecting the 9 or 12 volt power to any of the Arduino input or output pins. - Which pins on the L298 connect to the Arduino 5 VDC?
Connect the Arduino 5 VDC to Vss (Pin 9) and enable A (pin 6) on the L298. - How do you isolate logic voltage from motor voltage?
The H-bridge isolates the logic voltage from the motor voltage. - What is the goal regarding the elevator car movement in the sketch?
The goal is to get the car to move up and down one floor in each direction. - Why might the speed differ in each direction?
The speed difference is due to the weight of the car. - What specific adjustments are needed in the Arduino sketch?
You must account for speed differences by adjusting time constants in your sketch.