The one wire Digital Temperature Sensor – DS18B20 from Maxim (formerly Dallas) is a great chip for measuring temperature in your projects. Luckily, there is a Dallas Temperature library for the arduino which makes using this sensor very easy.
 The most recent version of this library can be found at
http://www.milesburton.com/?title=Dallas_Temperature_Control_Library
We used version 3.6.0 for this tutorial which can also be downloaded here
Download a copy of the library. In it you will find two folders
Drag and drop the DallasTemperture folder into your arduino/libraries folder
If you dont already have the OneWire library then you will need to copy that folder into the libraries folder also.
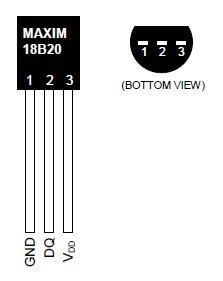
Now, before we get to the programming part, lets wire up our temperature sensor. The DS18B20 can be powered by between 3.0V and 5.5V so you can simply connect its GND pin to 0V and the VDD pin to +5V from the Arduino. However, the DS18B20 can also extract its power from the data line which means we only effectively need two wires to connect it up. This makes it great for use as an external sensor.
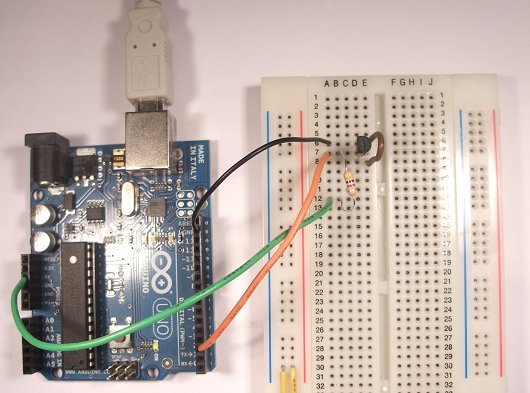
So we will use the 2 wire method. Simply connect both the GND and VDD pins to 0V (yes both). Then connect the DQ pin to pin 2 on the Arduino board (can be any Arduino digital pin)
A 4K7 ohm pullup resistor is required on the DQ pin to pull it up to 5V
Here is our sensor setup on a breadboard
Here’s a closeup. The brown wire connects pins 1 and 3 together, and the black wire connects them both to 0V. The orange wire is our signal wire to pin 2 on the Arduino, and there is a 4K7 pullup resistor to 5V
For more detail: Arduino – One Wire Digital Temperature Sensor – DS18B20

