You’ve all probably had a chance to do that classic high-school experiment: pop bottle rockets. You’ve probably taped on some fins, a paper nosecone, and presto! You launch a “rocket” that is loads of fun- and watched it fall down from the sky.
Why stop there?
Here, I’ll show you the basics of building the next-level water rocket that can be the basis for many interesting projects. The best part is that most of the things required are either cheap or things you can find at home. If you want to design your own rocket, I’ll help you plan and design. If you’re just looking for a step-by-step project, I’ve got that as well.
So let’s get started!
By the way, this is my first instructable, so if you feel that something’s not done right, feel free to add a comment. Your feedback is appreciated!
Please keep in mind: My goal here is not to show you how to build one project. I am trying to help you start thinking and designing water rockets on your own, using your own ideas. I do present a project build, but I encourage you to alter the design and functionality as you see fit.
Finally, if you like it, please vote for it in any contest it may be in! Thanks!
Step 1: A Little Lecture on Rocket Science
Now, this is rocket science, but that doesn’t mean it’s that difficult. Here are a few basic terms I’ll be using:
Apogee- highest point on the parabola described by the rocket’s flight, or, in other words, the point at which the rocket is farthest from the ground,
Cp- center of pressure,
Cg- center of gravity.
Everything else is relatively self-explanatory.
Key points to remember during design and construction (there may be more):
1. Drag- the more drag on a rocket, the lower it’s apogee. Therefore, minimize drag.
2. Thrust- the more power the rocket produces, the higher it will go. Therefore, increase thrust.
3. Stability- the rocket’s Cp must be behind it’s Cg- this will make the rocket stable and therefore increase maximum altitude.
4. Mass- the lighter the rocket, the higher it goes. Note that decreasing your rocket’s weight to almost zero would decrease it’s performance- there is an ideal mass to volume ratio that enables best performance.
There is this effect in theory and in the real world that prevents us from doing everything at maximum potential. I.e. a bicycle cannot have a gear chain ratio that is oriented both for speed and strength at the same time. This type of trade off occurs here as well- we cannot increase thrust without increasing drag. The faster the air moves, the greater the volume of that air is (that interacts with the rocket) over a given time period.
Our goal is to design the highest-flying rocket with additional features that makes it more interesting than a simple 2L bottle rocket- so what does that involve?
Step 2: To Be Advanced or Not – That Is the Question!

The issue with the simple bottle rocket is that we can not do anything with it other than launch it and watch it fall back down. I don’t know about you, but this gets somewhat boring. What if we could watch the flight from the rocket? A digital camera should do the trick.
But- my camera costs a lot. I don’t want it wrecked , so I’ll need some sort of recovery mechanism. A parachute, maybe?
What if I don’t want to get wet while launching the rocket? It would be nice to have a timer countdown device.
These are a few points that will be addressed during construction. If you have ideas, write them down. It’s never worse when you forget a brilliant idea that’s crucial to your project’s success. Asking questions like this is fundamental to developing a functional product.
Step 3: Options
Now let’s decide what we should do. Here’s a synopsis of possible ventures:
Parachute recovery
Involves deploying a small parachute to slow down the descent speed of a rocket. Generally uses a pyrotechnic charge in model rockets but we will use a spring-loaded mechanism with a servo latch device.
Videotaping
Only do this if you are sure that your recovery mechanism works all the time and with no faults. Cameras are expensive. I will take no responsibility for your misfortunes.
Timer for launch
Pretty simple, I think we’ll do it to help time the parachute deployment as well. Involves an Arduino and 7-segment display, as well as a few push buttons and LEDs.
These are all I’ll discuss in depth, but here are a few for you to try out. Most of these I’ve used in my project, and I’ll provide ideas on how to do then as well:
-Accelerometer-based parachute deployment- an accelerometer can be used to calculated velocity, acceleration, and may be used for parachute deployment
-Barometric altimeter with data logger- using a cheap altimeter, you can create a time versus altitude graph, as well as measure air temperature (although this depends on the altimeter breakout board)
-Increase the volume of your water rocket- I’ll actually discuss this in detail later on, but essentially one can splice bottles together to create larger pressure chambers. This helps to increase altitude, obviously.
-Retrograde recovery device- this is probably one of the most difficult projects involving water bottle rockets. the idea is to fire an air/ air+water mixture downwards just before ‘touchdown’ to increase the duration for which the rocket decelerates. If you get this to work, please comment! It would be great to know.
-Any other interesting rocket-related device- I’ve seen rockets with payload chambers, boosters, staging mechanisms, nozzles, etc. The sky is the limit!
Step 4: Design
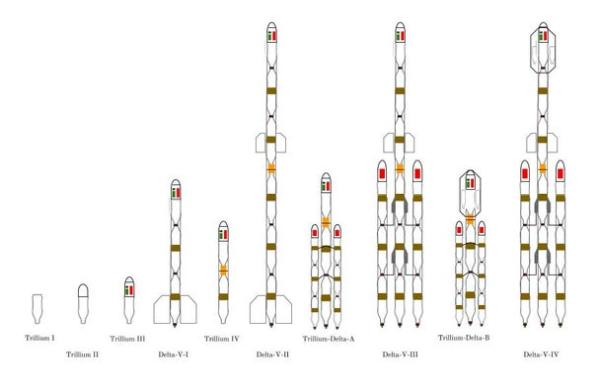
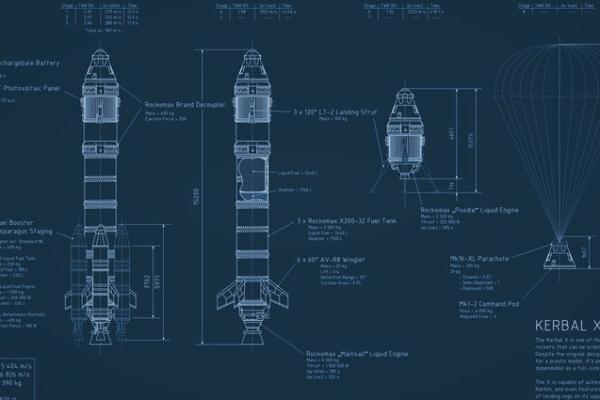
It’s never a good idea to run out and buy materials without forethought, even be they as cheap as here. I went through this situation while working on my Technological Design Culminating project, which, incidentally, is shown above.
Design your rocket based on what you’re capable of. The first image depicts my plan, whereas the second is the result. None of the larger rockets ever flew due to leakage. The final result was a small yet effective device that held the school record for altitude at 90m @65psi (pounds per square inch, a measurement of pressure).
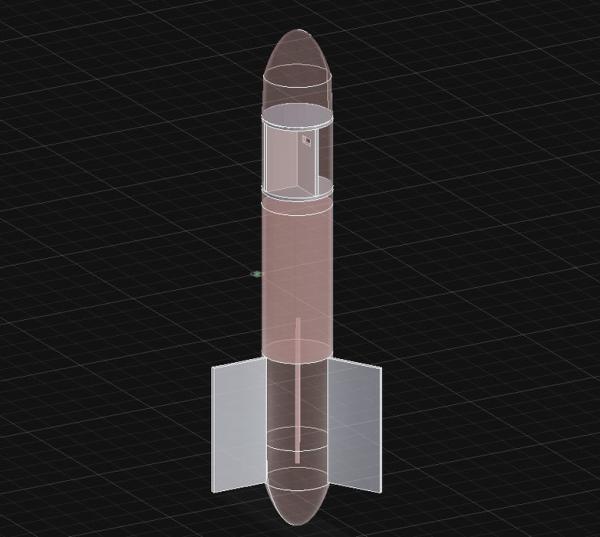
There are certain things that are generic in terms of basic construction. You will want a rounded nosecone, as this is the shape that encounters the least air resistance. Fins should be placed as far back as possible. Try to limit extra weight and size by placing everything in a very compact layout.
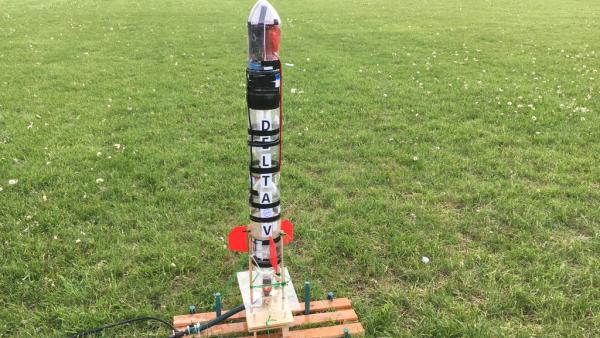
Step 5: Project Build- Delta-V Water Rocket
This is the rocket I’ll be describing in-detail. It uses two 1-liter bottles, one for the pressure chamber and one for the nosecone and payload. It boasts of a programmable timer function to deploy the parachute at any desired time after liftoff, a launch-detect mechanism, a sevenisegment led display for programming, a servo motor deployment system and an eighteen inch parachute. It is used with a simple launcher, and does not need nozzles of any kind. Best of all- it has the capacity to carry a GoPro Hero 5 camera, or any other camera.
The total cost to build this was under 5$. 🙂
Also, please read through to the end of this Instructable before buying anything, as alternatives are presented that may be more easily accessible to you than the initial project.
Step 6: Materials Required, As Well As Relevant Tools
These are the materials you’ll need to build the physical structure of the rocket (this does not include electronics of any kind):
-1-liter bottles (x4) Try to get the ones that are very elongated and have smooth walls, and smooth, -flowing curves toward the bottle’s neck. You’ll only need three, but get an extra just in case. Buy a drink you actually like- so that you won’t waste resources. That way, you’ll be a bit more eco-friendly.
-Corrugated plastic board (absolute minimum 50x50cm) Again, get enough so you can experiment and rebuild if something doesn’t work. Most schools have scraps of this stuff lying around, and if you’re not in school then look in the dollar store. The stuff “For Sale” signs are made out of is fine.
-Ping-pong ball (x1) For the nosecone. If you don’t have one, then look in any sports store. If you do have one, make sure nobody sees you take it.
-Rubber bands (as many as you have, minimum 2)
-Thick color paper (a few sheets)
-Transparent tape, i.e. Scotch (one should be enough) Any tape will do, but transparent tape looks better. The source is the dollar store.
-Hot glue sticks (as much as you need) with glue gun (x1) It’s easier to glue some things together than tape them, especially where there’s no chance of them getting wet. Glue guns may be bought from Mastercraft, Lowe’s, Canadian Tire, Hobby shops, etc. Preferably get the mini version as the full-size ones tend to melt the plastic too easily. Also, don’t forget glue sticks (it happens often, trust me)
-X-acto knife, or any other hobby knife (x1) For cutting the corrugated plastic. Any Hobby shop will provide you with a wide variety of knives.
-Sharp pair of scissors (x1)
-Ruler
-Pencil, eraser
Step 7: Electronics Stuff and Relevant Tools
This is what you will need to buy to build this prototype, if not available to you already:
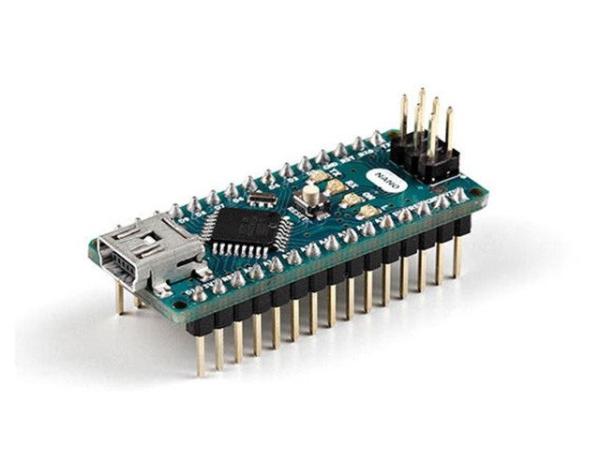
-Arduino Nano Rev3.0 or equivalent (x1) This is the control center of your rocket.
http://www.ebay.ca/itm/Nano-V3-0-Mini-USB-ATmega32…
-Generic 7-segment LED display, either common anode or common cathode (x1) Part of the user interface.
http://www.ebay.ca/itm/5PCS-0-56-7-Segment-Red-LED…
-Generic pushbuttons, SPST tactile type (min. 2) User interface.
-Slide switch, generic (through hole, breadboard pin spacing @ 1/10″)
-Tilt switch, generic (x1) Used to detect acceleration of rocket at liftoff.
http://www.ebay.ca/itm/10Pcs-Metal-Ball-Tilt-Shaki…
-Generic jumper wires, 20cm lengths (male to male or male to female, read step 9 before deciding)
-Male header pins, enough for your Arduino (read step 9)
-LED assortment
-Buzzer, generic
– Mini servo motor with arm(x1) http://www.ebay.ca/itm/POP-9
-At least 4 220ohm resistors rated 1/4W
-Perforated board, copper plated 5×7 cm (x2)
http://www.ebay.ca/itm/Carte-Prototypage-Simple-fa…
-Soldering equipment (includes soldering iron, lead-free solder, stand)
https://www.creatroninc.com/product/30w-general-pu… -Iron
https://www.creatroninc.com/product/soldering-iron… – Stand
https://www.creatroninc.com/product/63-37-lead-sol…– Solder
Don NOT buy equipment and tools from eBay or amazon- cheaply made tools pose a greater hazard than quality-made tools. Also, non-eBay tools tend to last longer, so you won’t have to buy a new soldering stand every year, for example. It’s OK to buy electronics from eBay (most of the time), especially if it’s generic- but expect 2-5 weeks delivery from most Asian sources.
The Arduino Nano can be bought from ebay as well, but I recommend purchasing one from a website such as sparkfun or robotshop as the quality is guaranteed in the two latter cases.
Source: Arduino-controlled Water Rockets