
Summary of Arduino Accelerometer mma7361
This article is an educational tutorial explaining analog-to-digital conversion (ADC) using an Arduino and an MMA7361 accelerometer. The author, a teaching assistant at Vanderbilt University, breaks down how variable signals are digitized into 0-1023 values representing 0-5 volts. It demonstrates calculating voltage from ADC output and interpreting acceleration data on the X, Y, and Z axes by orienting the sensor top-side up or bottom-side up.
Parts used in the Arduino Accelerometer mma7361 Project:
- Arduino
- MMA7361 Accelerometer
- Accelerometer module from Virtuabotix
Hey guys, I am a teaching assistant for an introduction to engineering class for biomedical engineering majors at Vanderbilt University this semester. I created this video to explain analog-to-digital conversion to them because time ran out during class and I did not get to this point in the lecture. I ran across the Teach It! Instructables contest and thought if I already had the video created, why not enter it into the contest, so here goes.
Arduino Accelerometer mma7361:
Analog to Digital Conversion Tutorial
The video gives a simple introduction to analog-to-digital conversion and then explains how this relates to reading data from an accelerometer using an Arduino. For those of you who do not know, as the name suggests, an accelerometer measures the gravitational pull on the device. This particularly accelerometer measures acceleration in the x, y, and z axes. The accelerometer I am using in the demo is the MMA7361 and the datasheet can be found online. The datasheet will give more in-depth info of the accelerometer itself. If you search “MMA7361 filetype:pdf” in Google, it should pop right up. It is also attached in this Instructable. If you are not used to reading datasheets, it may be a little intimidating. Please feel free to ask if you have any questions. Additionally, the accelerometer module that I am using was purchased on Amazon from Virtuabotix, if you are interested. Anyways, here’s my video. The video itself is self-sufficient, but I highlighted the major parts of it in steps if you want a quick summary. I hope you learn something from it. And if you have any questions, please feel free to ask.
If you like my Instructable, please consider voting for it in the Instructables Teach It! Contest.
Step 1: What is Analog-to-Digital Conversion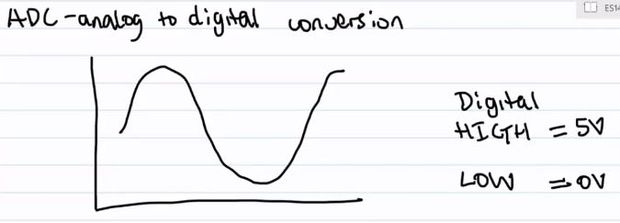
Analog-to-digital conversion (ADC) is the process is taking a variable signal and “digitizing” the signal so that a computer can process it.
Step 2: Bits or… Number of States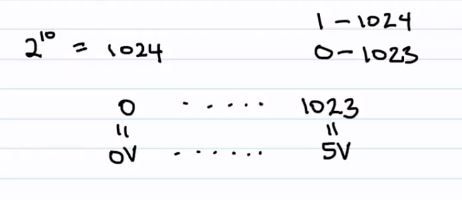
An Arduino has a 10-bit ADC, meaning that the voltages that the Arduino is reading from some sensor (in our case the sensor is an accelerometer) is represented by a number in the range of 0-1023. The max voltage an Arduino reads is 5 V and the smallest is 0 V. These voltages are represented by 1023 and 0 respectively.
A discussion on bits can get a little more extensive and a little outside the scope of this Instructable, so feel free to explore this a little more on your own or ask me in the comments section.
Step 3: Converting from Voltage to ADC Output and Vice-Versa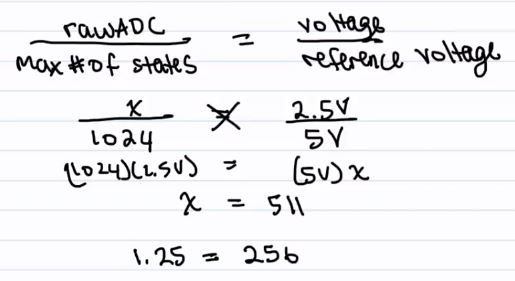
If you are reading a voltage of 2.5 V, you can calculate the Arduino’s ADC output by doing a simple proportion. Oftentimes, you are reading an unknown voltage and want to use the Arduino’s ADC output to determine what voltage you are sensing. Simply modify the proportion accordingly.
Step 4: Understanding Accelerometers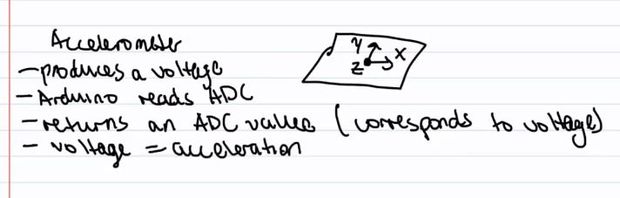
We can use an Arduino to sense the voltage outputted by an accelerometer. This voltage corresponds to an acceleration.
Step 5: Accelerometer 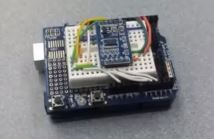
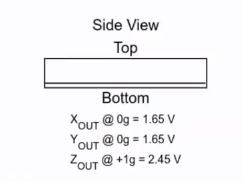
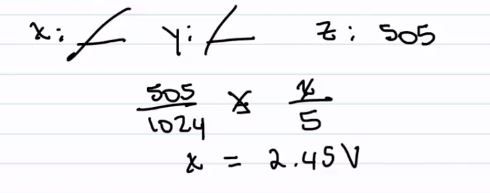
If we have the accelerometer top-side up, these are the values we can expect to get from the Arduino’s ADC.
Sorry I used “x” as my variable in this example. We are calculating the acceleration in the “z-axis.” Using “x” as my variable is a habit. “x” was the first variable of choice in my Algebra classes.
Step 6: Accelerometer Bottom-Side Up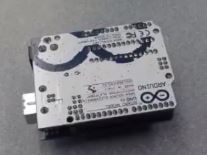
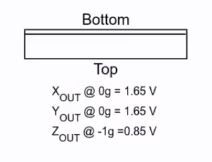
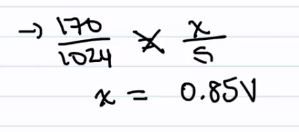
If we have the accelerometer bottom-side up (z-axis down), these are the values we could expect.
Again, we are calculating acceleration in the z-axis not “x.”
Step 7: Wrap-up
Anyways, that’s it. I hope you learned something from this.
If you liked my Instructable, please consider voting for it in the Instructables Teach It! Contest.
- What is analog-to-digital conversion?
It is the process of taking a variable signal and digitizing it so that a computer can process it. - How many states does an Arduino have?
An Arduino has a 10-bit ADC, meaning voltages are represented by numbers in the range of 0-1023. - What is the maximum voltage an Arduino reads?
The maximum voltage an Arduino reads is 5 V. - Can you calculate voltage from ADC output?
Yes, you can determine the sensed voltage by modifying the proportion between voltage and ADC output. - Does the MMA7361 measure acceleration in multiple directions?
Yes, this particular accelerometer measures acceleration in the x, y, and z axes. - Where can I find the datasheet for the MMA7361?
You can find the datasheet online by searching MMA7361 filetype:pdf in Google or in the attached files. - What happens to the values when the accelerometer is bottom-side up?
If the accelerometer is bottom-side up with the z-axis down, different expected values are generated from the Arduino's ADC. - Why did the author use x as a variable in the example?
The author used x as a variable because it was their first choice in Algebra classes, even though they were calculating the z-axis.
