Summary of Add SSL Certificates To MKR1000
This guide explains how to install custom SSL certificates on an Arduino MKR1000 using a graphical user interface (GUI) to connect to HTTPS sites. The process involves uploading a specific firmware sketch via the Arduino IDE, then using a standalone GUI tool to fetch and upload the certificate from a target website directly to the board's WiFi module. Note that this method overwrites existing certificates on the device.
Parts used in the Install SSL Certificate on MKR1000:
- Arduino MKR1000
- Arduino IDE
- Arduino Firmware updater
- WiFi101 FirmwareUpdater GUI
- Firmware updater sketch
- USB cable
Cannot connect to your favourite https site with your MKR1000? Follow this guide to install SSL certificate in a easy way using the GUI.

Things used in this project
Hardware components |
||||||
 |
|
× | 1 | |||
Software apps and online services |
||||||
 |
|
|||||
|
||||||
Story
Please note that with the IDE starting from version 1.6.10 the certificate uploader (and the firmware updater) is direct inside the IDE without the need to launch any external executable.
Check this out https://www.arduino.cc/en/Tutorial/FirmwareUpdater
Part 1
Sometimes you may need to upload an SSL certificate on your Arduino / Genuino MKR1000 because the one from www.yourbeautifulsite.io is not included.
This task can be easily accomplished by downloading from the Github website the GUI (Graphical user interface).
**Please note that this procedure will upload to your MKR1000 only the certificates selected with the GUI, if any other certificates are on the board will be overwritten. If you need another certificate just repeat this guide selecting proper one you need.**
This procedure is also available a full terminal text-based to do the update.
Images shown come from the OSX version.
Download the firmware updater GUI from here: https://github.com/arduino-libraries/WiFi101-FirmwareUpdater/releases/tag/0.7.0
Part 2
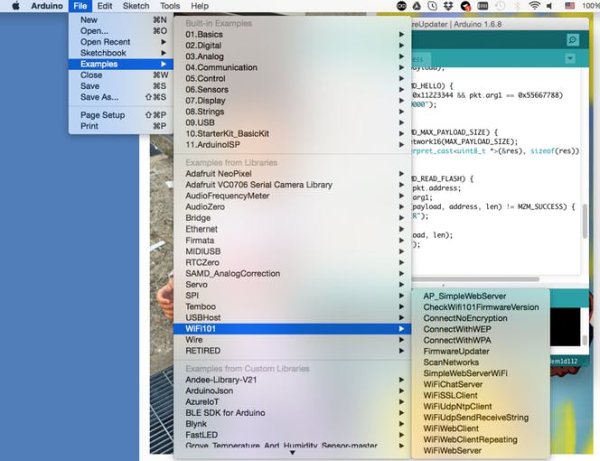
Select your appropriate version (Linux, Windows or OSX) , unzip to a temporary folder. Connect the MKR1000 to the PC via USB cable. Open the Arduino IDE and upload the sketch called “Firmware updater” that is in Example -> Wifi101
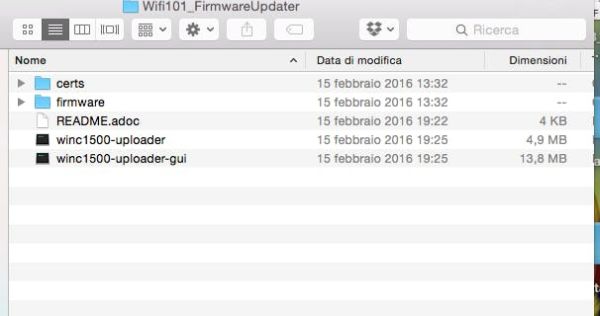
Upload the sketch to the MKR1000 connected via USB. Once uploaded, from the uncompressed folder launch the winc1500-uploader-gui:
The main program window will open: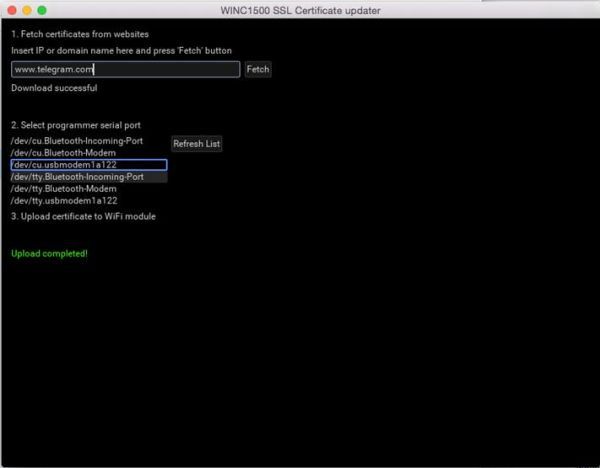
Under the section 1. type the website you want to connect to. For this example we choose telegram.com website.
Press “fetch“
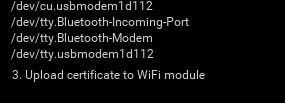
The software will fetch the certificate from the server. Select the port where the board is connected to (on OSX is something like /dev/cu.usbmodemXXXX).
Press “3. upload certificate to the Wifi module”.
Conclusions
Good work guys!
After a while you will see a successful confirmation. Now the MKR1000 stores the correct certificate to your SSL server.
Enjoy!
Code
Source : Add SSL Certificates To MKR1000
- How do I upload an SSL certificate to my MKR1000?
You can use the WiFi101 FirmwareUpdater GUI after uploading the Firmware updater sketch to the board. - Can I update the certificate without external executables if I have IDE 1.6.10 or newer?
No, the article states that starting from version 1.6.10, the uploader is built into the IDE, but the guide specifically demonstrates using the external GUI for this task. - Does the procedure overwrite existing certificates on the board?
Yes, the procedure uploads only the selected certificates and will overwrite any others currently on the board. - What should I do if I need a different certificate later?
You must repeat the guide and select the proper certificate you need during the process. - Where can I download the firmware updater GUI?
The GUI can be downloaded from the GitHub releases page for arduino-libraries/WiFi101-FirmwareUpdater. - Which operating systems are supported by the GUI?
The available versions are for Linux, Windows, and OSX. - What is the first step after connecting the MKR1000 via USB?
You must open the Arduino IDE and upload the Firmware updater sketch found under Example -> Wifi101. - How do I specify the website for the certificate?
Type the website name into section 1 of the main program window and press fetch.