
Summary of Arduino-powered LED Clock
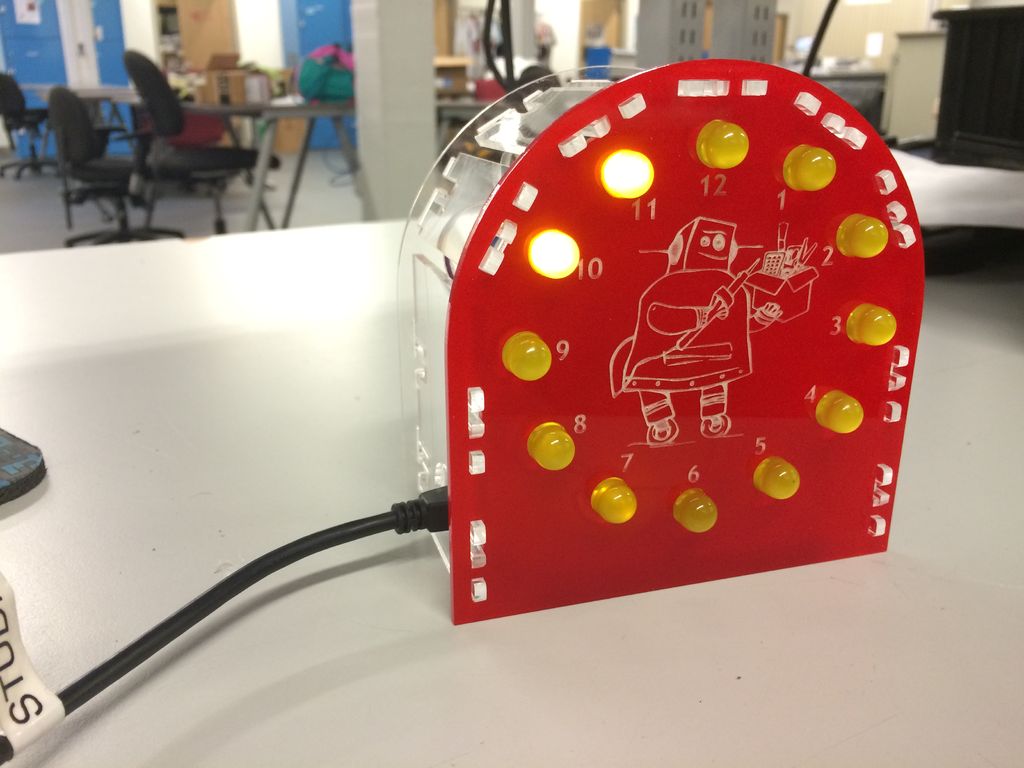
This project builds a simple single-color LED clock that shows time to the nearest half hour using an Arduino Nano and a DS1307 RTC, mounted in a laser-cut 1/8" acrylic snap-together case.
Parts used in the LED clock:
- Arduino Nano
- 400 tie-point Breadboard
- Ribbon Cable
- DS1307 RTC IC
- 32.768 kHz Crystal
- (12) 10mm LEDs
- (12) 180 Ohm resistors
- (2) 10k Ohm resistors
- 0.1 inch spaced, 12 wire ribbon cable, 7 inch long
- Jumper wires
- 18 inch x 6 inch 1/8 inch acrylic
A fun, simple LED clock, that will give you the time to the nearest half hour using single-color LEDs. Parts needed are as follows:
- Arduino Nano
- 400 tie-point Breadboard
- Ribbon Cable
- DS1307 RTC IC
- 32.768 kHz Crystal
- (12) 10mm LEDs
- (12) 180 Ohm resistors
- (2) 10k Ohm resistors
- 0.1″ spaced, 12 wire ribbon cable, 7″ long
- Jumper wires
- 18″ x 6″ 1/8″ acrylic
The tools needed for this job are:
- Laser Cutter
- Soldering iron, flux, solder
- Wire cutter
- Wire stripper
- Needle-nose pliers
- Vice (optional)
- Hot glue gun
- Arduino IDE installed on a computer
Step 1: Laser-cut clock casing
The first thing that needs to be done for this LED clock is to design the clock case! This gives the layout of your LEDs as well as a good housing to use to help keep the assembly very neat and simple. I attached my illustrator file that can be used on a laser cutter with 1/8″ acrylic and is designed to snap together.
 Arduino Clock V3.ai346 KB
For more detail: Arduino-powered LED Clock
- What does this LED clock display?
It gives the time to the nearest half hour using single-color LEDs. - Which microcontroller is used in the project?
Arduino Nano is used as the microcontroller. - What real-time clock component is required?
The project uses a DS1307 RTC IC with a 32.768 kHz crystal. - How many LEDs are needed?
Twelve 10mm single-color LEDs are required. - What material is the clock case made from?
The case is laser-cut from 1/8 inch acrylic sized 18 inch by 6 inch and is designed to snap together. - What size resistors are required for the LEDs?
Twelve 180 Ohm resistors are used for the LEDs. - Is a ribbon cable specified and what kind?
A 0.1 inch spaced, 12 wire ribbon cable about 7 inches long is specified. - What tools are needed to assemble the clock?
Tools listed include a laser cutter, soldering iron with flux and solder, wire cutter, wire stripper, needle-nose pliers, vice (optional), hot glue gun, and a computer with Arduino IDE.
