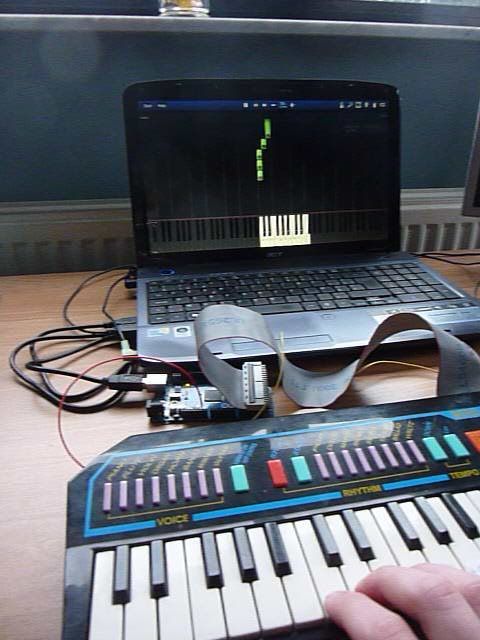
Goal of this project:
Convert a cheap toy piano to work as a midi device and use it with Synthesia (http://www.synthesiagame.com/)
Other programs that use midi inputs can also be used.
Approach:
The pushbuttons of the piano are used to make a simple pull-down circuit for the arduino mega. The arduino interprets the keystrokes and sends serial midi data to the pc. Then this data is send to a virtual midi port with “serial-midi converter”. This midi port is connected to Synthesia via “MIDI Yoke”. MIDI Yoke is a driver that creates virtual ports. Each port has an input and an output which are connected. With MIDI Yoke you can couple different midi programs without any physical hardware.
Step 1: Parts and tools
List of the parts needed for this project:
– Toy piano
– Arduino mega (This project van also be done with an arduino uno but you should use an line decoder to expand your arduinos inputs.)
– Flat ribbon cable (from old pc)
– Connectors (1 for piano and 1 for arduino)
List of tools needed:
– Soldering iron
– Desoldering pump or wick
– Ohmmeter
– Hot glue or any other strong glue
Step 2: Hardware
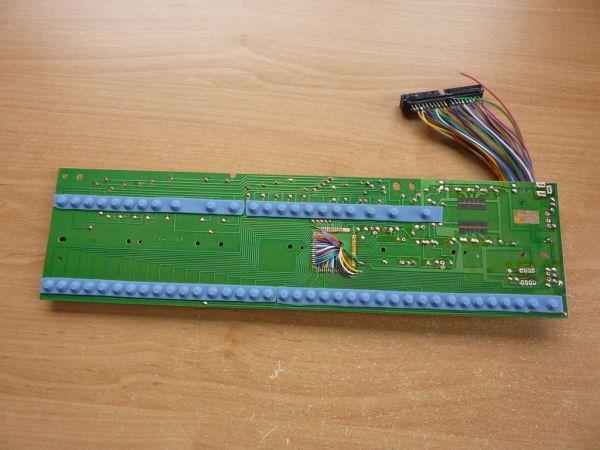
The pushbuttons of the piano keys are used to make simple pull down circuits. The internal pull-up resistors in the atmega IC are used so we don’t need extra external pull-up resistors.
– Open the toy piano and locate the pushbuttons corresponding to the piano keys.
– Check if all the buttons have a common line. This is the ground line.
– Locate and remove the main IC. Solder wires to all leads going to the buttons including the ground wire.
– Check you didn’t make any shorts while soldering. (ohmmeter)
– Solder the other ends to the connector for the flat ribbon cable.
– Make a cutout in the housing of the piano for the connector.
– Reassemble the piano.
For more detail: Convert a toy piano to work as a midi device and use it with Synthesia