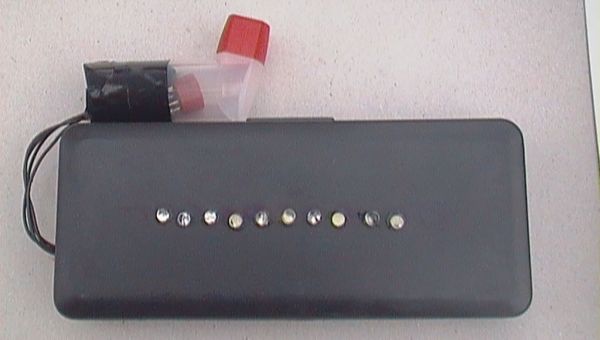
What is a breathalyzer you may ask? It is a device for estimating blood alcohol content (BAC) from a breath sample. In simple terms it is a device to test weather a person is drunk or not. As the title suggests it runs on the Arduino. Our breathalyzer uses the MQ-3 alcohol sensor from sparkfun. It is a simple and fun to do project.

This instructable explains how to create your own breathalyzer , making a shield for the Arduino , putting the breathalyzer in a box, and making some changes to your breathalyzer.
This Breathalyzer is not meant to be used as a means of breathalyzing. The MQ-3 is not accurate enough to register exact BAC and is sensitive to temperature and humidity. Never drink and drive and if you do call me =D .
Step 1: Parts & Tools
Parts:
~ Arduino Uno – Sparkfun.com
~ MQ-3 Alcohol Sensor – Sparkfun.com
~ 100k Ohm Potentiometer – Sparkfun.com
~ 330 Ohm Resistor – Sparkfun.com
~ 5 x Green LED’s – Sparkfun.com
~ 3 x Yellow LED’s – Sparkfun.conm
~ 2 x Red LED’s – Sparkfun.com
~ 7805 Voltage Regulator – Local Electronics Store
~ 1000 uf Capacitor – Local Electronics Store
~ 2 x 9v Batteries – Local Electronics Store
Tools:
~ Soldering Iron – Sparkfun.com
~ Solder Wire – Sparkfun.com
~ Jumper Wires –Sparkfun.com
~ Protoboard – Sparkfun.com
~ Project Box – Local Electronics Store
~ Inhaler Tube – I Found It In My House
Step 2: The Chemistry
When the user exhales into a breath analyzer, any ethanol present in their breath is oxidized to acetic acid at the anode:
CH3CH2OH(g) + H2O(l) → CH3CO2H(l) + 4H+(aq) + 4e-
At the cathode, atmospheric oxygen is reduced:
O2(g) + 4H+(aq) + 4e- → 2H2O(l)
The overall reaction is the oxidation of ethanol to acetic acid and water.
CH3CH2OH(l) + O2(g) → CH3COOH(l) + H2O(l)
The electrical current produced by this reaction is measured by a microprocessor, and displayed as an approximation of overall blood alcohol content (BAC) by the Alcosensor.
Step 3: The Code
Heres the code for our breathalyzer:
const int analogPin = 0; // the pin that the potentiometer is attached to
const int ledCount = 10; // the number of LEDs in the bar graph
int ledPins[] = {
10,9,8,7,6,5,4,3,2,1 // Here we have the number of LEDs to use in the BarGraph
};
void setup() {
for (int thisLed = 0; thisLed < ledCount; thisLed++) {
pinMode(ledPins[thisLed], OUTPUT);
}}
void loop() {
//This is the code to light up LED’s
int sensorReading = analogRead(analogPin);
int ledLevel = map(sensorReading, 500, 1023, 0, ledCount);
for (int thisLed = 0; thisLed < ledCount; thisLed++) {
if (thisLed < ledLevel) {
digitalWrite(ledPins[thisLed], HIGH);
}
else {
digitalWrite(ledPins[thisLed], LOW);
} }}
Step 4: Creating A 5V Supply
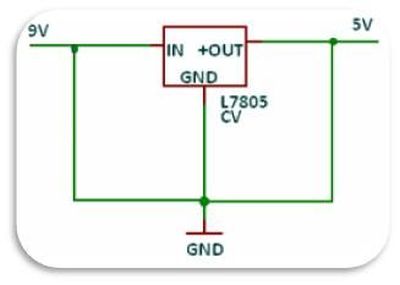
We will use a 7805 5v regulator to take in 9v from the battery and give out steady 5v to MQ-3 alcohol sensor.We are doing this so that the MQ-3 receives enough power(<750ma).If we connect the MQ-3 directly to the arduino , there is a danger of frying it.I used a single 1000 uf capacitor with the 7805 regulator to give out 5v.I created the 5v supply on a seperate circuit board you can use the same circuit board on which we are going to solder the LEDs.I also connected a switch so that the breathalyzer can be switched on or off.See the last image for the circuit diagram.In the circuit the capacitor is between the middle pin and the right pin (See the picture tag)
For more detail: Breathalyzer using an Arduino

