My purpose for this project was to take a knot and “show” its construction by tracing its path. It was only through happenstance that I discovered my chosen medium (2 metres of NeoPixel LED lights) fit so well with Adafruit’s snow globe. You might choose not to knot your lights at all. You could just coil your lights around your globe.
Supplies
- 1 – Adafruit Circuit Playground Snow Globe Kit
- 2m – Adafruit Mini Skinny NeoPixel Digital RGB LED Strip – 60 LED/m – WHITE
- 4m – hologram scoubidou (plastic lacing)
- distilled water
- glycerine
- tinsel glitter
- E6000 glue
- insulated wire
- soldering iron
- hot glue
- tape
Step 1: Choose Your Knot
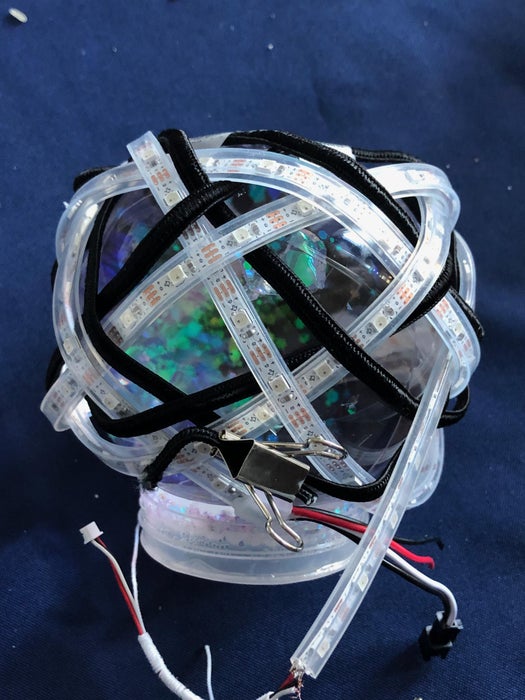
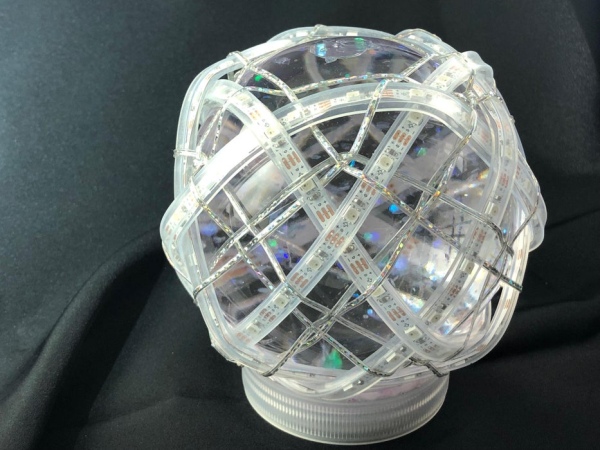
2 metres of NeoPixel coils around the snow globe in Adafruit’s DIY snow globe kit 5 times with just a smidge of overlap. If you decide that you, too, want to tie a knot with your LED strip you need to pick a knot. You could use a 4m spool of the same and make a 10 line knot, or solder more lengths together for even more complicated globe knots. Whatever you choose, first cut cord of the desired length and tie the knot in textile first. It is a much more durable and congenial medium. For my knot, I chose the 6 bight 5 lead cylindrical braid knot (more popularly known as a Turk’s Head Knot).
The main purpose of first modelling your path in cord is so that the LED strip experiences as little manipulation as possible. Minimize the opportunities for metal and wire to kink unfavourably or work harden unnecessarily. The snow globe is a very slippery substructure or armature, so I tied my knot, adjusted it until I liked the coverage, and taped the top of my knot in place.
Step 2: Follow With LEDs
While it might be possible to execute this (or similar) project with the bare NeoPixel strip, my strip has the weatherproof plastic sheath which, I believe, makes it able to withstand slightly rougher handling. Starting near the base of the snow globe, to better hide the join and extra wires, trace the path of the cord with your LED strip. Overs are easy, but when undering, watch the slack carefully to make sure that you don’t end up twisting, firmly kinking, or actually folding your strip.
Step 3: Secure the LED Strip
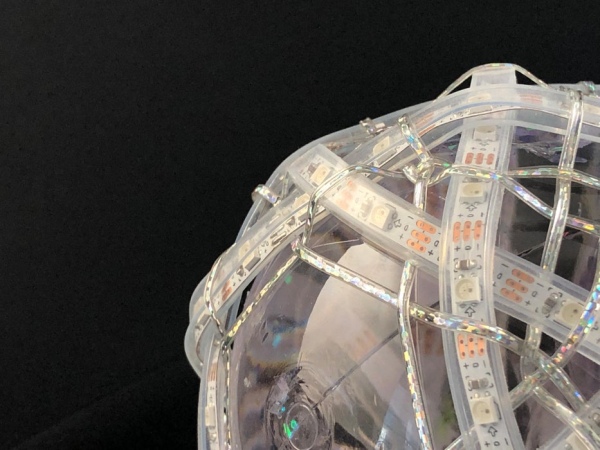
I had expected the sheath to be more grippy, but my knot was still too loose and slippy over the snow globe, so I retraced my knot with a decorative support cord (hologram scoubidou). To add structure and take up more space, when tracing with my support cord: where the original overs, the support cord unders and vice versa. For a more symmetric design, I traced the pattern twice, once on each side of the original. I call this decorative technique “reverse outlining”.
If you cannot find, or dislike, holographic scoubidou, other options to consider might be transparent fishing line, metallic thread, actual wire, or just gluing the strip directly to the globe.
Step 4: Program the LEDs
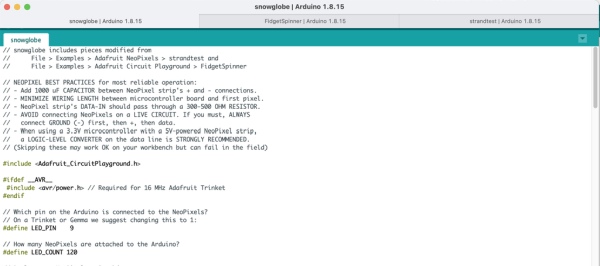
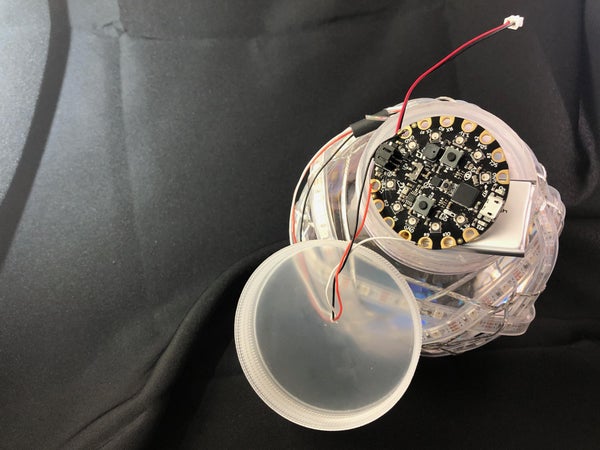
At this point, I alligator clipped the wires from my NeoPixel strip to the Circuit Playground while plugged into my Mac. Using the Arduino IDE I modified File > Examples > Adafruit NeoPixels > strandtest and kludged in pieces from File > Examples > Adafruit Circuit Playground > FidgetSpinner for interruptible timing and sensor handling. The FidgetSpinner code watches for side to side flicking motions which I modified to detect turning over the snow globe (z-axis inversion).
The Circuit Playground itself would be lighting up the inside of the snow globe from below, so I gave it an animation to hopefully maximize glitter sparkle, with colours to match whatever was happening with the strip at the time.
Step 5: Final Assembly
For the innards of the globe, I mostly followed Adafruit’s snow globe example of distilled water with 2 tsp glycerine and chunky glitter to taste (this DIY recipe recommends tinsel glitter, which I could not source online in Canada, at least during plague times, but based on my results, this seems like sound advice). Keeping the surfaces dry is obviously futile in a water filled snow globe situation, although I did wipe the inside edge of the globe. Apply liberal amounts of glue to the sides of the plug and cap your globe. Then apply more glue around the join of plug to globe from the outside for good measure. Let dry overnight before you trust your electronics to the seal (I store my globe upside down just for paranoia sake).
Speaking of electronics, I removed the wiring attached to my NeoPixel strip and soldered longer, thinner wires in their place. Applied heat shrink tubing to reinforce the join, although that could also have been done with the hot glue used to tack down and secure the cord and LED strip ends.
Drill a hole in the centre of the screw cap, feed the wires through and solder as appropriate to your Circuit Playground. Install battery and cap the works. Enjoy! 😎
Source: Rainbow Knotted LED Snow Globe