Summary of Cheap and Simple Arduino Eggbot
This Instructables shows how to build a low-cost Arduino-based plotter that draws on eggs and other spherical objects using common parts, plywood, toy tires, PVC, and simple assembly. It covers making a plywood case, egg mounts, a pen holder with a servo-actuated second axis, wiring, and software installation (video and download link provided).
Parts used in the Cheap and Simple Arduino Eggbot:
- Arduino Uno
- 2x Stepper motor 28BYJ-48
- 2x ULN2003 stepper motor control boards
- Power supply 12V
- Servo SG90
- Plywood (7.5 mm)
- Bearing
- Bolts
- Nuts
- Tires from a toy car
- PVC plastic
- Pen (and pen cap)
- Washers
- Glue and various tools
In this Instructables I want to show how to make a simple and cheap arduino plotter that can draw on eggs or other spherical objects. In addition, soon Easter and this homemade will be very handy
Step 1: Watch the Video
Step 2: Materials
List of materials:
-Arduino Uno
-2х Stepper motor (28BYJ-48)
-2x Stepper motor control boards (ULN2003)
-Power supply for 12V +
-Servo (sg90)
– Plywood (7.5 mm)
– Bearing
-Bolts
-Nuts
-Тires from a toy car
-PVC plastic
-Pen
And various tools
Step 3: Case
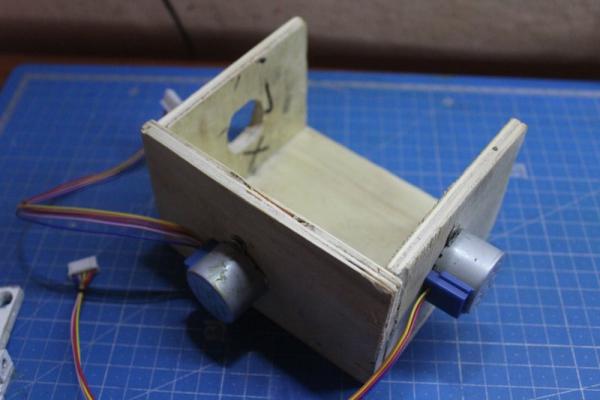
To begin with, we’ll build the case. First of all, you need to cut out billets from the plywood with dimensions: 120×90 and 120×80 and two more blanks with dimensions: 90×70. Then with a 10mm drill, make a hole like in the photo and still need to make a hole for the bearing and insert it there. After that, everything needs to be glued together. After drying, it is necessary to fasten in the indicated places of the stepper motor
Step 4: Mounts for Eggs
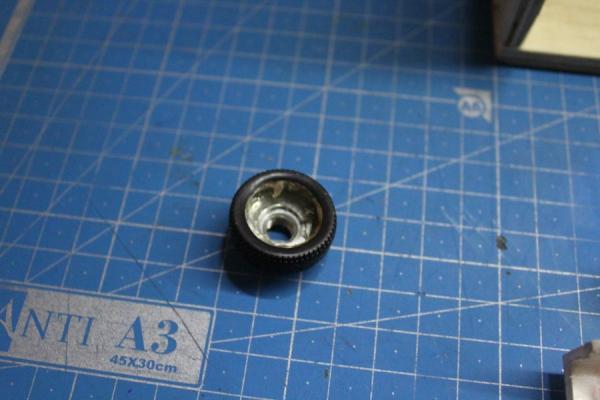
Mounts for eggs made with: tires from a toy car, circles of PVC plastic, nuts, washers, bolts and a handle from the handle that perfectly adjusts to the motor shaft. After gluing all the way as in the photo you need to insert a bolt into the bearing and fix it there with the help of a nut. Bolt one more nut (it is used as a lock nut) and then screw one part of our holder. On the engine, wear our other piece with the cap from the pen
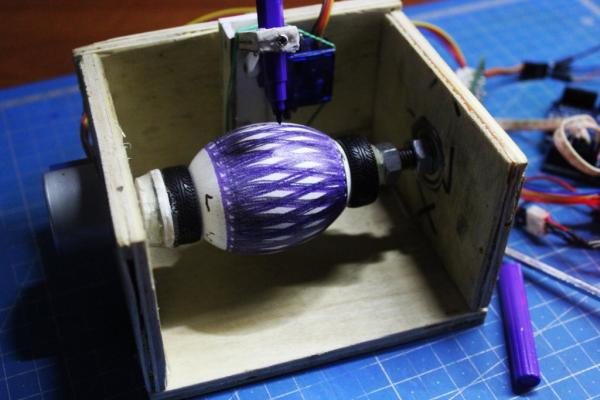
Step 5: The Pen Holder and the Second Axis
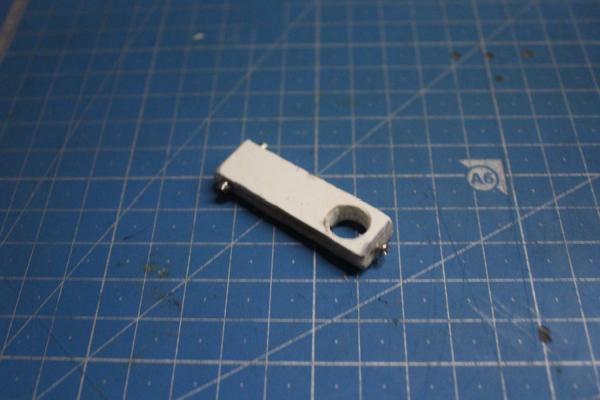
The handle holder and the second axis I made of PVC plastic. To connect this axis with the stepper motor, I also used a cap from the handle. The servo is screwed to this part as in the photo.
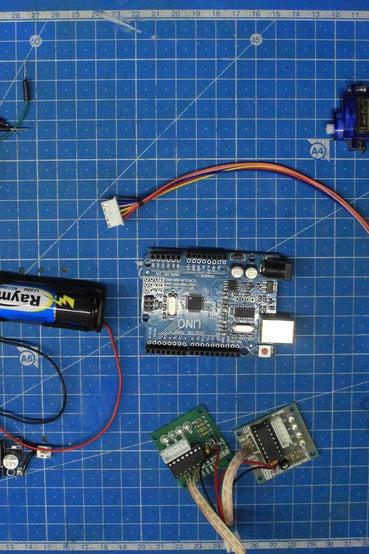
Step 6: Circuits and Software
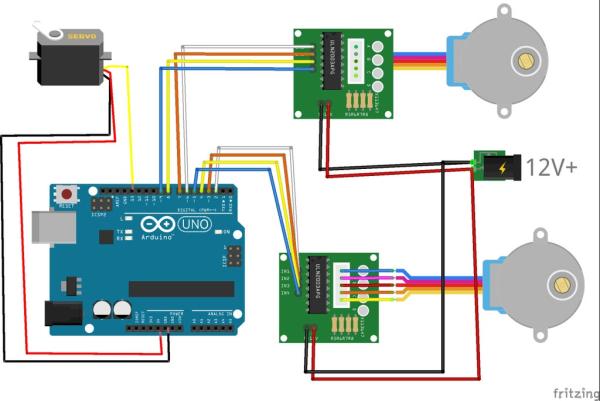
In detail about the installation of the software you will learn in the video on the 11th minute
Software: https://drive.google.com/file/d/1hm_65HLByGXMsDwqKbeTmxwxzDT6B4lS/view?usp=sharing
Step 7: The End
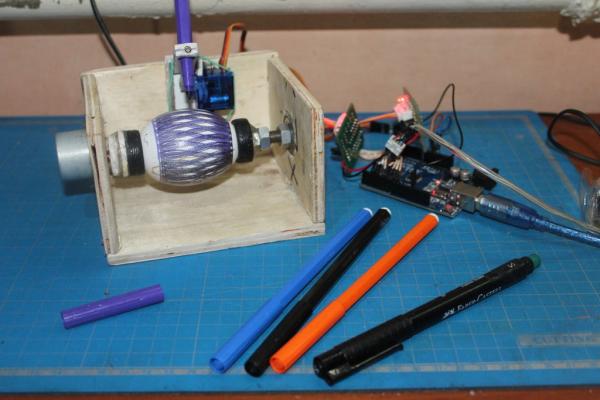
That’s it. Now you need to fix the egg in our plotter and start creating. Good Easter !!!
Source: Cheap and Simple Arduino Eggbot
- What does this project make?
A simple and cheap Arduino plotter that can draw on eggs or other spherical objects. - What electronics are required?
An Arduino Uno, two 28BYJ-48 stepper motors with two ULN2003 driver boards, a SG90 servo, and a 12V power supply. - How is the egg mounted?
The egg mount is made from toy car tires, PVC circles, bolts, nuts, washers, and a bearing assembled and fixed to the motor shaft. - What materials are used for the case?
The case is built from 7.5 mm plywood cut to specified dimensions and glued together with holes drilled for bearings and motors. - How is the pen held and actuated?
The pen holder and second axis are made from PVC plastic; a servo is screwed to this part and a pen cap is used to connect to the stepper motor. - Is there software provided?
Yes; software installation is detailed in the video at minute 11 and a download link is provided in the article. - Where can I watch assembly guidance?
The article links to a video demonstration on YouTube for step-by-step assembly. - Do I need special tools?
No special tools are listed beyond common tools for cutting plywood, drilling (10 mm hole), gluing, and fastening bolts and nuts.