
Summary of Anti-Sunflower – Points to Your Darkness!
This article details the creation of an "Anti-Sunflower," a project where a servo-mounted flower turns toward darkness using three Light Dependent Resistors (LDRs). The Arduino board reads light levels from each sensor to calculate the optimal angle, driving the motor away from bright areas. The build involves soldering components onto a PCB, mounting the mechanism in a pot with soil, and uploading custom code to control the movement.
Parts used in the Anti-Sunflower:
- 3 LDRs
- 3 10k Ohm resistors
- A servo motor
- Arduino Board
- Few Jumper wires
- Soldering Kit
- Perforated PCB
- Small Pot
- Dry soil
Since childhood, I always wanted to try my hands on electronics. Recently I bought the Arduino and started exploring it. In this process, I got to know more about Light Dependent Resistors (LDR).
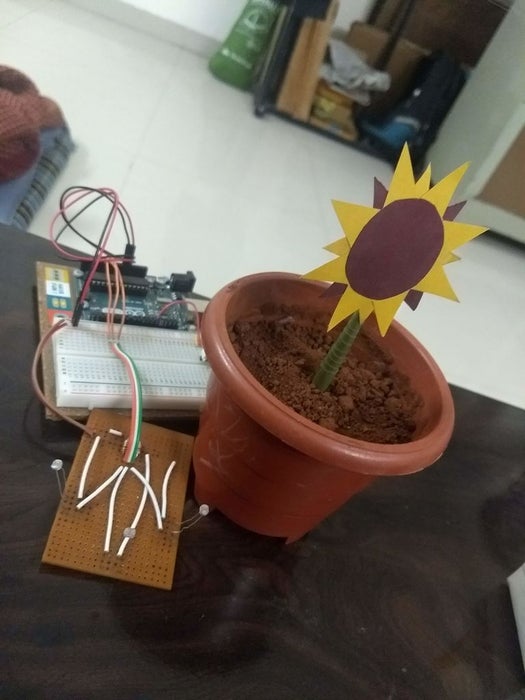
Somehow, I stumble across this idea. Basically, it’s an electric sunflower which does the opposite of actual sunflower. It points to the darkness!!!
Step 1: Stuff You Need
- 3 LDRs
- 3 10k Ohm resistors
- A servo motor
- Arduino Board
- Few Jumper wires
- Soldering Kit
- Perforated PCB
- Small Pot along with some dry soil.
Step 2: The Circuit
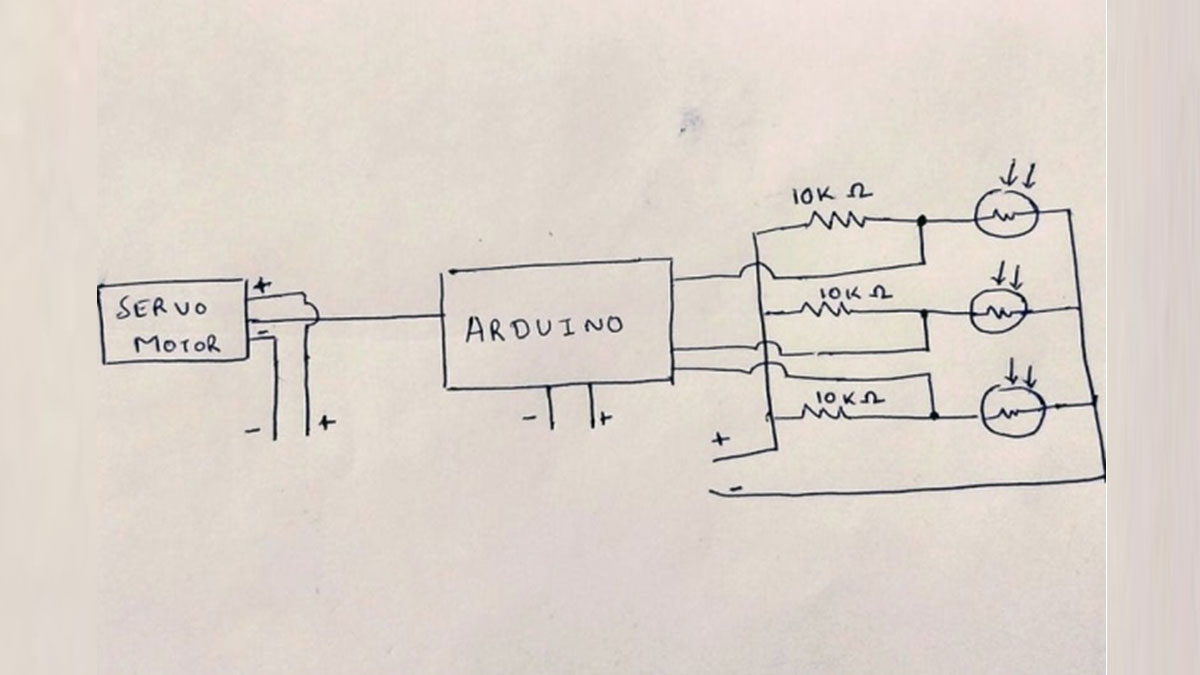
The crux is each LDR is responsible for an angle, left for 180 degrees, middle one for 90 degrees and right one for 0 degrees. For example, if the middle LDR not receiving any light and other LDRs are getting some light then
Arduino will receive following input:
- Left LDR => HIGH
- Middle LDR => LOW
- Right LDR => HIGH
Based on this input, Arduino can compute the angle (90 degrees in this case) and send this information to the servo motor.
Step 3: The Code
In layman terms, that’s what the code does:
- It takes input from 3 LDRs.
- Using this input, it calculates the amount of light each LDR is getting.
- Now, it computes the angle it should go. For example if the right & middle LDR both are not getting any light, then the angle calculated will be 45 degrees (Mid angle of 0 degree & 90 degree is 45 degrees).
Find the code here.
Step 4: Build the Circuit
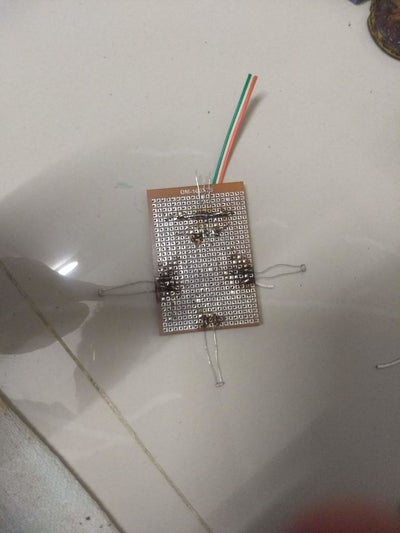
Use Perforated PCB to solder resistor and LDRs. Use the Arduino breadboard for connecting PCB and servo motor. Upload the code and test.
Step 5: Plant the Anti-sunflower
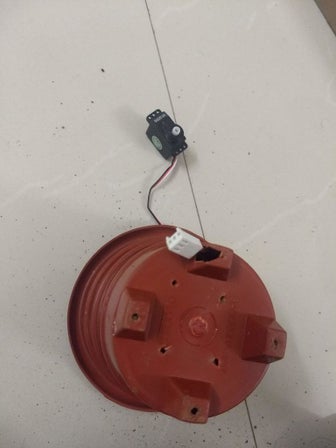
I’ve used a small pot and made a hole in it to pass the wires. Put some soil, keep the servo motor, add some more soil. Then just connect the servo motor with Arduino and you’re done!
Step 6: The Flower in Action
Source: Anti-Sunflower – Points to Your Darkness!
- What is the main function of this electric sunflower?
It points to the darkness instead of the light like a real sunflower. - How many LDRs are required for the circuit?
The project requires exactly three LDRs. - Which component is responsible for calculating the angle based on light input?
The Arduino computes the angle based on inputs from the three LDRs. - Can you explain how the left LDR is mapped?
The left LDR is responsible for the 180-degree angle position. - What happens if only the middle LDR receives no light?
The system calculates the angle as 90 degrees. - Where should the resistor and LDRs be soldered?
You should use a Perforated PCB to solder these components. - How do you connect the PCB to the servo motor?
Use the Arduino breadboard to connect the PCB and the servo motor. - What is the purpose of making a hole in the small pot?
The hole allows wires to pass through when planting the anti-sunflower. - Does the code handle cases where two sensors detect darkness?
Yes, if two sensors are dark, it calculates a mid-angle between their positions. - What material is placed inside the pot to secure the motor?
Dry soil is added around the servo motor to hold it in place.
