Home > Projects > GPS Based Projects > Simulate GPS/Read Photoresistor with MKR1000/ADAFRUIT

Simulate GPS/Read Photoresistor with MKR1000/ADAFRUIT

Summary of Simulate GPS/Read Photoresistor with MKR1000/ADAFRUIT


This article demonstrates an IoT project using an Arduino MKR1000 to read a photoresistor and simulate GPS data, publishing both to the Adafruit IO platform. The author explains how to set up feeds, connect via MQTT, and use simulated coordinates for testing before deploying real hardware. The code includes logic for analog reading, data formatting, and connection handling, providing a practical guide for beginners learning IoT development with Adafruit's ecosystem.

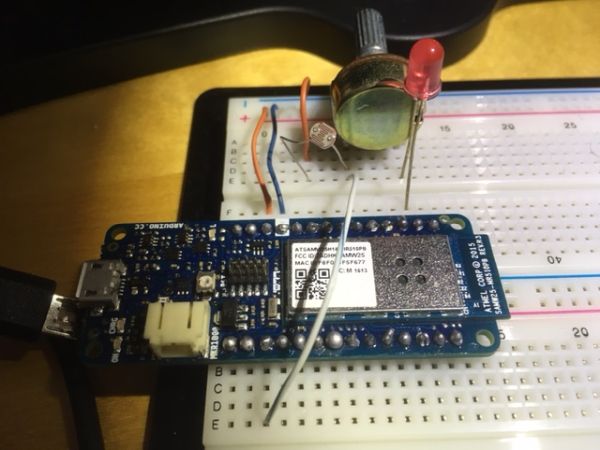
Parts used in the Simulate GPS/Read Photoresistor Project:

  • Arduino MKR1000
  • Photo resistor
  • Resistor 1k ohm
  • Arduino IDE
  • ADAFRUIT IO

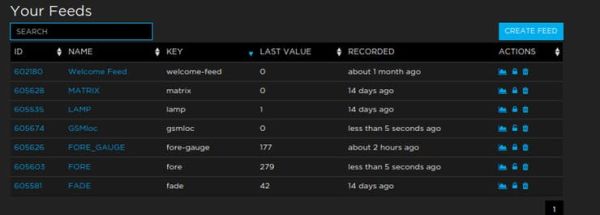
“ADAFRUIT IO” makes IoT for everyone. Here we publish the data from a photo-resistor and a simulated GPS.
Things used in this project

Hardware components

Arduino MKR1000
Arduino MKR1000
× 1
Photo resistor
Photo resistor
× 1
Resistor 1k ohm
Resistor 1k ohm
× 1

Software apps and online services

Arduino IDE
Arduino IDE
ADAFRUIT IO

Story

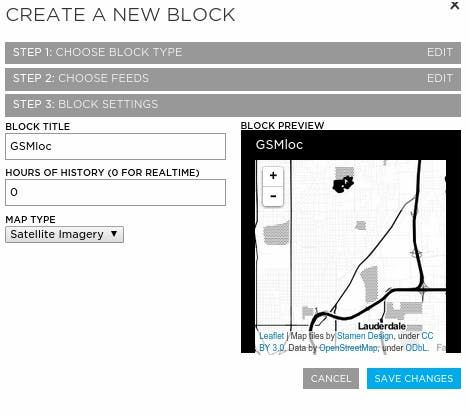
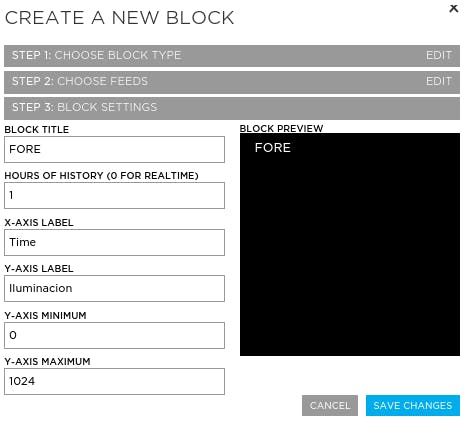
Here how to set up the blocks in ADAFRUIT:
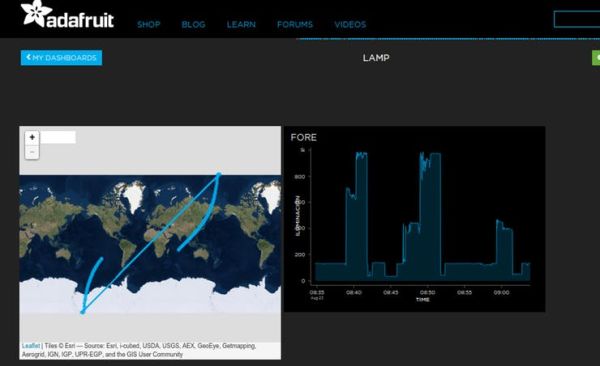
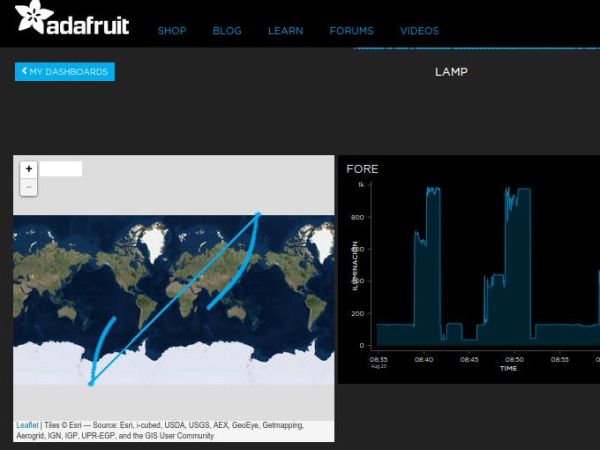
Here how the dashboard and feed look like in ADAFRUIT IoT:

Screenshot from 2016-08-23 12_08_03

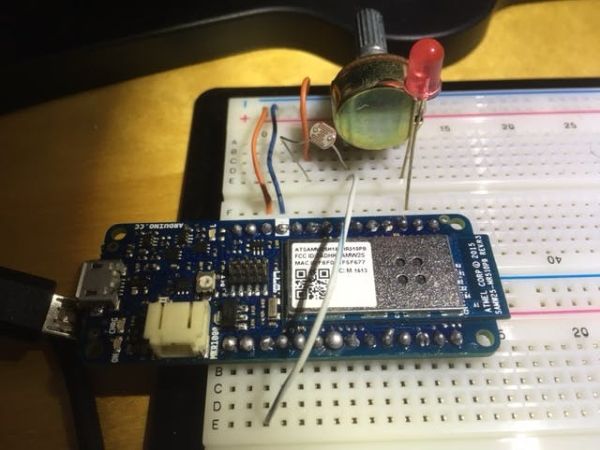
Schematics

Code

/***************************************************
 * This proyect is based on information provided from ADAFRUIT
 * And is implemented and adapted for MKR1000. Juan Santana 23.08.2016
 * 
 * 
  Adafruit MQTT Library ESP8266 Example
  Must use ESP8266 Arduino from:
    https://github.com/esp8266/Arduino
  Works great with Adafruit's Huzzah ESP board:
  ----> https://www.adafruit.com/product/2471
  Adafruit invests time and resources providing this open source code,
  please support Adafruit and open-source hardware by purchasing
  products from Adafruit!
  Written by Tony DiCola for Adafruit Industries.
  Adafruit IO example additions by Todd Treece.
  MIT license, all text above must be included in any redistribution
 ****************************************************/
//#include <ESP8266WiFi.h>
#include <SPI.h>
#include <WiFi101.h>
#include "Adafruit_MQTT.h"
#include "Adafruit_MQTT_Client.h"
#include <math.h>

// function prototypes
void connect(void);

/****************************** Pins ******************************************/


/************************* WiFi Access Point *********************************/

#define WLAN_SSID       "sss"      //your WIFI network
#define WLAN_PASS       "sss" // your WIFI passwd

/************************* Adafruit.io Setup *********************************/

#define AIO_SERVER      "io.adafruit.com"
#define AIO_SERVERPORT  1883
#define AIO_USERNAME    "ssss" // ADAFRUIT ID
#define AIO_KEY         "sss" //ADAFRUIT 

/************ Global State (you don't need to change this!) ******************/

// Create an ESP8266 WiFiClient class to connect to the MQTT server.
WiFiClient client;

// Store the MQTT server, client ID, username, and password in flash memory.
// This is required for using the Adafruit MQTT library.
const char MQTT_SERVER[] PROGMEM    = AIO_SERVER;
// Set a unique MQTT client ID using the AIO key + the date and time the sketch
// was compiled (so this should be unique across multiple devices for a user,
// alternatively you can manually set this to a GUID or other random value).
const char MQTT_CLIENTID[] PROGMEM  = __TIME__ AIO_USERNAME;
const char MQTT_USERNAME[] PROGMEM  = AIO_USERNAME;
const char MQTT_PASSWORD[] PROGMEM  = AIO_KEY;

// Setup the MQTT client class by passing in the WiFi client and MQTT server and login details.
Adafruit_MQTT_Client mqtt(&client, MQTT_SERVER, AIO_SERVERPORT, MQTT_CLIENTID, MQTT_USERNAME, MQTT_PASSWORD);

/****************************** Feeds ***************************************/

// Setup a feed called 'lamp' for subscribing to changes.
// Notice MQTT paths for AIO follow the form: <username>/feeds/<feedname>
//const char LAMP_FEED[] PROGMEM = AIO_USERNAME "/feeds/lamp";
//const char FADE_FEED[] PROGMEM = AIO_USERNAME "/feeds/fade";
const char FORE_FEED[] PROGMEM = AIO_USERNAME "/feeds/fore";
//const char FORE_GAUGE_FEED[] PROGMEM = AIO_USERNAME "/feeds/fore_gauge";
//const char MATRIX_FEED[] PROGMEM = AIO_USERNAME "/feeds/matrix";
const char GSMLOC_FEED[] PROGMEM = AIO_USERNAME "/feeds/gsmloc/csv";

//Adafruit_MQTT_Subscribe lamp = Adafruit_MQTT_Subscribe(&mqtt, LAMP_FEED);
//Adafruit_MQTT_Subscribe fade = Adafruit_MQTT_Subscribe(&mqtt, FADE_FEED);

Adafruit_MQTT_Publish fore = Adafruit_MQTT_Publish(&mqtt, FORE_FEED);
//Adafruit_MQTT_Publish fore_gauge = Adafruit_MQTT_Publish(&mqtt, FORE_GAUGE_FEED);
//Adafruit_MQTT_Publish matrix = Adafruit_MQTT_Publish(&mqtt, MATRIX_FEED);
Adafruit_MQTT_Publish gsmloc = Adafruit_MQTT_Publish(&mqtt, GSMLOC_FEED);


/*************************** Sketch Code ************************************/

//Setup general variables
int val = 0;
int val_AnalogIn_A = 0;
int var = 0;
int var_long = 0;
float var_1 = 0.3;

int volt_FR = 0;

#include <SD.h>
#include <stdio.h>
//File *myFile;


// function for MKR1000 in order to get the GPS in a proper format
char *dtostrf (double val, signed char width, unsigned char prec, char *sout) {
  char fmt[20];
  sprintf(fmt, "%%%d.%df", width, prec);
  sprintf(sout, fmt, val);
  return sout;
}

void setup() {

  // set pins


  // set Serial comm
  Serial.begin(9600);
  delay(2000);

  //ADAFRUIT test
  Serial.println(F("Adafruit IO Example"));

  // Connect to WiFi access point.
  Serial.println(); Serial.println();
  delay(5000);
  Serial.print(F("Connecting to "));
  Serial.println(WLAN_SSID);

  WiFi.begin(WLAN_SSID, WLAN_PASS);
  while (WiFi.status() != WL_CONNECTED) {
    delay(5000);
    Serial.print(F("."));
  }
  Serial.println();

  Serial.println(F("WiFi connected"));
  //Serial.println(F("IP address: "));
  //Serial.println(WiFi.localIP());


 // print your WiFi shield's IP address:
  IPAddress ip = WiFi.localIP();
  Serial.print("IP Address Arduino MKR1000: ");
  Serial.println(ip);


  // connect to adafruit io
  connect();

}

void loop() {

//define GPS information in a proper data structure
char sendbuffer[120];
uint32_t x=0;
float latitude, longitude, speed_kph, heading, speed_mph, altitude;

//ADAFRUIT handshake
  Adafruit_MQTT_Subscribe *subscription;

  // ping adafruit io a few times to make sure we remain connected
  if(! mqtt.ping(3)) {
    // reconnect to adafruit io
    if(! mqtt.connected())
      connect();
  }


  //prepare data to publish in ADAFRUIT : Photoresistor value and GPS data (simulated in this case)
  
  //Get the PhotoResistor value in Pin A! in MKR1000
  val_AnalogIn_A = analogRead(A1);

  //print out in the serial monitor to check
      Serial.print("Analog In A1 : ");
      Serial.println(val_AnalogIn_A);

      // Grab the current state of the sensor for ADAFRUIT
      int32_t fore_data = val_AnalogIn_A;

       // Publish data

  if (! fore.publish(fore_data)) {
    Serial.println(F("Failed"));
  } else {
    Serial.println(F("OK!"));
  }


    //GPS handshake
   char *p;

    // paste in 'value' first, just an incrementer for GSMLoc
    itoa(x, sendbuffer, 10);
    p = sendbuffer+strlen(sendbuffer);
    p[0] = ','; p++;

    // concat latitude
    latitude =-90 + var + var_1;
    dtostrf(latitude, 2, 6, p);
    p += strlen(p);
    p[0] = ','; p++;
    var++;


    // concat longitude
    longitude =-180 + var_long + var_1;
    
    dtostrf(longitude, 3, 6, p);
    p += strlen(p);
    p[0] = ','; p++;
    p[0] = '0'; p++;  // 0 altitude
    // null terminate
    p[0] = 0;
    var_long++;

    if (var == 180)
    {
      var = 0;
      var_1 = var_1 + 0.01;
    }

     if (var_long == 360)
    {
      var_long = 0;
      var_1 = var_1 + 0.02;
    }

    Serial.print("Sending simulated coordinate: "); Serial.println(sendbuffer);
    
    if (! gsmloc.publish(sendbuffer)) {
      Serial.println(F("Failed GPS send info"));
      //txfailures++;
    } else {
      Serial.println(F("send buffer GPS OK!"));
      //txfailures = 0;
    }
  
  delay(100);

  }


// connect to adafruit io via MQTT
void connect() {

  Serial.print(F("Connecting to Adafruit IO... "));

  int8_t ret;

  while ((ret = mqtt.connect()) != 0) {

    switch (ret) {
      case 1: Serial.println(F("Wrong protocol")); break;
      case 2: Serial.println(F("ID rejected")); break;
      case 3: Serial.println(F("Server unavail")); break;
      case 4: Serial.println(F("Bad user/pass")); break;
      case 5: Serial.println(F("Not authed")); break;
      case 6: Serial.println(F("Failed to subscribe")); break;
      default: Serial.println(F("Connection failed")); break;
    }

    if(ret >= 0)
      mqtt.disconnect();

    Serial.println(F("Retrying connection..."));
    delay(5000);

  }

  Serial.println(F("Adafruit IO Connected!"));

}

Source : Simulate GPS/Read Photoresistor with MKR1000/ADAFRUIT

Quick Solutions to Questions related to Simulate GPS/Read Photoresistor Project:

  • How can I learn to publish data with Adafruit IO?
    You can learn by trying and making projects yourself with real hardware like the MKR1000, as the platform provides many examples.
  • Can I simulate GPS data before buying real hardware?
    Yes, it is recommended to generate simulated coordinates prepared according to the FONA 808 format to test the interface before purchasing hardware.
  • What hardware components are required for this project?
    The project requires an Arduino MKR1000, a photo resistor, and a 1k ohm resistor.
  • Does the code handle WiFi connection errors?
    Yes, the code includes a loop that retries the connection every 5 seconds if the status is not WL_CONNECTED.
  • What is the purpose of the serial monitor in this setup?
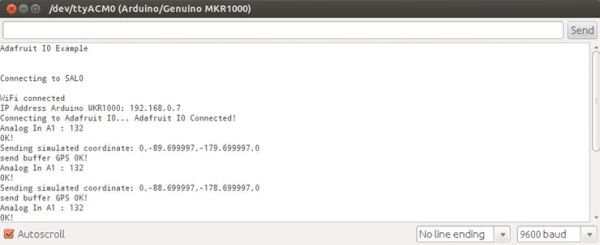
    The serial monitor displays information to control if all processes are running OK and shows the analog input values and simulated coordinates.
  • How does the code simulate latitude and longitude changes?
    The code uses incrementing variables (var and var_long) combined with a float value (var_1) to generate changing coordinate strings in a specific CSV format.
  • Which library is used to connect to the MQTT server?
    The project uses the Adafruit MQTT Library along with the WiFi101 library for the MKR1000.
  • What happens if the MQTT connection fails during the loop?
    The code attempts to ping the server; if the ping fails or the client is not connected, it calls the connect function to reconnect.

About The Author

Ibrar Ayyub

I am an experienced technical writer holding a Master's degree in computer science from BZU Multan, Pakistan University. With a background spanning various industries, particularly in home automation and engineering, I have honed my skills in crafting clear and concise content. Proficient in leveraging infographics and diagrams, I strive to simplify complex concepts for readers. My strength lies in thorough research and presenting information in a structured and logical format.

Follow Us:
LinkedinTwitter
Scroll to Top