Create your Blynk mobile app to monitor your garden and activate the irrigation.
Things used in this project
Hardware components |
||||||
 |
|
× | 1 | |||
 |
|
× | 1 | |||
 |
|
× | 1 | |||
Software apps and online services |
||||||
|
||||||
Story
In this tutorial we are going to learn how to use the Blynk app to monitor and control the status of our irrigation system.
Blynk setup
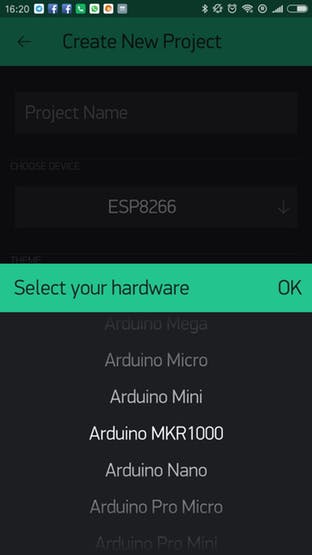
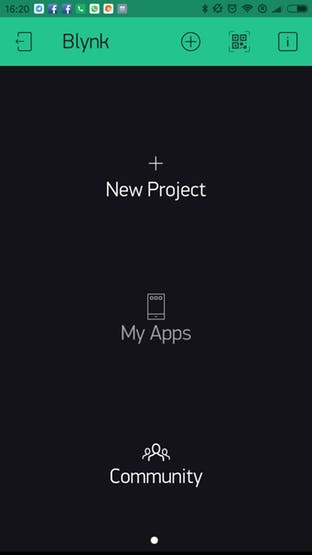
First of all you need to download the Blynk app on your smartphone and create an account. Then we can start creating a new project, select from the list your hardware and we are ready to go.
The Arduino Code
Now we need to figure out the code that needs to go to our MKR1000.
Blynk has a very big and well documented code tutorial selection on the https://examples.blynk.cc website.
Lets’s start by opening the push data example [https://examples.blynk.cc/?board=Arduino%20MKR1000&shield=Arduino%20WiFi%20Shield%20101&example=GettingStarted%2FPushData ]
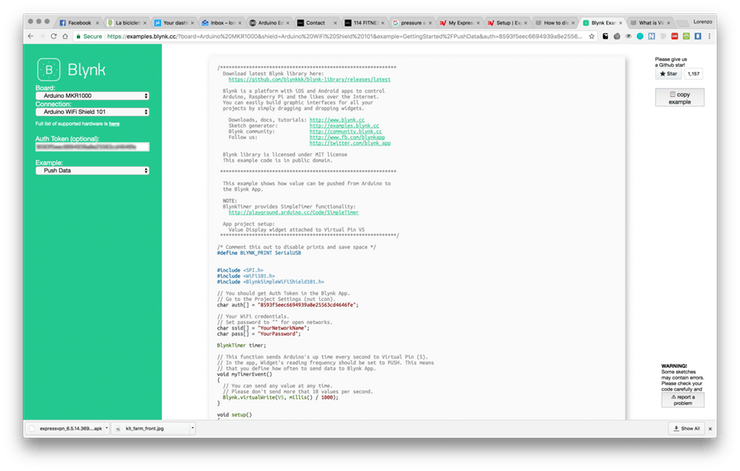
As you can see on the left you can select the type of board you have and the way it will be connected to the internet. Also, at the end of the setup process you should have received an email with a new Auth token, that you need to use for the project.
If you insert the token in the field in the left the Arduino sketch should change accordingly…. You are almost ready to upload this to your board.
The only missing piece is the Arduino Blynk library. open the library manager, look for it and proceed with the installation.
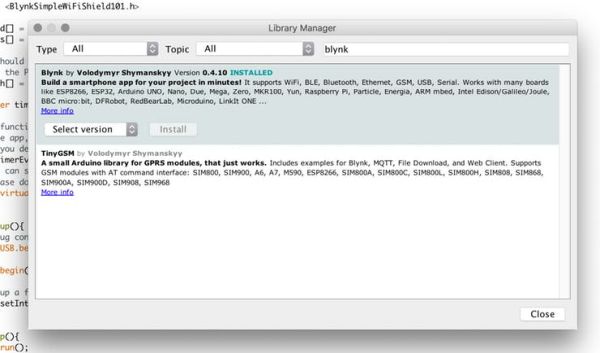
At this point just copy the code from the blynk example and upload it to your board.
[at the time I’m writing this Article the Web Ide cannot compile the sketch, probably due to some issue with different library versions, with the Java IDE you should not encounter any problem. keep an eye on this github issue]
Let’s look a bit at the code:
void setup(){
 // Debug console
 SerialUSB.begin(9600);
 Blynk.begin(auth, ssid, pass);
 // Setup a function to be called every second
 timer.setInterval(1000L, myTimerEvent);
}
the setup function only start the blink library and defines the timer interval; every 1000s calls the “myTimerEvent”.
void myTimerEvent(){
 // You can send any value at any time.
 // Please don't send more that 10 values per second.
 Blynk.virtualWrite(V5, millis() / 1000);
}
The myTimerEvent() is a function that every time it gets called writes the amout of seconds that has passed since the start of the start of the program to a “virtualPin“.
The virtualWrite function together with the virtualPin are a very easy way to send data from the Arduino board to the Blynk app. The virtual Pin is just a way to assign a id to the value you are writing so that it is easier to then get find it from within the app, …Don’t worry, everything will get more clear very soon as we start configuring our app.
void loop(){
 Blynk.run();
 timer.run(); // Initiates BlynkTimer
}
The loop() function only make things run.
Keep in mind that since data are going trough the internet, and trough the Blynk servers, you cannot send too many data, too many often. If the Server detects that you are sending value more that 10 times per second it will disconnect your device.
For this reason you should avoid using virtualWrite function inside the loop but use the nice timing utility offered by the library.
Configure your app
Open the Blync app again an open your project.
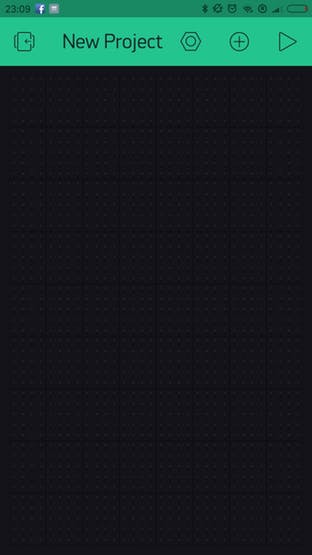
click on the plus icon on the top right to add a widget to your control panel.
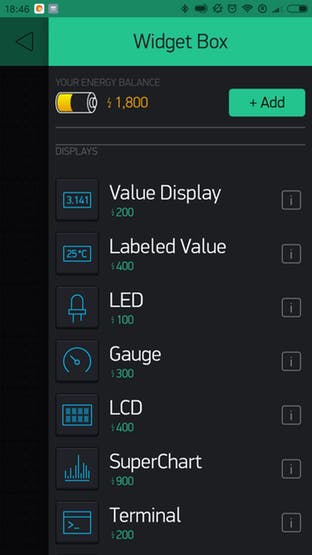
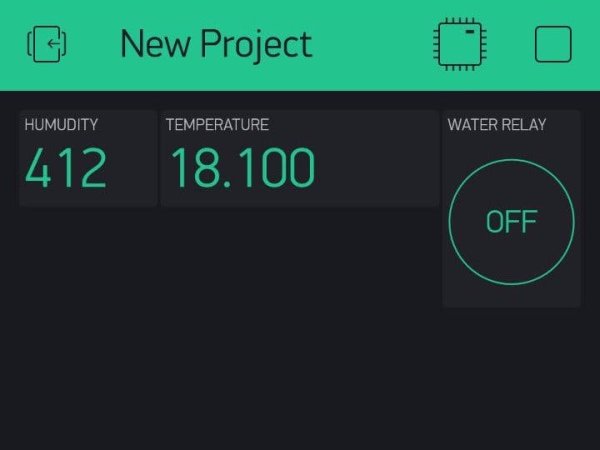
Select the Value display. You should now see a empty box on your screen.
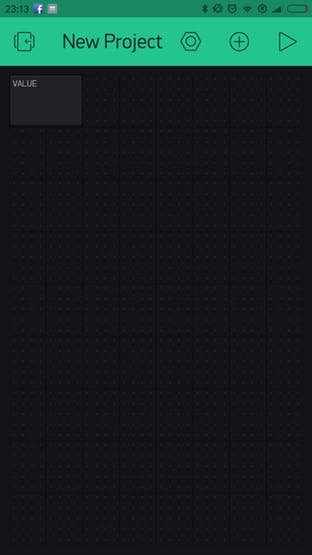
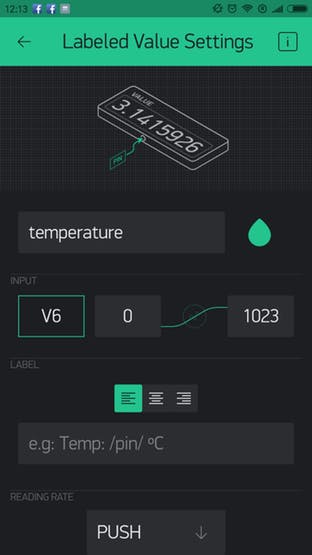
Double tap on it to edit its settings.
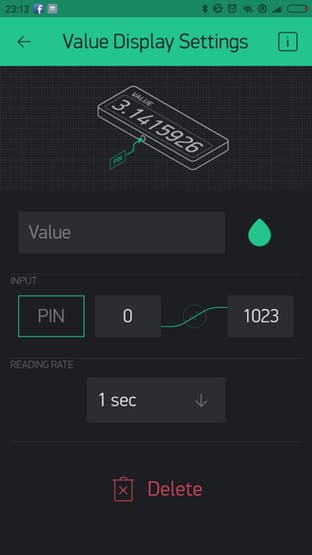
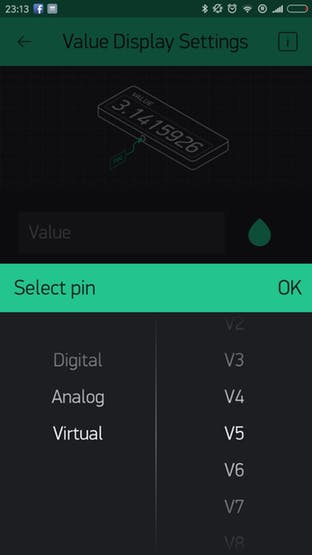
First of all we should configure the type of input. click on the PIN button and select Virtual as pin type; and V5 as pin number, Do you remember theBlynk.virtualWrite(V5, millis() / 1000); function in our Arduino code?
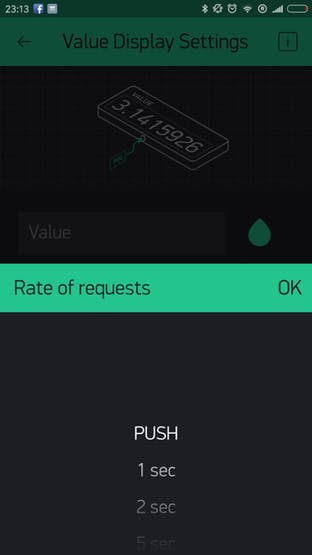
Now configure the reading rate. As we are controlling ourself how often the value get pushed to the board you can just set it to PUSH
Now you should be all set! go back to the project screen in your app and click on the play icon on the top right edge of the app.
You should see the value changing every second.
Getting the real data
Now that we know how to send a single value to the board, we can actually send the real value we read from the sensor to the Blynk app.
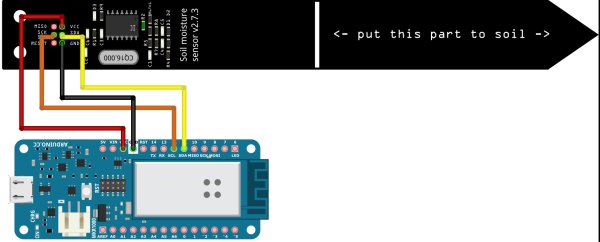
Connect the i2c soil moisture sensor to your Arduino as shown below.
Prepare the Blynk app to show one more value in the dashboard. And configure it as pin V6.
The provided code below reads the soil temperature and humidity values and sends the data to the Blynk app every 1s.
Just replace the auth, ssid, and pass value with your network and authentication settings.
#define BLYNK_PRINT SerialUSB
#include <SPI.h>
#include <WiFi101.h>
#include <BlynkSimpleWiFiShield101.h>
// You should get Auth Token in the Blynk App.
// Go to the Project Settings (nut icon).
char auth[] = "xxxxxxxx";
// Your WiFi credentials.
// Set password to "" for open networks.
char ssid[] = "xxxxxxxx";
char pass[] = "xxxxxxxx";
#include <I2CSoilMoistureSensor.h>
#include <Wire.h>
I2CSoilMoistureSensor soilMoistureSensor(0x60);
float soilTemperature;
int soilMoisture=0;
BlynkTimer timer=0;
// This function sends Arduino's up time every second to Virtual Pin (5).
// In the app, Widget's reading frequency should be set to PUSH. This means
// that you define how often to send data to Blynk App.
void myTimerEvent()
{
 ///////////////////////////////////////////////
 //get all the data from the soul moisture sensor
 ///////////////////////////////////////////////
  while (soilMoistureSensor.isBusy()) delay(50); // available since FW 2.3
  soilMoisture=soilMoistureSensor.getCapacitance();
  soilTemperature=soilMoistureSensor.getTemperature()/(float)10;
  soilMoistureSensor.sleep(); // available since FW 2.3
 ///////////////////////////////////////////////
 //Send the data to blynk
 ///////////////////////////////////////////////
 // You can send any value at any time.
 // Please don't send more that 10 values per second.
 Blynk.virtualWrite(V5,soilMoisture );
 Serial.println(soilMoisture);
 Blynk.virtualWrite(V6,soilTemperature );
 Serial.println(soilTemperature);
}
void setup()
{
 // Debug console
 SerialUSB.begin(9600);
 Blynk.begin(auth, ssid, pass);
 // Setup a function to be called every second
 timer.setInterval(1000L, myTimerEvent);
  soilMoistureSensor.begin(); // reset sensor
  delay(1000); // give some time to boot up
  Serial.print("I2C Soil Moisture Sensor Address: ");
  Serial.println(soilMoistureSensor.getAddress(),HEX);
  Serial.print("Sensor Firmware version: ");
  Serial.println(soilMoistureSensor.getVersion(),HEX);
  Serial.println();
}
void loop()
{
 Blynk.run();
 timer.run(); // Initiates BlynkTimer
}
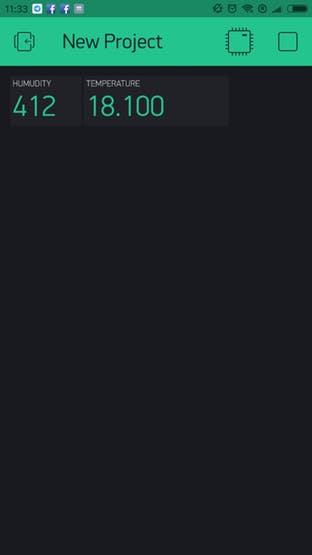
If everything goes as expected you should now see the two values appearing on your app one next to the other.
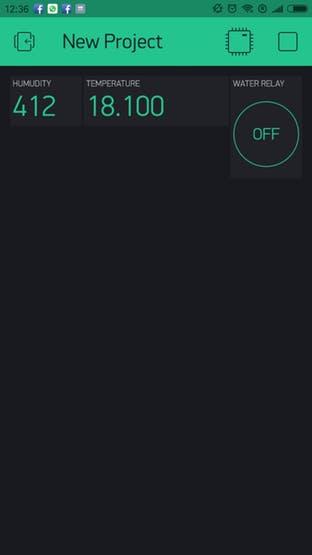
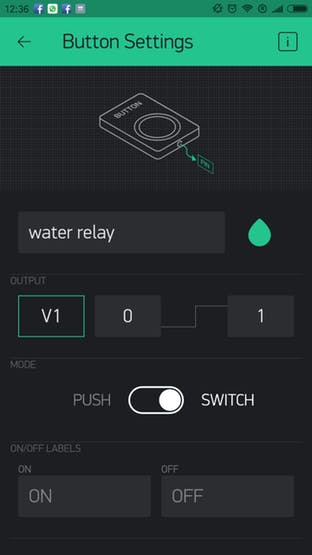
Controlling the relay
With the Blynk app we can also control our Arduino board. Add a button widget to your Blynk interface and configure it as virtual pin V1.
To get the information from the Blynk app to the arduino, the Blynk app provides you with a very handy function:
// This function will be called every time Slider Widget
// in Blynk app writes values to the Virtual Pin 1
BLYNK_WRITE(V1) {
 int pinValue = param.asInt(); // assigning incoming value from pin V1 to a variable
 // You can also use:
 // String i = param.asStr();
 // double d = param.asDouble();
 SerialUSB.print("V1 button is: ");
 SerialUSB.println(pinValue);
 if (pinValue == 1) {
   digitalWrite(relayPin, HIGH);
 } else {
   digitalWrite(relayPin, LOW);
 }
}
The function BLINK_WRITE(V1) will be executed every time you interact with a widget on your blynk interface that is mapped to the virtual pin V1.
To start testing this you can just upload this new code to the board.
#define BLYNK_PRINT SerialUSB
#include <SPI.h>
#include <WiFi101.h>
#include <BlynkSimpleWiFiShield101.h>
// You should get Auth Token in the Blynk App.
// Go to the Project Settings (nut icon).
char auth[] = "xxxxxxxxx";
// Your WiFi credentials.
// Set password to "" for open networks.
char ssid[] = "xxxxxxxxx";
char pass[] = "xxxxxxxxx";
#include <I2CSoilMoistureSensor.h>
#include <Wire.h>
I2CSoilMoistureSensor soilMoistureSensor(0x60);
float soilTemperature = 0;
int soilMoisture = 0;
int relayPin = 6;
BlynkTimer timer;
// This function sends Arduino's up time every second to Virtual Pin (5).
// In the app, Widget's reading frequency should be set to PUSH. This means
// that you define how often to send data to Blynk App.
void myTimerEvent()
{
 ///////////////////////////////////////////////
 //get all the data from the soul moisture sensor
 ///////////////////////////////////////////////
   while (soilMoistureSensor.isBusy()) delay(50); // available since FW 2.3
   soilMoisture=soilMoistureSensor.getCapacitance();
   soilTemperature=soilMoistureSensor.getTemperature()/(float)10;
   soilMoistureSensor.sleep(); // available since FW 2.3
 ///////////////////////////////////////////////
 //Send the data to blynk
 ///////////////////////////////////////////////
 // You can send any value at any time.
 // Please don't send more that 10 values per second.
 Blynk.virtualWrite(V5, soilMoisture );
 Serial.println(soilMoisture);
 Blynk.virtualWrite(V6, soilTemperature );
 Serial.println(soilTemperature);
}
// This function will be called every time Slider Widget
// in Blynk app writes values to the Virtual Pin 1
BLYNK_WRITE(V1) {
 int pinValue = param.asInt(); // assigning incoming value from pin V1 to a variable
 // You can also use:
 // String i = param.asStr();
 // double d = param.asDouble();
 SerialUSB.print("V1 button is: ");
 SerialUSB.println(pinValue);
 if (pinValue == 1) {
   digitalWrite(relayPin, HIGH);
 } else {
   digitalWrite(relayPin, LOW);
 }
}
void setup()
{
 // Debug console
 SerialUSB.begin(9600);
 Blynk.begin(auth, ssid, pass);
 // Setup a function to be called every second
 timer.setInterval(1000L, myTimerEvent);
   soilMoistureSensor.begin(); // reset sensor
   delay(1000); // give some time to boot up
   Serial.print("I2C Soil Moisture Sensor Address: ");
   Serial.println(soilMoistureSensor.getAddress(),HEX);
   Serial.print("Sensor Firmware version: ");
   Serial.println(soilMoistureSensor.getVersion(),HEX);
   Serial.println();
 pinMode(2, OUTPUT);
}
void loop()
{
 Blynk.run();
 timer.run(); // Initiates BlynkTimer
}
By pressing the button on the blynk interface you should now see the led switching on your mkr1000.