
Summary of Interfacing: How to Make an Arduino Uno UltraSonic Range Finder!
This article outlines how to build an Arduino ultrasonic range finder using the HC-SR04 sensor, capable of measuring distances from 2cm to 400cm with 1cm accuracy. It explains the device's operation based on sound wave reflection and lists necessary hardware and software for construction in under an hour.
Parts used in the Arduino Ultrasonic Range Finder:
- HC-SR04 (Ultrasonic Ranging Module)
- Arduino Uno
- 16×2 Alphanumeric LCD (JHD162A)
- Jumper Wires: Male to Female
- Arduino Power Jack Connector
- 9V battery
- Arduino IDE (Software)
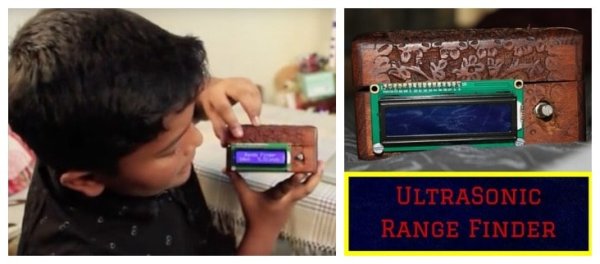
A range finder is a device used to find the distance from a point to the nearest obstacle. This device uses ultrasonic technology to measure the distance. You can consider it like an electronic, hassle-free version of a measuring tape with a measuring range of 2cm to 400cm and an accuracy of 1cm. Typical applications for an Arduino ultrasonic range finder include parking sensors, obstacle warning systems, level controllers, and terrain monitoring devices. You can make your own Arduino ultrasonic range finder in less than an hour using cheap and easily available components.
Required Materials
Hardware:
- HC-SR04 (Ultrasonic Ranging Module )
- Arduino Uno
- 16×2 Alphanumeric LCD (JHD162A)
- Jumper Wires: Male to Female
- Arduino Power Jack Connector
- 9V battery
Software:
How Does it Work?
For this range finder, we use an UltraSonic sensor to measure the distance between two points. The principle of operation for this sensor is measuring the distance traveled by sound in a given time. The sensor generates high-frequency sound waves which hit the nearest obstacle and create an echo. The time taken for the echo to reach the sensor is determined. This is used to calculate the distance since the speed of sound in air is a known constant(343m/s). We can display this information on an LCD in centimeters or inches. All these actions are controlled using an Arduino. Let’s have a look at the HC-SR04 ranging sensor now!
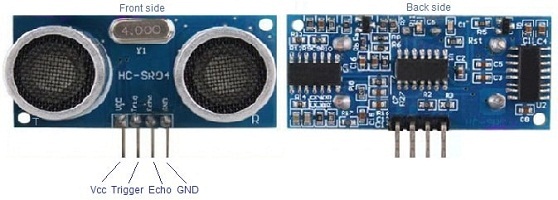
- VCC: 5V supply voltage is given to this pin.
- Trigger: A 10uS long pulse is given to this pin to trigger the transmission. Upon receiving a valid trigger pulse, the HR-SR04 issues eight 40KHz pulses. The time taken by these pulses to reflect back is measured and the distance is calculated from it.
- Echo: At this pin, the HC-SR04 outputs a signal whose high time is proportional to the range.
- Ground: Ground is connected to this pin.
Setting up the Connections for Your Arduino UltraSonic Range Finder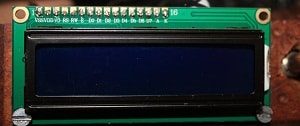
Connect the ultrasonic sensor and LCD to the Arduino as shown in the diagram above.
Uploading the Code to Your Arduino
If you are new to Arduino, download the Arduino IDE (Integrated Development Environment). Now upload the code given below to the Arduino Uno using IDE:
Read More: Interfacing: How to Make an Arduino Uno UltraSonic Range Finder!
-
What is the primary function of a range finder described in the article?
A range finder is a device used to find the distance from a point to the nearest obstacle. -
How does the ultrasonic sensor measure distance?
The sensor generates high-frequency sound waves that hit an obstacle and create an echo; the time taken for the echo to return is used to calculate distance. -
What are the typical applications for this Arduino ultrasonic range finder?
Typical applications include parking sensors, obstacle warning systems, level controllers, and terrain monitoring devices. -
Can you make your own Arduino ultrasonic range finder quickly?
Yes, you can make your own Arduino ultrasonic range finder in less than an hour using cheap and easily available components. -
What voltage supply is required for the VCC pin on the HC-SR04?
A 5V supply voltage is given to the VCC pin of the HC-SR04 sensor. -
What signal is sent to the Trigger pin to initiate measurement?
A 10uS long pulse is given to the Trigger pin to trigger the transmission of eight 40KHz pulses. -
What constant value is used to calculate the distance based on sound speed?
The speed of sound in air is used as a known constant of 343m/s for the calculation. -
Which software environment is needed to upload code to the Arduino Uno?
You need to download and use the Arduino IDE (Integrated Development Environment) to upload the code.
