
Summary of Stripboard Arduino
This article demonstrates how to build a cost-effective, stripped-down Arduino clone called the "Stripduino" using a stripboard (veroboard) and basic electronic components. The project involves cutting tracks on the board, soldering components like the ATmega168 microcontroller and voltage regulator, and programming it via ISP or serial methods. It highlights customization options and pin layout differences compared to standard Arduino boards.
Parts used in the Stripduino:
- Atmel ATMega168
- Stripboard
- 7805 Voltage regulator
- LEDs
- 220 Ohm resistors
- 10k Ohm resistor
- 10 uF capacitors
- 16 MHz clock crystal
- 22 pF capacitors
- .1 mfd capacitors
- Small momentary button
- Wire for jumpers
In this, my first Instructable I’m going to show you how to make a stripped down Arduino for a fraction of the price, using Stripboard/Veroboard.

Material List:
1x Atmel ATMega168 = �2.65
1x Stipboard = 72p
1x 7805 Voltage regulator = 26p
2x LEDs = 16p
2x 220 Ohm resistors = 8p
1x 10k Ohm resistor = 4p
2x 10 uF capacitors = 12p
1x 16 MHz clock crystal = 45p
2x 22 pF capacitors = 10p
2x .1 mfd capacitors = 10p
1x small momentary button = 18p
# small amount of wire for jumpers
Total = �5.94
(All prices based on single component prices from bitsbox)
Step 1: Cutting the tracks
Once you have collected all your components, its time to cut the tracks in your stripboard, this can be done with a ‘spot face cutter’ or an appropriately sized drill bit (by hand).
Below is a guide on what tracks to cut, and how to place the components for soldering.
Step 2: Go Custom!
 z
z
Now you have all the raw components soldered in place, test it out with one of the arduino codes such as “blink” that will make use of the built in LED on pin 13.
Now feel free to add male pins, sockets, ICSP, extra regulated +5v and ground pins……if it fits on your breadbord, it will fit on your Stripduino!
Would love to hear any feedback on this project, and hear how you would go about changing the designs.
Step 3: Interfaceing
Don’t forget that the Stripduino pin layout will differ from that of the Arduino Duemilanove, so always refer to the ATMEGA168 pin map when attaching your projects I/O pins.
Step 4: Programming/Bootloader
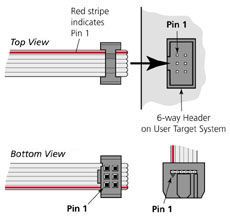
You can program this Stripduino with the easy addition of a 6 pins (ISP) for use with a a 6-pin AVR Programmer Cable.
you could also play about with fitting a a 7404 integrated circuit and DB-9 serial connector using this guide here http://www.arduino.cc/en/Main/StandaloneAssembly
box color=”#985D00″ bg=”#FFF8CB” font=”verdana” fontsize=”14 ” radius=”20 ” border=”#985D12″ float=”right” title=”Major Components in Project” headbg=”#FFEB70″ headcolor=”#985D00″]1x Atmel ATMega168 = �2.65
1x Stipboard = 72p
1x 7805 Voltage regulator = 26p
2x LEDs = 16p[/su_box]
For more detail: Stripboard Arduino
- How can I program the Stripduino?
You can program it by adding a 6-pin ISP interface for an AVR Programmer Cable or by fitting a 7404 integrated circuit and DB-9 serial connector. - What is the best way to cut the tracks on the stripboard?
You can use a spot face cutter or an appropriately sized drill bit by hand. - Does the Stripduino pin layout differ from a standard Arduino?
Yes, the pin layout differs from that of the Arduino Duemilanove, so you must refer to the ATMEGA168 pin map when attaching I/O pins. - Can I add extra pins to the Stripduino?
Yes, you can add male pins, sockets, ICSP, and extra regulated +5v and ground pins if they fit on your stripboard. - What code should I use to test the Stripduino initially?
You can test it with one of the Arduino codes such as blink, which uses the built-in LED on pin 13. - How much does this project cost in total?
The total cost is 5.94 based on single component prices from bitsbox. - What is the main benefit of building this specific Arduino clone?
The main benefit is creating a stripped-down Arduino for a fraction of the price. - Where can I find more details about the standalone assembly method?
More details are available at the guide provided in the text regarding fitting a 7404 integrated circuit and DB-9 serial connector.