
Summary of MQ-3 Alcohol Sensor Circuit Built with an Arduino
Summary (under 100 words): This project shows how to build an alcohol sensor (breathalyzer) using an MQ-3 sensor and an Arduino. The MQ-3 detects ethanol in exhaled air and provides an analog output proportional to alcohol level and a digital output that goes high when a threshold is exceeded. The digital output can trigger an LED. The MQ-3 module has four pins (+5V, GND, AOUT, DOUT) and a potentiometer to adjust the detection threshold. Mouthwash can be used to test the sensor without drinking alcohol.
Parts used in the MQ-3 Alcohol Sensor Project:
- MQ-3 alcohol sensor module (board with potentiometer)
- Arduino (any compatible board)
- LED
- Power supply 5V (from Arduino)
- Connecting wires/jumper cables
- Breadboard or mounting hardware (optional)
In this project, we will go over how to build an alcohol sensor with an arduino.
The alcohol sensor we will use is the MQ-3 sensor. This is a sensor that is not only sensitive to alcohol, particularly ethanol, which is the type of alcohol which is found in wine, beer, and liquor.
This type of sensor circuit can be used as a breathalyzer to check a person’s blood alcohol level. Just as we exhale carbon dioxide when we breathe out, we also will breathe out some alcohol if we have alcohol in our blood. Any alcometer device can measure this alcohol content.
The more ethanol in your blood, the more there is in the air on exhalation. This alcohol content gives a good indication for if a person is drunk and how drunk they are.
The amount of alcohol exhaled into the air is proportional to the amount of alcohol which will be found in a person’s blood. Alcometers use a built-in formula to estimate blood alcohol content from exhaled air alcohol content.
For different countries, the level of alcohol in the blood that defines a person as over the limit for driving varies. The range ranges from 0.01 to 0.10. Most countries have a limit of about 0.05. For example, Greece, Greenalnd, and Iceland all have limits of 0.05. Canada has a higher limit set at 0.08. In the United States, it is also 0.08. This means that if the alcometer reading measures above this, the person can receive a DUI.
For our circuit, it can function as an alcometer so that we get an estimate of a person’s blood alcohol level.
Disclaimer: You don’t have to drink alcohol in order to test this sensor. Mouthwash, such as Listerine, contains alcohol. If you gargle mouthwash for a few seconds and then breathe into the sensor, the readings should jump and register. This is all that’s needed to test. I take no responsibility for any drunkenness.
Components Needed
- MQ-3 alcohol sensor
- Arduino
- LED
The MQ-3 can be obtained very cheaply, just a few bucks. A good place to look for it is on ebay, which always has auctions on them for the $2-$3 range.
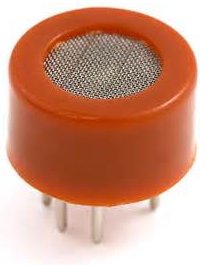
Important, it is recommended that you do not obtain the standalone sensor but the whole MQ-3 board. This is because if you buy the standalone sensor, you will have to finish building the whole schematic before you can connect it to the arduino. So that less work is required for integrating it with the arduino, it is recommended that you buy the complete MQ-3 sensor circuit. This you can see below.
If you buy the complete board, there are 4 leads which need to be connected.
There 4 leads are +5V, AOUT, DOUT, and GND.
The +5V and GND leads establishes power for the alcohol sensor.
The other 2 leads are AOUT (analog output) and DOUT (digital output). How the sensor works is the terminal AOUT gives an analog voltage output in proportion to the amount of alcohol the sensor detects. The more alcohol it detects, the greater the analog voltage it will output. Conversely, the less alcohol it detects, the less analog voltage it will output. If the analog voltage reaches a certain threshold, it will send the digital pin DOUT high. Once this DOUT pin goes high, the arduino will detect this and will trigger the LED to turn on, signaling that the alcohol threshold has been reached and is now over the limit. How you can change this threshold level is by adjusting the potentiometer to either raise or lower the level.
MQ-3 Alcohol Sensor Circuit Schematic
The alcohol sensor circuit we will build with an MQ-3 sensor integrated with an arduino is shown below.

For more detail: MQ-3 Alcohol Sensor Circuit Built with an Arduino
- What does the MQ-3 sensor detect?
The MQ-3 is sensitive to alcohol, particularly ethanol, which is found in wine, beer, and liquor. - How many leads does the MQ-3 module have and what are they?
The MQ-3 module has four leads: +5V, AOUT, DOUT, and GND. - What does AOUT provide?
AOUT gives an analog voltage output proportional to the amount of alcohol the sensor detects. - What happens when the analog voltage reaches a threshold?
When the analog voltage reaches a set threshold, the DOUT pin goes high. - How does the Arduino use the DOUT signal?
The Arduino detects DOUT going high and triggers the LED to turn on to signal the alcohol threshold has been reached. - How can you change the detection threshold on the MQ-3 module?
You adjust the potentiometer on the MQ-3 module to raise or lower the threshold level. - Do you have to drink alcohol to test the sensor?
No, you can gargle mouthwash which contains alcohol and then breathe into the sensor to test it. - Why buy the complete MQ-3 board instead of the standalone sensor?
The complete MQ-3 board includes circuitry and leads, so less work is required to integrate it with the Arduino compared to the standalone sensor.