
Summary of “Ayrduino” Single-Sided Arduino Clone
This article describes a cost-effective, single-sided Arduino clone called the "Ayrduino," designed for university electronics labs to reduce equipment costs. The board is a stripped-down version of the Duemilanove, featuring a 16MHz ATmega328 and on-board 5V regulation while omitting SMT parts and USB-Serial conversion to simplify manufacturing via the toner-transfer method. Although it requires an FTDI cable for programming and lacks certain features like a 3.3V regulator or ISP connector, these trade-offs are deemed acceptable for student lab use.
Parts used in the Ayrduino:
- 16MHz ATmega328 microcontroller
- On-board 5V voltage regulator
- Screw-terminal power-in connector
- Pin-13 LED
- Standard Arduino form-factor mount-points
- Three component-side jumpers
- FTDI cable (for programming)
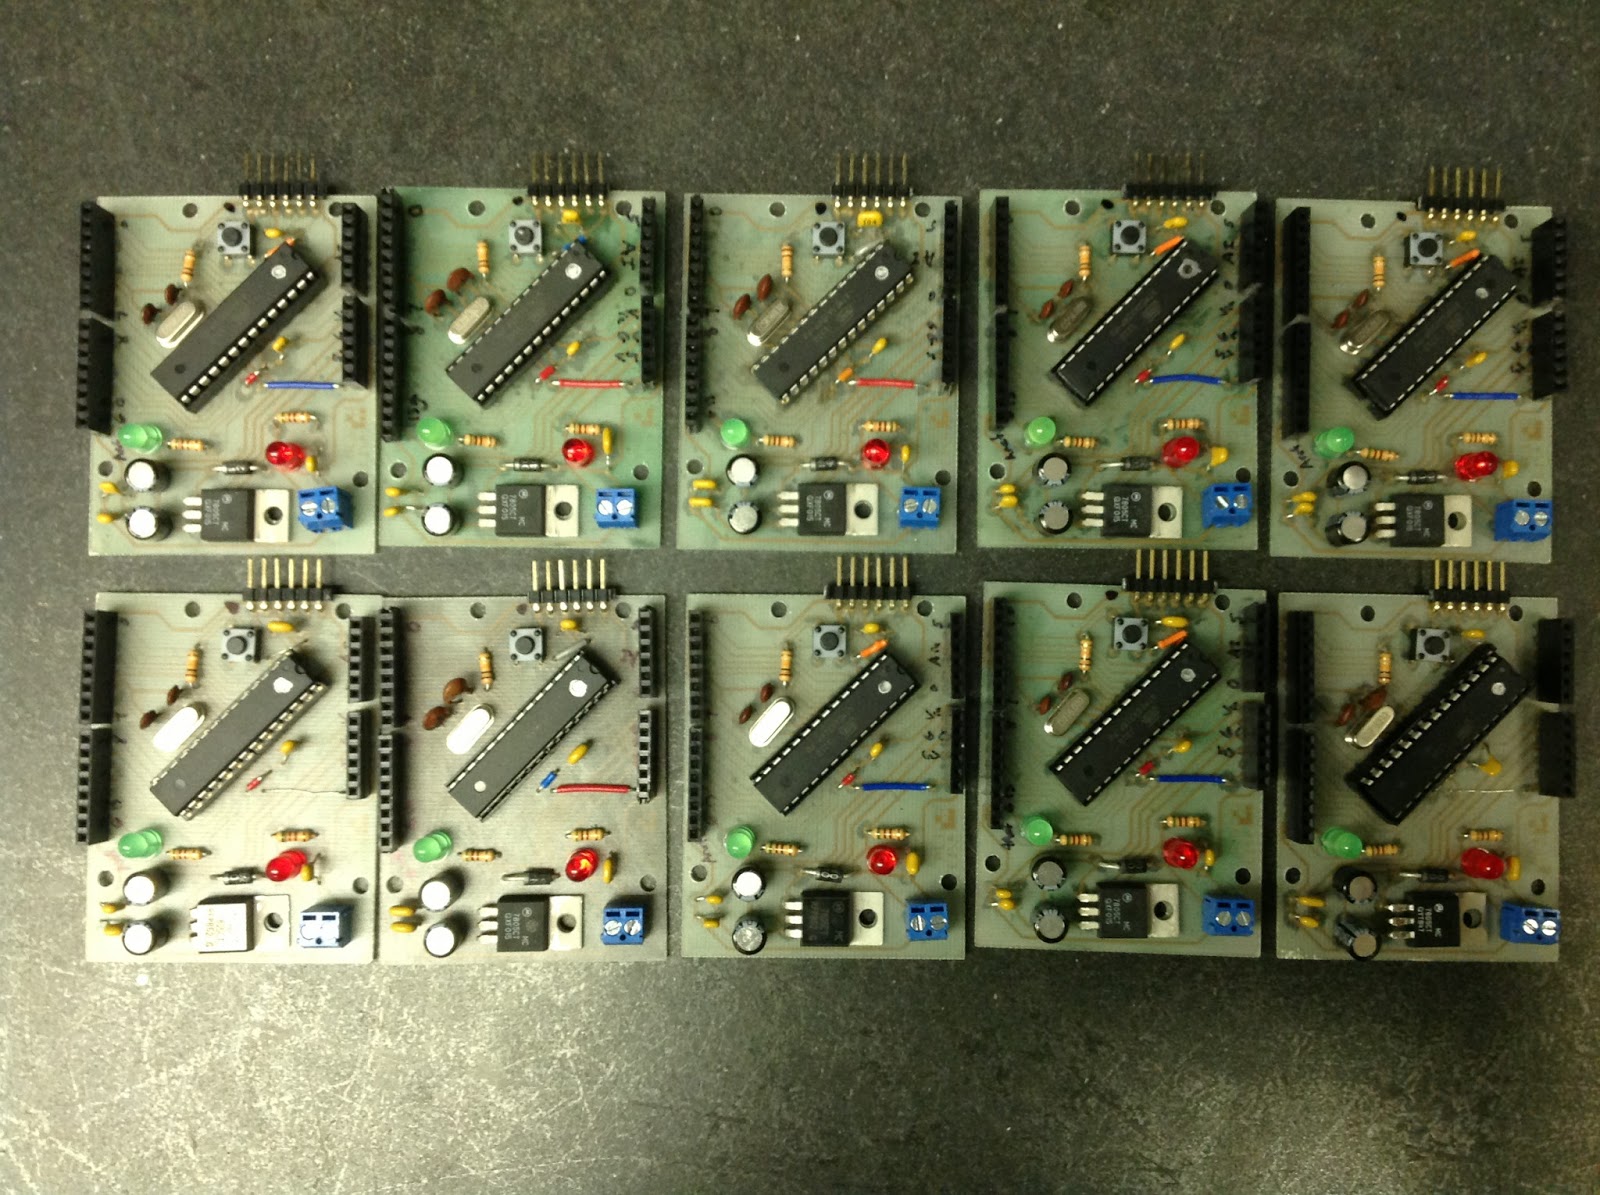
I’m teaching “Electronics for Scientists” this semester, and I wanted to allow each student to have their own Arduino to play with for microcontroller lab exercises and possibly use for their final projects. The Arduino is not very expensive at roughly $30 per, but they add up quickly when you have a whole class of students needing one each. I’d been buying enough electronics equipment over the course of the semester that my department chair was showing an involuntary tic any time I knocked on his office door… So I built my own. They are a stripped-down variant of the Duemilanove.
Hoo-ah:
- Standard Arduino form-factor and mount-points.
- Accepts standard Arduino shields.
- Single-sided board, easy to make with toner-transfer method.
- 16MHz ATmega328.
- No SMT parts.
- On-board 5V regulation.
- Screw-terminal power-in connector, rather than barrel jack.
- Pin-13 LED.
Meh:
- Lacks on-board USB-Serial conversion, so programming requires an FTDI cable.
- No 3.3V regulator.
- This is as detailed a board as I ever want to make using toner-transfer.
- No TX/RX LEDs.
- No ISP connector.
- Three component-side jumpers. Couldn’t quite get all traces on the back side!
None of these down-sides are significant for this application. The requirement of FTDI cable is inconvenient, sometimes, but I have 3-4 of them in the lab and students share them without too much squabbling.
My grader, Lena, did most of the drilling and soldering work. She’s graduating next week, and I’ll miss her, but the graduate program in Nuclear Engineering at University of New Mexico is going to be thrilled.
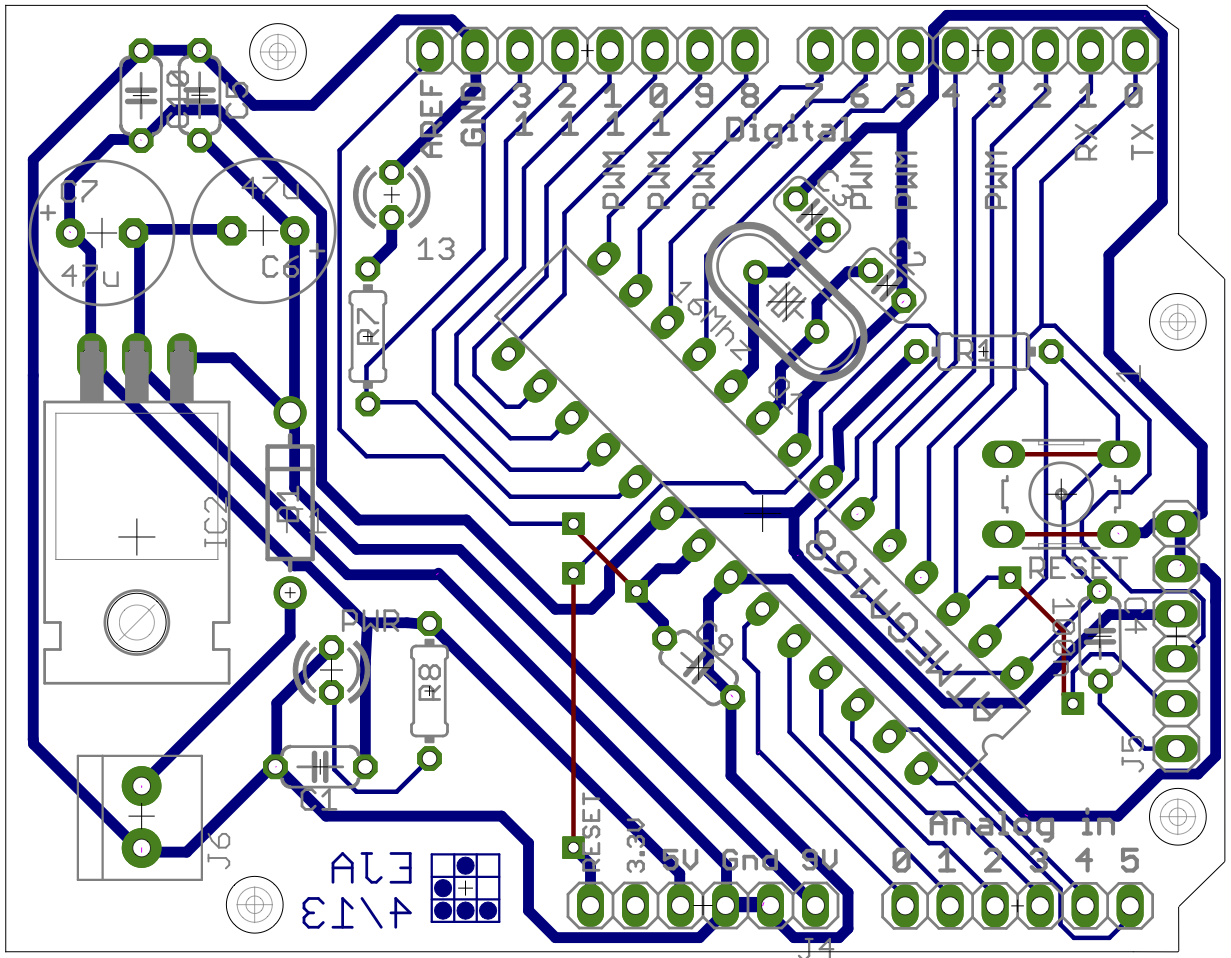
If you want to make your own single-sided Arduino variant, and this set of pros/cons is acceptable to you, here are the EAGLE files. One of the smart-asses in the electronics class immediately dubbed it the “Ayrduino”…
Note: the Arduino design, on which this is based, is licensed under the Creative Commons Attribution-ShareAlike 2.5 license; so this is available under that same license as well.
For more detail: “Ayrduino” Single-Sided Arduino Clone
- Why was the Ayrduino project initiated?
The project was started to provide affordable microcontrollers for students because buying standard Arduinos added up quickly for a whole class. - What manufacturing method was used for the board?
The board was created using the toner-transfer method to achieve a single-sided design without SMT parts. - Does the Ayrduino support standard Arduino shields?
Yes, the board accepts standard Arduino shields due to its standard form-factor and mount-points. - How is the Ayrduino programmed if it lacks USB-Serial conversion?
Programming requires an external FTDI cable since the board does not have on-board USB-Serial conversion. - What are the main downsides of this specific Arduino variant?
The downsides include the lack of on-board USB-Serial conversion, no 3.3V regulator, no TX/RX LEDs, and no ISP connector. - Is the requirement for an FTDI cable a major issue for students?
No, the inconvenience is manageable as students can share the few available FTDI cables in the lab without significant conflict. - Under what license is the Ayrduino design available?
The design is available under the Creative Commons Attribution-ShareAlike 2.5 license, same as the original Arduino design. - What clock speed does the Ayrduino microcontroller operate at?
The board uses a 16MHz ATmega328 microcontroller.