Summary of Simple Solar Power using arduino
The article explains how solar cells convert light into electrical current (DC) and highlights key specifications to consider when using solar panels, such as output voltage, power, and the maximum power point (MPP). The example solar panel outputs up to 10V open circuit voltage with peak efficiency around 8V and 650mA, delivering 5.2 Watts. It emphasizes matching load requirements to the panel's limits and notes efficiency loss if not operating near the MPP. The article also discusses powering a RedBoard with the panel, considering voltage regulator limits and variable sunlight conditions affecting current output.
Parts used in the Simple Solar Power project:
- Solar Cell Huge (solar panel)
- RedBoard (microcontroller board)
- Voltage Regulator
Simple Solar Power
Light contains energy. When light hits a conductor (or semiconductor) some of the energy is translated into moving electrons, creating current. We can harness the current using solar cells (aka photovoltaic cells). When the sun shines on a solar cell, the current output is mostly constant, which is known as direct current, DC. DC is easy to use and great for charging batteries and powering microcontrollers, but using DC from solar cells can be tricky.
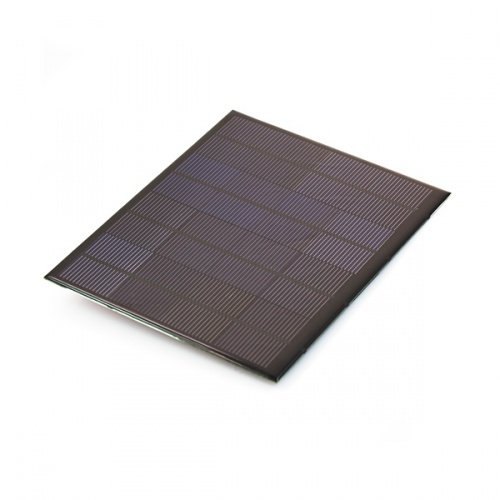 Solar panels come in many varieties. When shopping for solar panels for your system, there are a few specifications you need to follow. The specs below will refer to the Solar Cell Huge, shown above.
- Output voltage range: The panel above will output a voltage between 0V and 10V depending on the intensity of light and what you have attached to the solar panel (i.e. the load). You will need to make sure whatever you attach to the solar panel will be able to handle at most, 10V. This is called the open circuit voltage.
- Power: 5.2 Watts is the total power this solar panel can deliver at its maximum efficiency. The solar panel is most efficient at a point called the maximum power point, which is surprisingly not the maximum voltage, 10V, but a little less, 8V. When the panel provides its peak power, the current draw is around 650mA. This is called the short circuit current. Multiply 8V by 0.650A and you get 5.2W.
- Maximum power point: With no load (nothing connected to the solar cell), in full CO sunlight, the solar panel will output around 10V (Voc). When you start to draw more current (increasing load), the voltage starts to decrease, and the efficiency of the solar panel hits a sweet spot, then tapers off.
The sweet spot for operation is called the maximum power point (top of blue curve) and is around 8V @ 650mA for this specific panel. Sophisticated solar power systems use MPPT controllers to monitor and balance the system to maintain the max power point. To check if your system is at this point, simply measure the voltage on the solar cell with your load attached to see if you are close to 8V. It isn’t too big of a deal if you are not exactly at the maximum power point, the panel will still work, but you will be losing efficiency. Notice, in our testing, we saw 550mA short circuit (Isc), which is outside of the maximum power point.
 If you wanted to use this solar panel to power your RedBoard, make sure the voltage regulator can handle at most 10V on the input (which it does). It is almost this simple. Realistically, the solar panel will not be in direct sunlight most of the time and the panel could provide as little as 100mA or less on shady days. The RedBoard running the blink sketch (blinking the on board LED) draws a peak current of 60mA. This setup will not allow much room for additional hardware, due to the inconsistent and limited power draw from the panel.
For more detail: Simple Solar Power