The title “MultiMovEDIA” does not mean much – if anything – at first sight. However, looking at more carefully, we can see it is a composition of two words: “Multimedia”, referring to the information content and the channels it uses (text, image, sound), and “Move”, meaning movement. This project incorporates movement and dynamics into the world of multimedia, in a unique way, where moving one’s arm or just a finger makes everything possible; be it for computer games, CAD, music composition, image editing and other areas of cybernetics. Physical Computing methods are used along with sensors and a microcontroller to connect the outside world to various devices such as a computer, or in the case of music composition, to unique DIY devices made of various passive and active digital components. One such device is Kinect, having its own SDK for developing applications in various programming languages, allowing for 3D image processing and movement sensing for multimedia purposes, robotics and other technologies and application areas.
How is this project unique?
• It brings together many cheap technologies that are penetrating all areas of multimedia.
• It contains peripheral devices that are useful not only in multimedia, but also in medicine, mechatronics, manufacturing and other fields.
• It embraces many new ideas and applications that will be described later.
What are the modules of the MultiMovEDIA system?
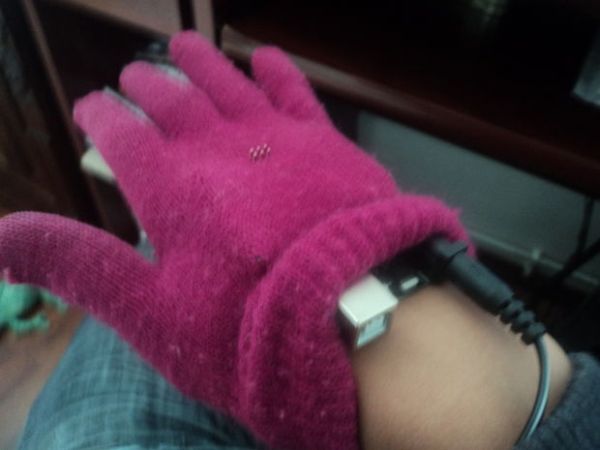
• MoveMusic – this application allows the conductor to become a performer. An accelerometer and a button mounted to a lightweight glove transform arm movements into musical symphony. The device’s operation is controlled by bending a finger: when the finger is bent, the arm movements generate sounds, when the finger is straight, the music stops. The accelerometer measures the values along the three axes (X, Y, Z) that correspond to different sound values and types. Every movement generates a new sound. This way orchestras can play in canon, or dancers can take the role of musicians. The output sound can be modified as desired, using MIDI technologies, such as MAX MSP, or mixers or other methods − the possibilities are limitless.
• MoveCAD – this module is the most interesting part of the project, in my opinion. Using the glove mentioned earlier and a pair of 3D glasses we can work with a cube in 3D. We can grab the cube with the glove, look at it from various angles and distances, and transform its shape, for example into a sphere. This method makes it possible to view images in 3D. This could be a great help in education, where students in a geometry class could see the shapes in 3D, and even create various geometric shapes. In medicine, the doctor could see the brain’s structure in 3D during an MRI exam. But it mostly be useful in multimedia arts, where the 3D possibilities of painting, sculpture and other art forms could be applied to interactive computing, most notably in the computer games industry.
• MoveGame – this module allows the further development of animation techniques and games. Hand movements replace the mouse, finger bending replaces typing on the keyboard. The most important thing is that no accessories, program packs or drivers are needed for operation. It can be used with any game, and it can also control the computer. Communication is done directly through the language tools ports, so that the computer detects the device as if it was a real mouse or keyboard. We only need to sacrifice one USB port, and the device is ready to use.
The MultiMovEDIA system can replace all unnecessary control devices that are expensive, take up space and are boring to use. There are many other areas where anthroposophic control can be introduced. Such solutions can make life easier for people, for example controlling weight-bearing robotic arms so that people could move heavy objects with a few simple hand movements. All modules are ready to be used with an USB port, which is available.
Step 1: Operation
1. MoveMusic
This module allows for the creation of various music using the ADXL335 three-axis accelerometer and “the finger bend sensing button”. The circuit’s control unit is the ATMega32U4 microcontroller with Teensy bootloader. The operation comprises three steps: 1. The microcontroller reads the data from the accelerometer and transforms these into sounds. 2 If the finger at the pushbutton is bent, the music will sound. 3. The sounds are displayed on the LCD display.
2. MoveCAD
This module consists of two parts:
1. 3Duino – to change the shape of a cube in 3D space
2. MovElement – to view a cube in 3D space from various angles and distances.
3Duino
Using our hands we can control an object in 3D – currently a cube, but with a little modification it could be anything. The 3D effect is achieved by a pair of Anaglyph blue-red glasses and the Anaglyph image converter. The image is moved by a Memsic 2125 accelerometer. If you have a bigger budget, I can recommend the gyroscope module, too. The program’s operation comprises three steps. 1. Arduino platform reads the accelerometer and processes the data. 2. After data processing, the microcontroller is connected to the PC via the USB port interface, and the Processing program receives the data and writes everything in into the “cube.txt” file. 3. A second PC program (written in C) filters and displays the image and moves the cube using the information it reads from the text file. Please notice that first you need to run the Processing code (“_3DuinoProcessing.pde”) for the first time after connecting the Arduino board with PC (after uploading the code (“_3Duino.pde”), Arduino board is ready to use) and only then run the “3DUINO.exe”.
This module was created for demonstration purposes, using the Arduino platform (ATmega168/ATmega8); the other modules are based on the Teensy platform, which is also an Arduino interface circuit, but faster, more efficient and cheaper.
MovElement
By moving our hands we can view a cube from different angles and distances. The 3D effect can be achieved by various technologies. I chose a pair of Anaglyph glasses, because it provides a cheap and effective solution. The movement sensing is performed by an ADXL335 three-axis accelerometer. The control chip is an ATmega32U4 with Teensy bootloader. The operation comprises three steps. 1. The chip reads and processes the data from the accelerometer. 2. It sends the control commands to the PC via USB, using HID protocol. 3. A PC program written in Processing analyses the data, then moves and positions the cube.
3. MoveGame
By moving our hand and fingers we can control the computer (text input, cursor control) and play computer games. We can also transfer some video games to the computer and control them with this application, if we are using emulators. For example, Playstation Emulator and other programs we can find on the Emulator Zone website. The movement sensing is performed by an ADXL335 three-axis accelerometer, and the flex sensor monitors the fingers for key command input. There are flex sensors assigned to each of the forward, backward, right, left and selection (Enter) commands. The control chip is an ATmega32U4 with Teensy bootloader. The operation comprises three steps. 1. The chip reads and processes the data from the accelerometer and the flex sensors. 2. It sends the control commands to the PC via USB, using HID protocol. 3. The computer receives the commands and based on them performs the key operations or moves the cursor to the selected points.
Step 2: Hardware
What is Arduino and Teensy?
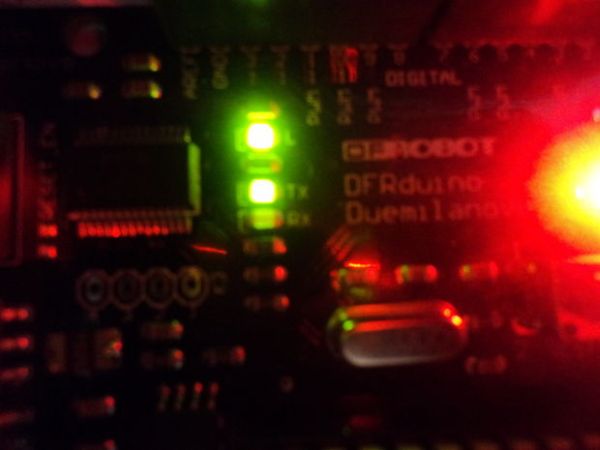
Arduino is an open physical computing platform based on a simple circuit and software development environment. The programming language used on Arduino is an implementation of Wiring that was developed from Processing. Physical computing is a creative framework that helps learning and exploring human’s relation to the digital world. It has many application areas, such as art, security technologies, hobby technologies, medicine, etc. Arduino is a C-language based platform that is very much universal thanks to the bootloader that has to be burned in before programming. Due to the bootloader-requirement, it can be used for various microcontroller families. It is a very compact, logical language. The circuit part is easy to make, even for a beginner electronics fan. For more information about Arduino click here or here . Teensy is a complete USB-based platform, built on the Arduino framework, but it is cheaper and more efficient. For more information about Teensy click here .
Power supply to the circuits
As power supply for both the Teensy board and the Arduino board power may be supplied via the USB port. As external power supply a 12V, 500mA unit may be used, or if necessary even a 9V battery as well, though this will deplete quickly. The microcontroller may not be driven directly by an external power supply, it the power supply in question delivers a voltage above 5V. In this case, different stabilizer circuits or components may be used to ensure a stable 5 volts tension. The simplest approach to solve this problem is the use of stabilizer integrated circuits. Such is the L7805 type of integrated circuit. These are inexpensive and efficient. However, it is important to take care also of cooling. These are not needed when using the Arduino panel, since this dose include stabilizer integrated circuit. However, one should be careful not to exceed 12V (1A) input voltage, because in spite of cooling the integrated circuit may blow up because of overvoltage. In the case of the Teensy panel, there is no built-in stabilizer circuit. In the case of the Teensy, if one does not want a USB power, then for the external power source the above mentioned integrated circuit is also needed.
The schematics are attached at the bottom of this page in more formats.
Step 3: Parts List
What do we need to build MultiMovEDIA modules?
Sketch: 3Duino.fz
Breadboard1 Tiny-Breadboard
Arduino1 Duemilanove/Diecimila/UNO
U1 (Memsic 2125) 2-Axis Accelerometer Breakout
Shopping List
Quantity Part
1 2-Axis Accelerometer Breakout
1 Tiny-Breadboard
1 Arduibo Duemilanove/Diecimila/Uno
Sketch: MovElement.fz
Breadboard1 Generic Bajillion Hole Breadboard
C1 (0.1 uF) Ceramic Capacitor
C2 (0.33 uF) Ceramic Capacitor
C3 (0.47uF) Ceramic Capacitor
C4 (33uF) Electrolytic Capacitor
Power plug1 Power plug
Teensy1 Teensy 2.0
U1 (ADXL335) 3-Axis Accelerometer Breakout
U2 (L7805) Voltage Regulator – 5V
U3 (LM3940) Voltage Regulator – 3.3V
Shopping List
Quantity Part
1 3-Axis Accelerometer Breakout
3 Ceramic Capacitor
1 Electrolytic Capacitor
1 Generic Bajillion Hole Breadboard
1 Power plug
1 Teensy 2.0
1 Voltage Regulator – 3.3V
1 Voltage Regulator – 5V
Sketch: MoveGame.fz
Bread1 Half-Breadboard
Breadboard1 Generic Bajillion Hole Breadboard
C1 (0.1 uF) Ceramic Capacitor
C2 (0.33 uF) Ceramic Capacitor
C3 (0.47uF) Ceramic Capacitor
C4 (33uF) Electrolytic Capacitor
Power plug1 Power plug
R1 (Flex Sensor 4.5″) Basic Flex Resistor
R1 (Flex Sensor 4.5″) Basic Flex Resistor
R1 (Flex Sensor 4.5″) Basic Flex Resistor
R1 (Flex Sensor 4.5″) Basic Flex Resistor
R1 (Flex Sensor 4.5″) Basic Flex Resistor
R2 (33K) Resistor
R2 (33K) Resistor
R2 (33K) Resistor
R2 (33K) Resistor
R2 (33K) Resistor
Teensy1 Teensy 2.0
U1 (ADXL335) 3-Axis Accelerometer Breakout
U2 (L7805) Voltage Regulator – 5V
U3 (LM3940) Voltage Regulator – 3.3V
Shopping List
Quantity Part
1 3-Axis Accelerometer Breakout
5 33K Resistor
5 Basic Flex Resistor
3 Ceramic Capacitor
1 Electrolytic Capacitor
1 Generic Bajillion Hole Breadboard
1 Half-Breadboard
1 Power plug
1 Teensy 2.0
1 Voltage Regulator – 3.3V
1 Voltage Regulator – 5V
Sketch: MoveMusic.fz
Bread1 Half-Breadboard
Breadboard1 Generic Bajillion Hole Breadboard
C1 (0.1 uF) Ceramic Capacitor
C2 (0.33 uF) Ceramic Capacitor
C3 (0.47uF) Ceramic Capacitor
C4 (33uF) Electrolytic Capacitor
J1 Piezo Speaker
LCD1 (HD44780 16X2) LCD screen
Power plug1 Power plug
R3 (10K) Trimmer Potentiometer
R4 (10K) Resistor
S1 Pushbutton
Teensy1 Teensy 2.0
U1 (ADXL335) 3-Axis Accelerometer Breakout
U2 (L7805) Voltage Regulator – 5V
U3 (LM3940) Voltage Regulator – 3.3V
Shopping List
Quantity Part
1 Resistor
1 3-Axis Accelerometer Breakout
3 Ceramic Capacitor
1 Electrolytic Capacitor
1 Generic Bajillion Hole Breadboard
1 Half-Breadboard
1 LCD screen
1 Piezo Speaker
1 Power plug
1 Pushbutton
1 Teensy 2.0
1 Trimmer Potentiometer
1 Voltage Regulator – 3.3V
1 Voltage Regulator – 5V
The above-mentioned list of components is needed for the construction of all the modules. If, for example one may want to construct a single module, then the number of components is reduced depending on the component requirement of the module in question (see wiring diagrams). The elements may be procured from SparkFun or even the Farnell webshop.
For more detail: MultiMovEDIA