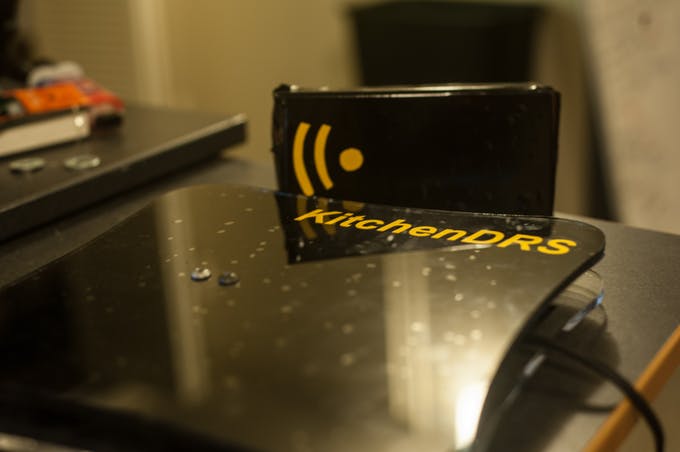
The Project
This project is a combination of the many smart fridges and pantry’s of the past. The idea is to combine all of them while also introducing Amazon’s DRS system through Alexa and the Echo products as a bonus feature.
The process will be simple:
As you put the item you purchased via Amazon Prime Pantry in your fridge, it will be scanned by an RFID tag scanner. This will detect an assigned UID, which will then correspond to a given ASIN. The ASIN will give details VIA web connection, such as weight, size, product name, etc.
Once scanned, the item will then be put onto a shelf with a built in scale. It will keep in mind the item that is going on, then detect the weight change, and track a percent and amount of that given item left.
These details will then go to an Amazon-hosted webpage where your Alexa can respond to simple questions, such as asking how much of an item is left, or asking Alexa to order something for you. She can also track expiration dates and give warnings.
The system will not be solely based around Alexa, though. It can have a small LCD screen that will display the information, and will allow programming to reorder if a certain item drops below a pre-determined amount.
Additionally, when you order a Pantry Box, it will include an RFID tag that you can scan to your pantry. This will assume that all of the items are full and ready to stock, and in turn saves time.
What will make this system better than others?
While there have been smart pantry systems in the past, many of them required too much user input, and many do not have the interconnections between the sensors that will be in this product. RFID smart pantrys only track what has been put in the fridge, not what is left; Scale based pantry’s only track weight and require the user interface with it and record what was put in.
As stated above, not only will this project fix those, but it will also interweave it into a service, this case is Amazon.
Building the Project:
Part 1, Materials:
This is very vague because it can be done in many methods, this is just the method I chose to do.
- Arduino of choice (Preferably AVR over STM)
- MFRC522 RFID scanner and Tag
- ESP8266, source of internet connection.
- Load cell ( I recommend one over 20 kg load)
- HX711 (For load cell amplification)
- 5 Volt Power Supply
- Ethernet cable (If card)
- Breadboard for testing
- Wire
- Acrylic or plastic for scale
Part 2, Libraries:
Again, much of this is up to personal choice. I am using these because I found them first and they worked for me best.
- Wire Library, found in Arduino IDE
- SPI library, found in Arduino IDE
To install the ones you do not have (HX711, ENC, MFRC) just unzip then install them into the Library Folder of where your IDE is installed. For the Ethernet you do NOT have to delete the Ethernet folder, instead, all you have to do is rename all “Ethernet.h” Libraries to “UIPEthernet.h”
Update: Because of the library being used, this will only work with utilization of an ESP8266 module
Part 3, Other Resources:
- Amazon API Developer
- Lots of time. Lots and Lots of time. Seriously though, I have put in 150+ hours over the past 4 weeks and it is no where near done, and half of those hours were from just simple wiring issues and code bugs that were not even relevant to the whole project. This is why I am bumping up there experience level.
- Along with time, patience. For obvious reasons.
- Google Developer/API
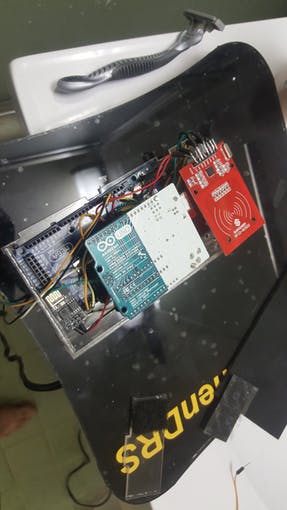
Part 4, Wiring:
I’ll post a diagram later, but for now:
RFID on UNO #1 ( I will refer to it as #1 for the rest of the writeup)
RFID        Arduino
VCC         3.3 Volts--While it will work on 5V, IT IS HIGHLY ADVISED AGAINST
RST         Any digital lower than 10; I have it assigned to pin 9
GND         Ground on Arduino, who would have guessed
MISO        PIN 12 on UNO, 50 on MEGA
MOSI        PIN 11 on UNO, 51 on MEGA
SCK         PIN 13 on UNO, 52 on MEGA
SS          PIN10, however this can be changed.
IRQ         Unassigned.
Ground      Also to Ground on Arduino #2
Serial Connections (WIRE) among Arduinos #1 and #2
UNO #1      MEGA
Analog_A4   20
Analog_A5   21
Ground      Ground
Ethernet on UNO #2 (again, will refer to it as #2 for the whole thing)
Updated: The Library being used does not work with Ethernet, instead it uses the ESP module. Similar to the HX711 below, wiring the ESP will be completely dependent on if you have a 3.3v power supply, or if you need a voltage divider.
ETHERNET    Arduino
VCC         3.3 Volts--While it will work on 5V, IT IS HIGHLY ADVISED AGAINST
RST         Unassigned how I have it right now, I might add a reset function later
GND         Ground on Arduino, again
MISO        PIN 12 on UNO, 50 on MEGA
MOSI        PIN 11 on UNO, 51 on MEGA
SCK         PIN 13 on UNO, 52 on MEGA
CS          PIN10, Not sure yet if it can be changed. I haven't snooped that far
CLOCKOUT    Unassigned.
INT         Unassigned.
WOL         Unassigned.
Ground      Also to Ground on Arduino #1
HX711: I would check the datasheet you get it with, whether it is Amazon, Ebay, or anywhere else. Two of mine were marked incorrectly and did not work as planned. Trial and error will get you there!
Read More: Amazon Kitchen DRS