Well, as you know, in September the new premiere shield of Arduino, Arduino YUN. This little friend has a Linux embedded system with which we can run anything you can think of (at least so far).
While there is very little information on this new board, with departure in the guide that provides the Arduino page (which will link later), plus a little knowledge of many Linux, can carry out a major project a Control Access.
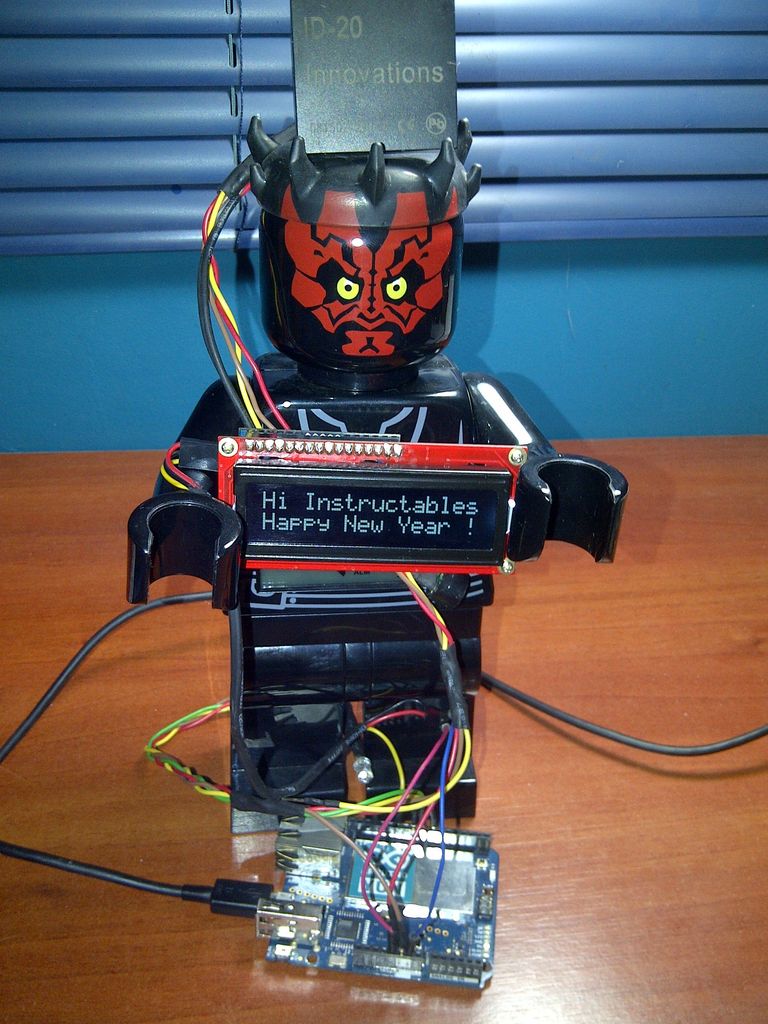
This time I will explain how to do this project, but in a manner sufficient particular all through our Arduino. This works, thanks a database server MySQL which will settle in our YUN, this database will store two tables, one for users associated with a particular RFID and another table to keep records of all cards that have passed through our reader. While we use programming languages PHP and Python scripts to perform some basic and work with our data.
Moreover, the hardware overhead, we use a reader ID-20 next to a Serial LCD of 16 characters, plus an RGB LED which will be our informant states.
We may use this access control everything we can think of, modify, and add a relay or another idea. It can be used on anything where you have cards and want a record.
Recall that this document is free publication, commercial use and exempt modifications are not allowed. I hope it’s a way more extensive path of Open Source electronics.
So we go to the next step, the parties need!
Step 1: The parts
* Arduino YUN https://www.sparkfun.com/products/12053 $71.95
* RFID Reader ID-20 (125 kHz) https://www.sparkfun.com/products/11828 $34.95
* RFID Reader Breakout https://www.sparkfun.com/products/8423 $0.95
* Basic 16×2 Character LCD 5V https://www.sparkfun.com/products/790 $16.95
* Serial Enabled LCD Backpack https://www.sparkfun.com/products/258 $16.95
* LED RGB 5mm https://www.sparkfun.com/products/105 $1.95
* Buzzer https://www.sparkfun.com/products/7950 $1.95
* Somes Header Pin and wire $5.00 aprox.
In all, if you buy at the store Sparkfun, everything will be near $150.
If you live in Latin America, I would recommend buying the parts in www.olimex.cl, is a very good Chilean electronics store.
Step 2: The assembling
For RGB LED, red LED pin must be on pin 9 of the Arduino, pin the green LED should go on Arduino pin 8 and pin the blue LED should be on pin 7 of the Arduino.
For the ID-20 you must connect the following pins as indicated in the table in respective order, pin reader to Arduino pin:
Pin ID-20 to pin Arduino
ID-20 \ Arduino
PIN 1 —-> GND
PIN 2 —-> 5V
PIN 7 —-> GND
PIN 9 —-> PIN 10
PIN 10 —-> BUZZER
PIN 11 —-> 5V
And finally, for the Serial LCD connector will only be necessary to 5v and GND pins of the Arduino, while the LCD Serial RX pin goes to pin 11 of the Arduino.
Step 3: Programing of the Arduino Yun
- MySQL Server
- PHP5
- MySQLdb for Python 2.7
- Mod of PHP5 to MySQL
Recall that by default in Bridge comes installed Python 2.7, so you never need to install any update for this.
Start logging SSH dare to enter our Arduino Yun, once you started them in, type the following command to update the list of applications opkg:
- opkg update
Step 4: Installation of MySQL
- opkg install libpthread libncurses libreadline mysql-server
- sed -i ‘s,^datadir.*,datadir = /srv/mysql/,g’ /etc/my.cnf
- sed -i ‘s,^tmpdir.*,tmpdir = /tmp/,g’ /etc/my.cnf
- mkdir -p /srv/mysql
- mysql_install_db –-force
- /etc/init.d/mysqld start
- /etc/init.d/mysqld enable
- mysqladmin -u root password ‘tu-nueva-clave’
Once finished entering our codes and started the MySQL server , you should configure the database that will manipulate . But before starting to type the codes, we need to understand the fields that carry our table.
The board shall consist of 5 courses, ‘id ‘, ‘ name’, ‘ name’ , ‘ email ‘, ‘ rfid ‘ to market some of them I will give a brief explanation of their use.
- ‘id’ : will the field or attribute int column that will tell us the number assigned to the User ID , this number is assigned by the same database and will be the way to index our records.
- ‘nombre’ : attribute column will be ‘ varchar ‘ may be indicated by the name with which our card user is identified.
- ‘ apellido’ : attribute column will be ‘ varchar ‘ may be indicated by the last name with which our user is associated.
- ‘ correo’ : is the attribute column ‘ varchar ‘ which will contain the e- mail the associated user.
- ‘ rfid’ : is the attribute column ‘ varchar ‘ which will contain the code of the RFID card you use .
(I will use the variables in Spanish, because is my native language and i like c: )
Now we can configure our database without problem, therefore we create a ‘ arduino ‘ call MySQL. You must type the following code:
- mysqladmin -u root -p create arduino
We ask for the password we entered earlier in the installation, we will submit it to complete the creation of the base. Finished all this, we enter the query to MySQL, you should type the following code in the console:
- mysql -root -p
Again we ask for the password, you must submit it again.
Once inside the MySQL console command, we pointer (‘mysql>’) should appear ready to type. The first thing we will do is move the base for ‘arduino’ data to work on it. This is done by typing the following command at the MySQL console:
- USE arduino
We believe the name table ‘usuariosrfid’ in the database will use for this project, type this code in the MySQL console:
- CREATE TABLE `usuariosrfid` (
- `id` int(255) NOT NULL AUTO_INCREMENT,
- `nombre` varchar(300) NOT NULL,
- `apellido` varchar(300) NOT NULL,
- `correo` varchar(300) NOT NULL,
- `rfid` varchar(300) NOT NULL,
- PRIMARY KEY (`id`)
- ) ENGINE=MyISAM DEFAULT CHARSET=latin1 AUTO_INCREMENT=0 ;
* Remember that when pressing the ENTER key at the end of the command line in the MySQL console, it will not run until you find the ‘;’ Therefore, at the end of the code is ‘;’
To complete the installation and configuration of MySQL, we fill some test fields within our base. Type in the following lines:
- INSERT INTO `usuariosrfid` (`id`, `nombre`, `apellido`, `correo`, `rfid`) VALUES
- (1, ‘Pedro’, ‘Suarez’, ‘[email protected]’, ‘1234a-12345-b-123c’),
- (4, ‘Matias’, ‘Lopez’, ‘[email protected]’, ‘987a-9876b-987c’);
Now continue with the creation of the table ‘ControlUsuarios’, which will house all RFID codes passing by the reader, this table consists of 3 fields, ‘id’, ‘rfid’, ‘date’.
- ‘id’ is the field or attribute int column which will contain the id of each record for indexing.
- ‘rfid’ attribute is the column ‘varchar’ containing the RFID tag code was read by the reader.
- ‘date’ is the attribute column ‘varchar’ which will contain the date the card was read.

To create the table ‘ControlUsuarios’, we enter the following code into the MySQL console:
- CREATE TABLE `ControlUsuarios` (
- `id` int(255) NOT NULL AUTO_INCREMENT,
- `rfid` varchar(300) NOT NULL,
- `fecha` varchar(300) NOT NULL,
- PRIMARY KEY (`id`)
- ) ENGINE=MyISAM DEFAULT CHARSET=latin1 AUTO_INCREMENT=0 ;
Finally type ‘exit;’ in the console to exit the MySQL Query, and return to SHH so we can start with PHP5.