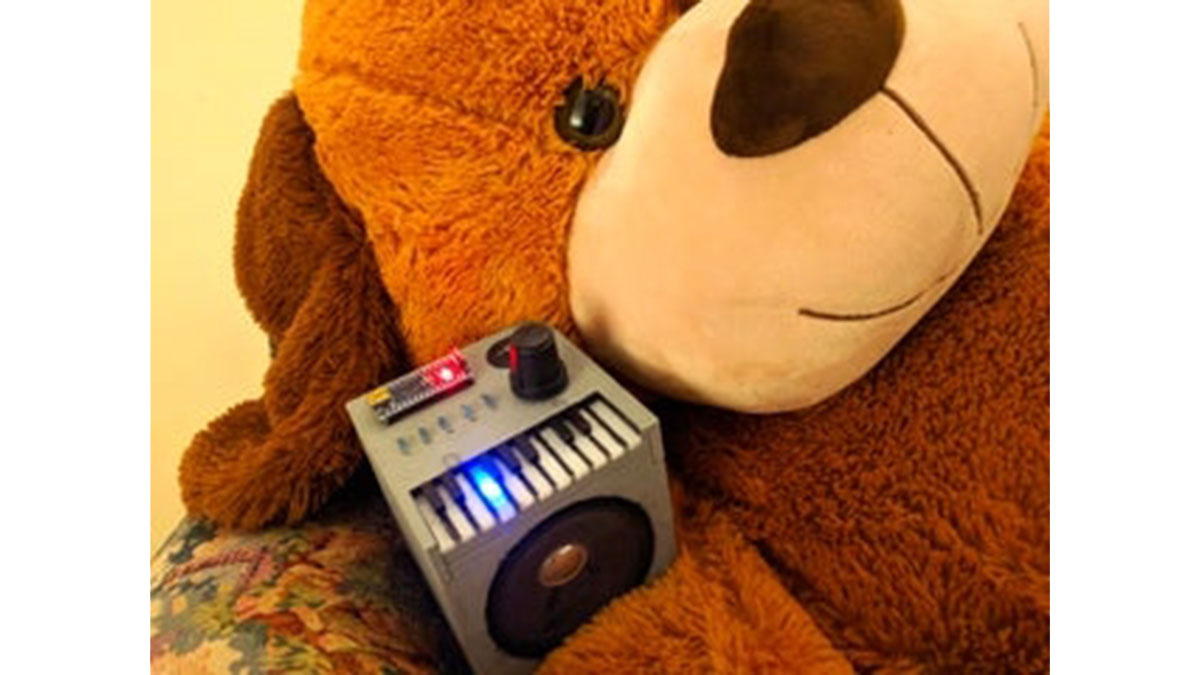
First of all, let me introduce Tobias, my girlfriend’s giant teddy bear, who is the inspiration for this project.
Tobias has a personality, built up over time while we jokingly wonder in our minds what he does while she’s away at work.
The project was intended to be a simple gift, an Arduino with a piezo speaker playing her favorite song. Quickly it got out of my control and became a music box:
- 3D printed
- capable of playing music without the need for a USB connection using AA batteries
- with piano “keys” that light up with each note
- capable of reproducing images on an old CRT television via RCA connectors
Supplies
- Arduino Nano
- Speaker (I took it from a damaged old radio)
- Toggle Switch (3 pin) – mode selector
- Rotary Potentiometer – volume control
- 2x 220Ω resistor
- 1x 440Ω resistor or 2x 220Ω resistor
- 1x 1kΩ resistor
- 11 3mm leds
- 2x RCA female connectors
- wires
- 3.5mm white acrylic
- hot glue or super glue
Tools:
- soldering kit
- 3D printer
- computer with Arduino IDE to upload the code
Step 1: Code – Upload
You will need:
- TVout library – allows the Arduino to put images and sound on a television with RCA or SCART connection http://code.google.com/p/arduino-tvout/
- arduino-volume1 – This library improves the sound quality, it is used in mode 1 (Arduino alone without TV connection). However, in mode 2, it is not possible to use it at the same time as the TVout library uses the same timer as volume1 https://github.com/connornishijima/arduino-volume…
If you want to change the music or image see next steps, if not just upload the code to your Arduino, but first make sure you have both libraries installed.
Step 2: Code (change the Music)
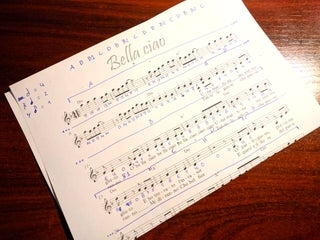
Here you can find the song: https://www.facebook.com/partiturashoy/photos/a.77…
I split the music in parts, assigning letters to each part that repeats itself. Then I assigned a value of 1 to 16 for each note and placed them on line 0 of each array. The values correspond to the frequency of the note to be played (array freq [ ]). In line 1 I put the duration of each note above. Example:
const byte melB1[2][ 6] PROGMEM={
{11, 8, 0, 8, 7, 6}, //note
{ 1, 3, 1, 1, 1, 1}}; // duration
If you want to use another song:
- change the freq [ ] array with the new desired frequencies (notes)
- change the arrays corresponding to each part of the song
- in void music () choose the order that should be played
- change the “X” in the array declaration for the number of elements in each line and also change in the corresponding void, example:
…
melB1[2][ X]
…
void melodiaB1(){
for (a=0; a<X; a++){
…
Step 3: Code (change the Image / Photo)
I used GIMP to change a photo to black and white, steps:
- Colors / Saturation = 0
The image must be changed to a 95×95 pixel resolution. The TVout library allows for higher resolutions but due to the size of the code I intended to use, I was forced to lower the resolution.
- Rectangle Select Tool (Aspect Ratio – fixed 1:1)
- Edit/Copy
- File/Create/From Clipboard
- Image/Scale Image (95×95)
It’s imperative to convert the image to black and white and not grayscale.
- Fuzzy Select Tool and Free Select Tool to select the areas that I want to appear in black.
- Pencil (black) to make our selection black
- Select / Invert (inverts our selection)
- Pencil (white) to color the rest of the area white
- Colors / Brightness-Contrast (contrast to max to ensure black is black)
Now that we have the image in black and white with a resolution of 95×95 pixels
- File/Export As (.BMP)
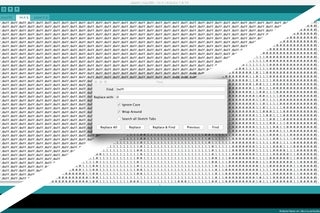
To convert the new image to code I used Image2Code https://www.crystalfontz.com/product/image2code
Which gives us an almost good array. Then I copied and pasted it into the Arduino IDE.
Using Edit / Find:
- search for all “0xFF” and replaced it with “0” (Replace All)
- do the same for “0x00” and replace it with “1”
- Delete all “{“ and “}”
“0” is going to be a black pixel
“1” is going to be a white pixel
Step 4: 3D Model
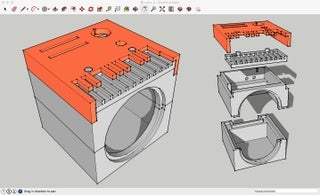
To create the box 3D model I used SketchUp. Due to the limitations of my 3D printer and the difficulty I imagined it would be making the internal connections I decided to create the model in 4 parts.
I uploaded the SketchUp file if you want to change something on the design, if not, just print the .stl files
Step 5: Assembly
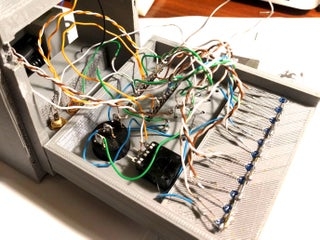
Assemble is not complex but it’s difficult due the size of the box and the quantity of wires to be connected.
Source: Tobias – Arduino Music Box With TVout