Summary of TerraDome : Mini Tropical Greenhouse With Arduino
TerraDome is a 50x50x45 cm octagonal indoor greenhouse controlled by an Arduino Mega. It monitors temperature and humidity using sensors, manages lighting with timers and LEDs, and features automatic doors inspired by Jurassic Park that open when temperatures rise too high. The project combines woodworking for the MDF structure and polystyrene windows with electronics like servos, relays, and a cooling fan to create a self-regulating environment for tropical plants.
Parts used in the TerraDome:
- Arduino Mega 2560
- TRU-PL-WR LED lighting for plants
- Renkforce 1289404 time programmer
- Fayalab light sensor 801 NU0014
- Velleman VMA311 DHT11 temperature and humidity sensor
- Constant current LED power supply TRU-NETZTEIL-8W 700mA
- Velleman VMA203 LCD Module and Keyboard (Arduino Shield)
- 2 Analog Mini Servo Modelcraft Y-3009
- Mean Well RS-15-5V AC / DC Power Supply 230V 5V 3A
- Velleman VMA414 40-pin Patch Cable
- 2 relay board 5 V SMTRELAY022
- Velleman VMA307 RGB Led Module
- 2 Standard LEDs (Orange / Blue) - 2 LEDs 10 mm TRU COMPONENTS
- MDF (Medium) 19 and 10mm
- 2.5 mm transparent polystyrene (Plexi)
- PC 80mm Power Supply Fan
- Heating mat for reptile 220V 7W ChenRui
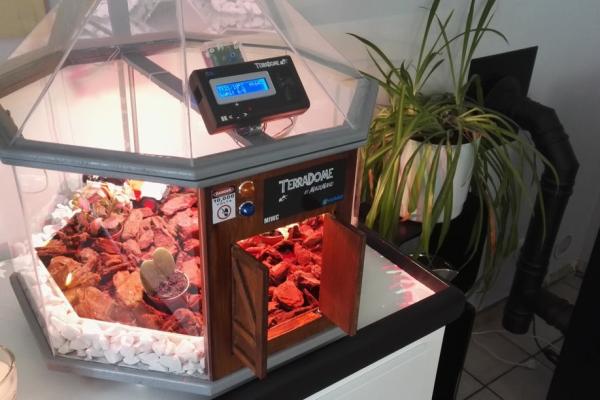
TerraDome is an indoor greenhouse for plants and tropical flowers shaped octagonal dome.
It is driven by an Arduino Mega that regulates temperature and lighting through different sensors and an LCD display. It also has doors to the Jurassic Park (or Jurassic World) that opens when the temperature is too high in the greenhouse.
Dimensions:50 x 50 x 45 cms
Time spent:35H (out of study)
Tools: Circular saw, ripper, drill press, miter saw, jigsaw, Dremel, hand tools …
Electronic Material :
- Arduino Mega 2560
- LED lighting for plants TRU-PL-WR
- Time programmer Renkforce 1289404
- Fayalab light sensor 801 NU0014
- Velleman VMA311 DHT11 temperature and humidity sensor
- Constant current LED power supply TRU-NETZTEIL-8W 700mA
- Velleman VMA203 LCD Module and Keyboard (Arduino Shield)
- 2 Analog Mini Servo Modelcraft Y-3009
- AC / DC Power Supply 230V 5V 3A Mean Well RS-15-5
- Velleman VMA414 40-pin Patch Cable
- 2 relay board 5 V SMTRELAY02
- 2 Velleman VMA307 RGB Led Module
- 2 Standard LEDs (Orange / Blue) – 2 LEDs 10 mm TRU COMPONENTS
Other:
- MDF (Medium) 19 and 10mm
- 2.5 mm transparent polystyrene (Plexi)
- PC 80mm Power Supply Fan
- Heating mat for reptile 220V 7W ChenRui
- Painting, hardware …
Step 1: Tinkercad 3D Model
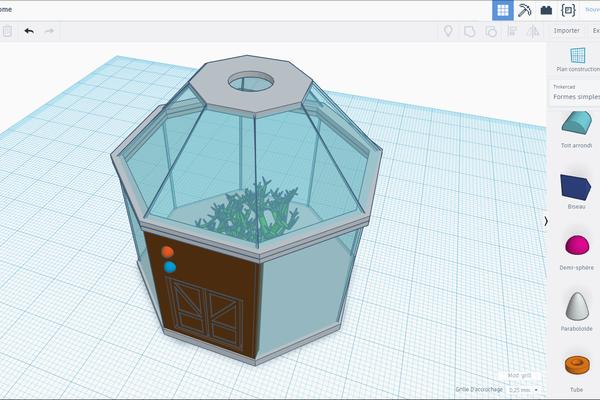
For the octagon I used an 8-sided polygon, I added a smaller one in piercing mode and I merged the 2 to keep only the edges. Windows are “boxes” in transparent color.
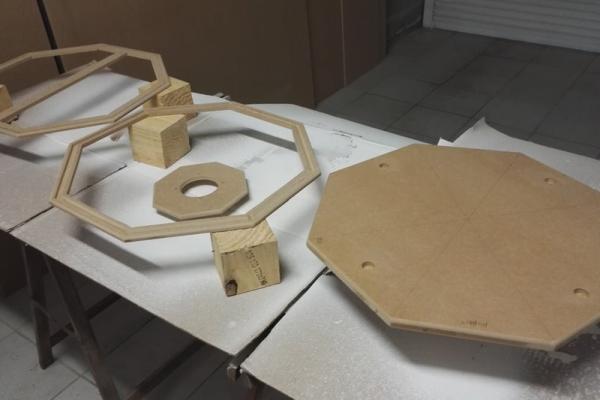
Step 2: Woodworking
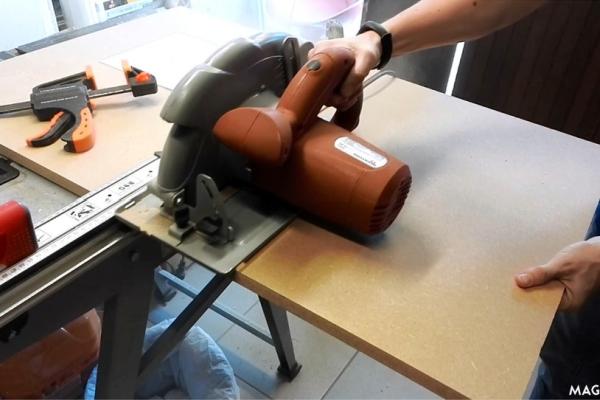
I used 19mm MDF for the base and 10mm for the rest.
To have an octagon with 8 equal sides, I used a website where I just entered the radius of the circle (25 cms). Which gives me sides of 20.71 cms.
I cut out the contours with the circular saw, and the internal cuts with the jigsaw.
I also made a hole of a diameter of 8 cms with a hole saw for the fan.
Step 3: Grooves for Windows
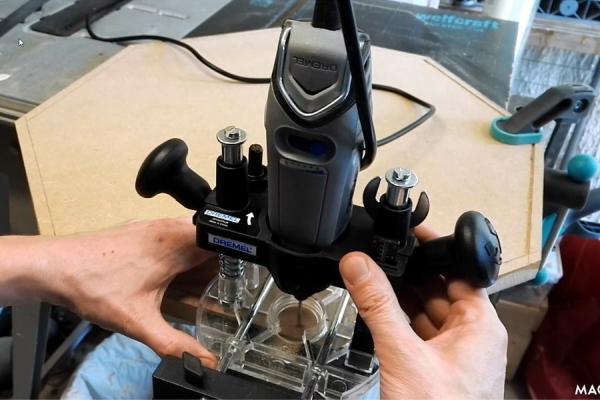
I created grooves on half the thickness of the wood to fit the windows. For that I used a Dremel with its router accessory (335).
For the roof, the windows being sloping, I used a triangle cutter with my router.
I finish with the rounding of all the edges with my router fixed under the workbench.
Step 4: Paint
I applied one layer of wood primer and 2 coats of gray paint spay.
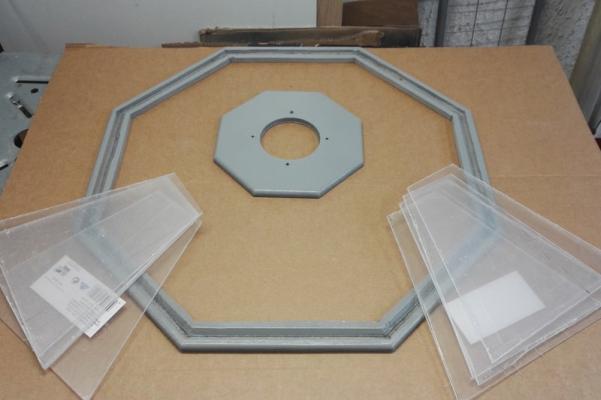
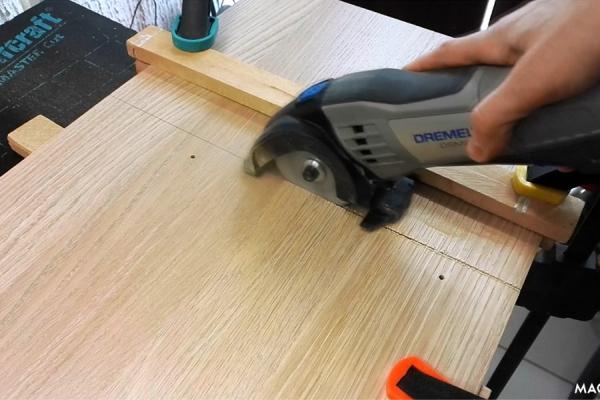
Step 5: Cutting Windows
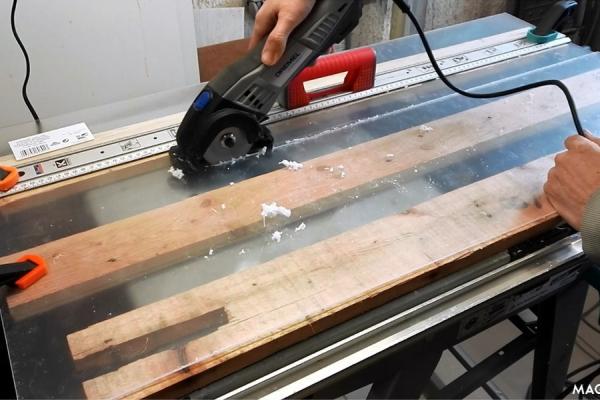
For the windows I used transparent polystyrene 2.5 mm thick. More resistant than glass and easy to work, it offers a beautiful transparency.
I cut it with my Dremel DSM20 which makes a clean cut without shards.
I measured the distance between the blade and the edge of the sole, I draw 2 lines on the wooden board, and I use it as a guide to cut all windows.
Step 6: Base
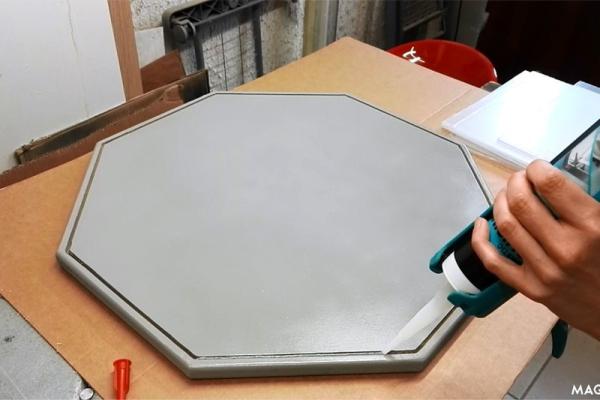
The windows are glued with transparent silicone, which seals at the same time.
Step 7: Roof
For the roof of the dome, I started by gluing the bottom of the windows, I held them between them with tape, and I added the top.
I then grouted all the edges and smoothed the joints with water and soap.
Step 8: Ventilation
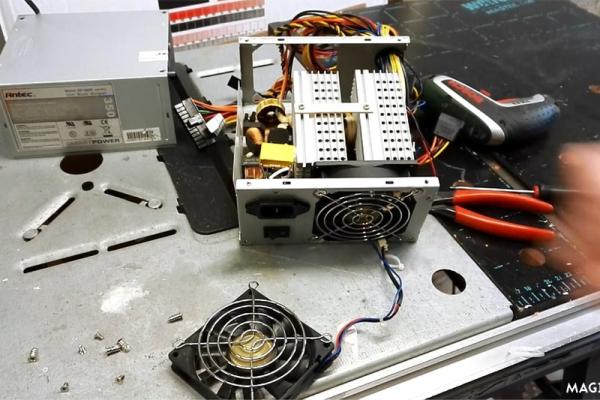
I recovered the fan on an out of service computer power supply.
I tested it under 5V instead of 12V, the speed is low but sufficient for this use.
I soldered fine white wires that will be hidden in the window seals. The fan is then screwed onto the dome with its protective grille.
Step 9: Miscellaneous
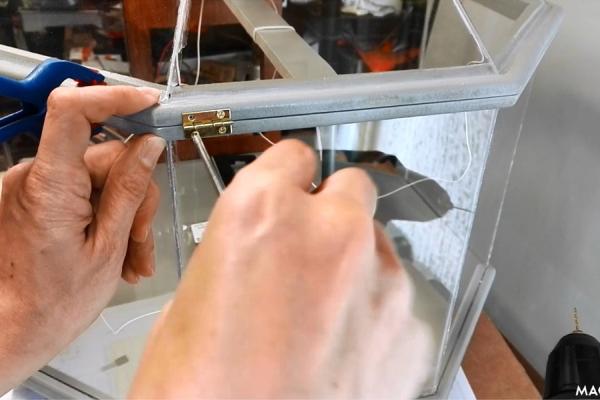
To facilitate the opening (when watering plants for example), I installed 2 hinges at the back.
I drilled 4 holes on 10 mm deep and I cut 4 plastic tubes that will serve as feet.
Step 10: Doors
The doors are inspired by Jurassic World (or Parc).
I created a base that contains the 2 servomotors and 2 LEDs with wood chips and cleats.
The doors are made of 5 mm plywood glued to wood glue. They are operated by their axes from 0 to 90 degrees.
The orange and blue Indicators mimic those of the Jurassic Parc fence.
Step 11: Electronic: Main Unit
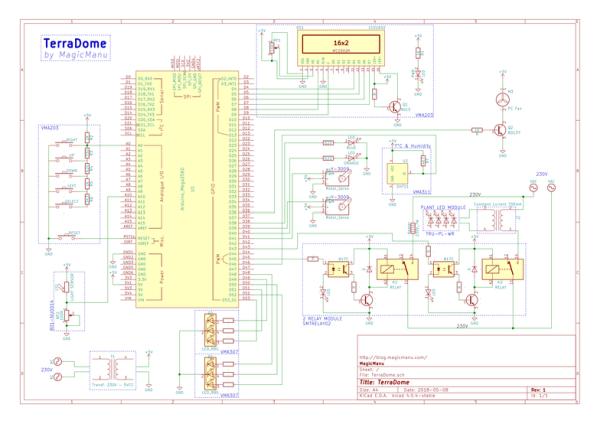
For the main unit I used a recovery box that I cut out to fit the display.
Of course an Arduino Mega is oversized for this project but I used what I had on hand. An Arduino Uno is enough.
The Arduino is directly powered by 5V so be sure of your power because we do not go through the regulator in this case!
For the display is easy because as it is a shield, it connects directly to the Arduino without any wiring.
Source: TerraDome : Mini Tropical Greenhouse With Arduino
- How does the TerraDome control ventilation?
The system uses a PC 80mm Power Supply Fan powered by an out-of-service computer power supply to cool the dome. - What material is used for the windows?
The windows are made from 2.5 mm thick transparent polystyrene because it is more resistant than glass and easy to work with. - Can I use an Arduino Uno instead of the Mega?
Yes, the article states that an Arduino Uno is enough for this project even though the author used a Mega which was oversized. - How do the doors operate?
The doors are operated by two analog mini servos that move their axes from 0 to 90 degrees based on temperature readings. - What triggers the door opening mechanism?
The doors open automatically when the temperature inside the greenhouse becomes too high. - How are the windows attached to the frame?
The windows are glued with transparent silicone which also serves to seal the joints between the wood and the plastic. - How is the Arduino powered directly?
The Arduino is powered directly by 5V without going through the regulator, so the user must ensure the power source is sufficient. - What tool was used to cut the grooves for the windows?
A Dremel with its router accessory was used to create grooves on half the thickness of the wood for the window frames.